> ## Documentation Index
> Fetch the complete documentation index at: https://docs.decoart.com/llms.txt
> Use this file to discover all available pages before exploring further.
# Maintenance Submodule
## Overview
The **Accounting → Maintenance** submodule provides comprehensive tools for configuring and maintaining the foundational elements of the accounting system within DASH. The maintenance functions ensure proper system configuration and support accurate financial reporting and transaction processing.
This submodule is used by accounting administrators, system administrators, controllers, and finance managers who need to configure accounting system parameters, maintain the chart of accounts, and ensure proper integration between accounting functions and operational processes.
The Maintenance submodule provides several tabs for configuring accounting system parameters:
* **Chart of Accounts**: Manage the complete chart of accounts structure.
* **GL Departments**: Configure departments for cost center reporting.
* **GL Department Types**: Define department categories and classifications.
* **GL Account Types**: Set up account type hierarchies for financial statements.
* **GL Account Categories**: Organize accounts into reporting categories.
* **JE Categories**: Define journal entry (JE) categories for classification.
* **CAR Numbers**: Manage Capital Asset Request tracking numbers.
* **AR/AP Memo Codes**: Configure codes for receivable and payable adjustments.
* **AR Allowance Codes**: Set up customer allowance and discount codes.
* **AP Invoice Types**: Define vendor invoice classifications.
* **AP Void Codes**: Configure codes for voided transactions.
* **Inventory Adjustment Codes**: Set up codes for inventory adjustments.
* **Scrap Codes**: Define codes for scrap and waste tracking.
* **Auto-JE Summary**: Generate automatic journal entry (JE) reports.
## Chart of Accounts
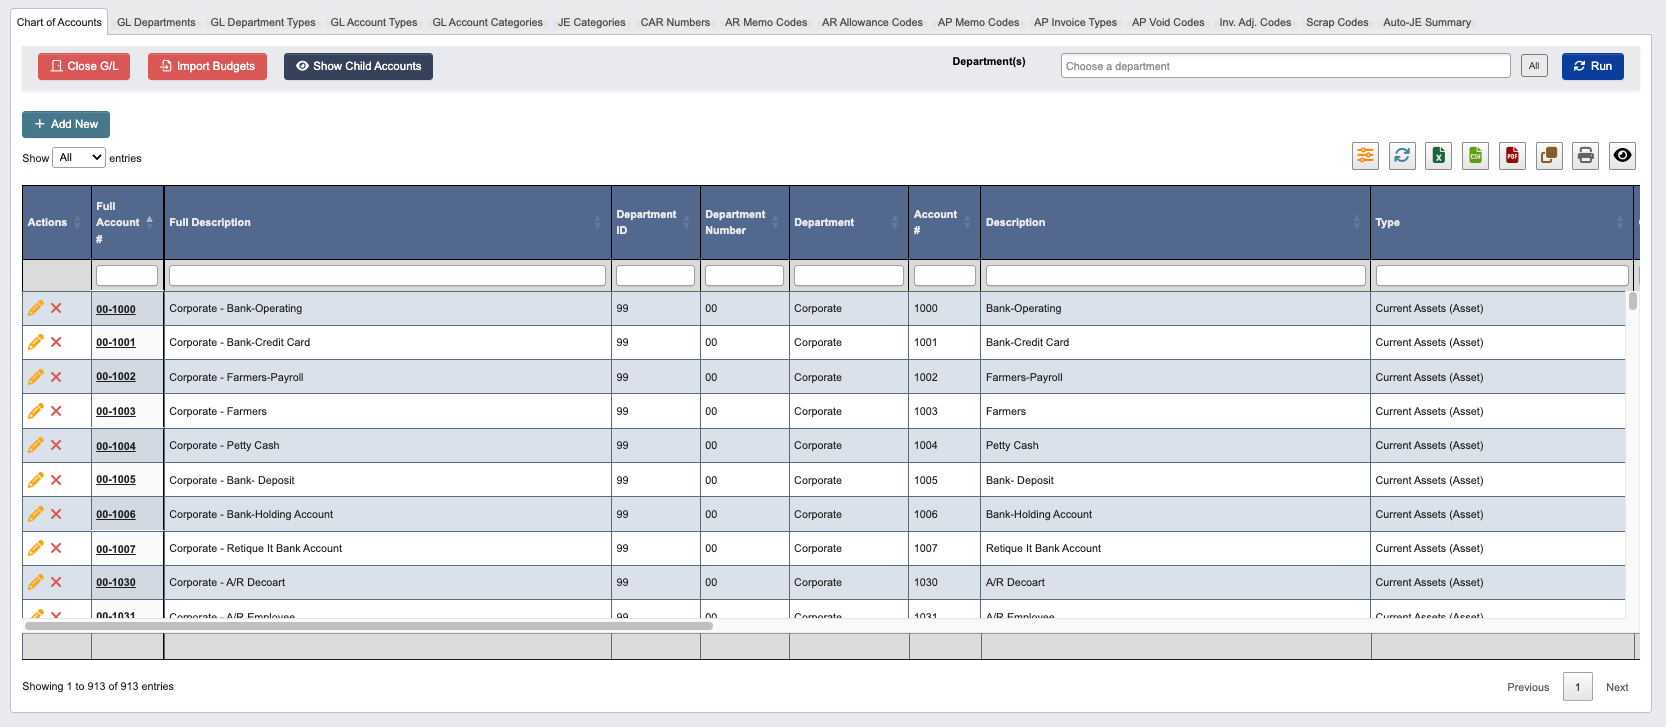 The Chart of Accounts is the foundation of the accounting system, defining all general ledger accounts used for financial reporting.
**Available Actions:**
* Click `Close G/L` to close general ledger periods for month-end processing.
* Click `Import Budgets` to upload budget data for accounts.
* Toggle `Show Child Accounts` to display child accounts.
* Toggle back with `Show Parent Accounts Only` to display the parent accounts.
* Select `Department(s)` from the drop down or click `All` to filter accounts by department.
* Click `Run` to generate the chart of accounts display.
### Adding New Accounts
1. Click `+ Add New` to create a new account.
2. Enter the account details. See [Accounting Reference](/accounting/accounting-reference) for definitions.
The Chart of Accounts is the foundation of the accounting system, defining all general ledger accounts used for financial reporting.
**Available Actions:**
* Click `Close G/L` to close general ledger periods for month-end processing.
* Click `Import Budgets` to upload budget data for accounts.
* Toggle `Show Child Accounts` to display child accounts.
* Toggle back with `Show Parent Accounts Only` to display the parent accounts.
* Select `Department(s)` from the drop down or click `All` to filter accounts by department.
* Click `Run` to generate the chart of accounts display.
### Adding New Accounts
1. Click `+ Add New` to create a new account.
2. Enter the account details. See [Accounting Reference](/accounting/accounting-reference) for definitions.
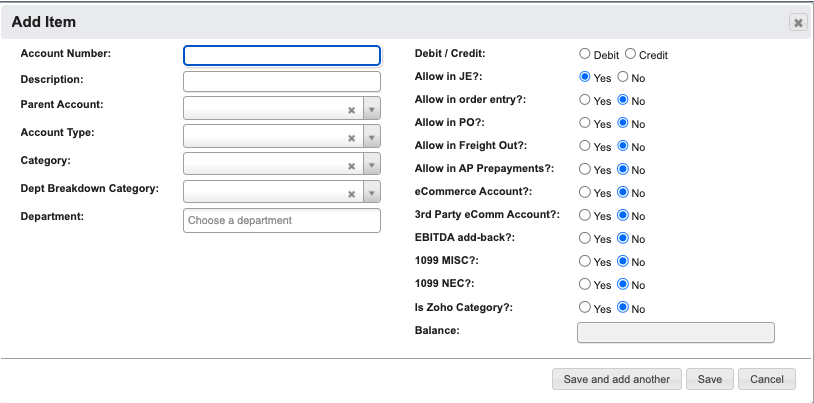 3. When you have filled in the details, click:
1. `Save and add another` to add another account.
2. `Save` to save the details and go back to the table.
3. `Cancel` to close the window and go back to the table.
## GL Departments
3. When you have filled in the details, click:
1. `Save and add another` to add another account.
2. `Save` to save the details and go back to the table.
3. `Cancel` to close the window and go back to the table.
## GL Departments
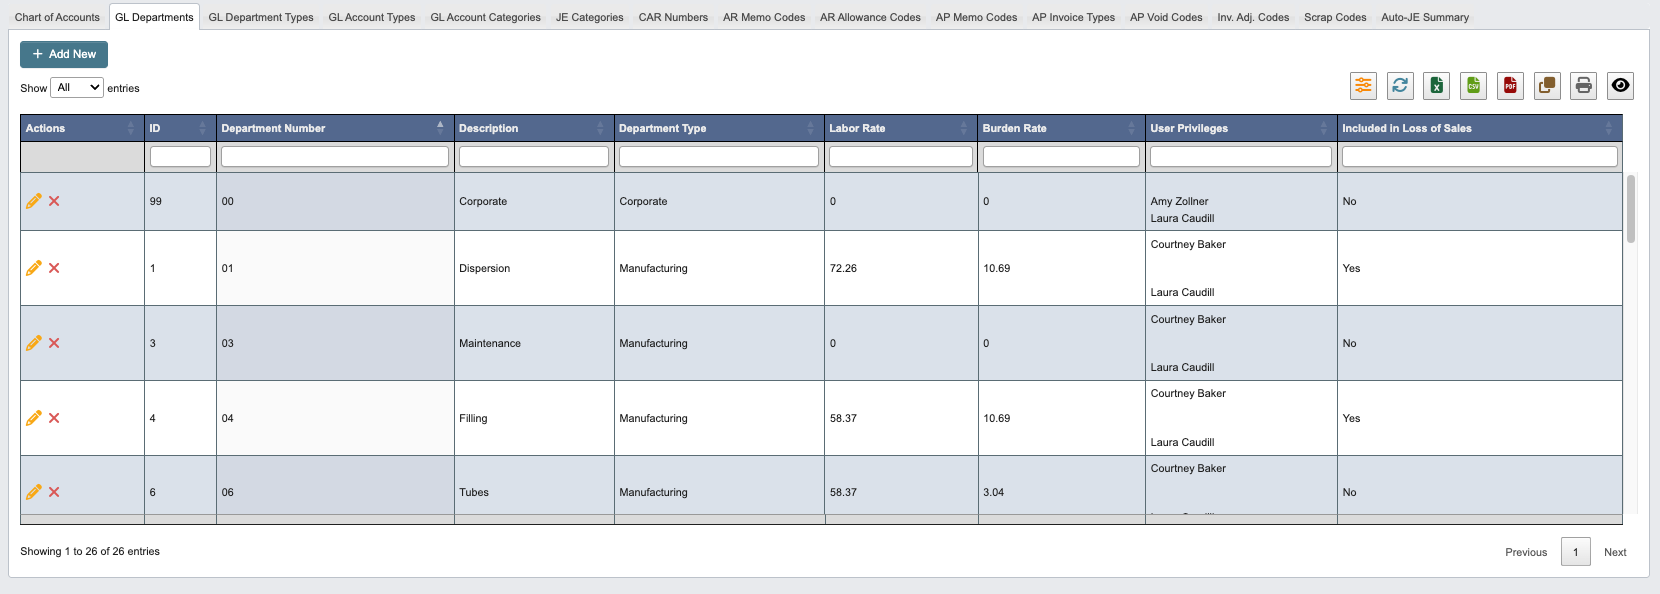 GL Departments enable cost center reporting and departmental financial analysis.
### Adding New Departments
1. Click `+ Add New` to create a new department.
2. Enter the department details. See [Accounting Reference](/accounting/accounting-reference) for definitions.
GL Departments enable cost center reporting and departmental financial analysis.
### Adding New Departments
1. Click `+ Add New` to create a new department.
2. Enter the department details. See [Accounting Reference](/accounting/accounting-reference) for definitions.
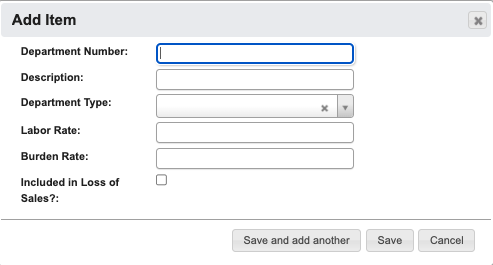 3. When you have filled in the details, click:
1. `Save and add another` to add another department.
2. `Save` to save the details and go back to the table.
3. `Cancel` to close the window and go back to the table.
## GL Department Types
3. When you have filled in the details, click:
1. `Save and add another` to add another department.
2. `Save` to save the details and go back to the table.
3. `Cancel` to close the window and go back to the table.
## GL Department Types
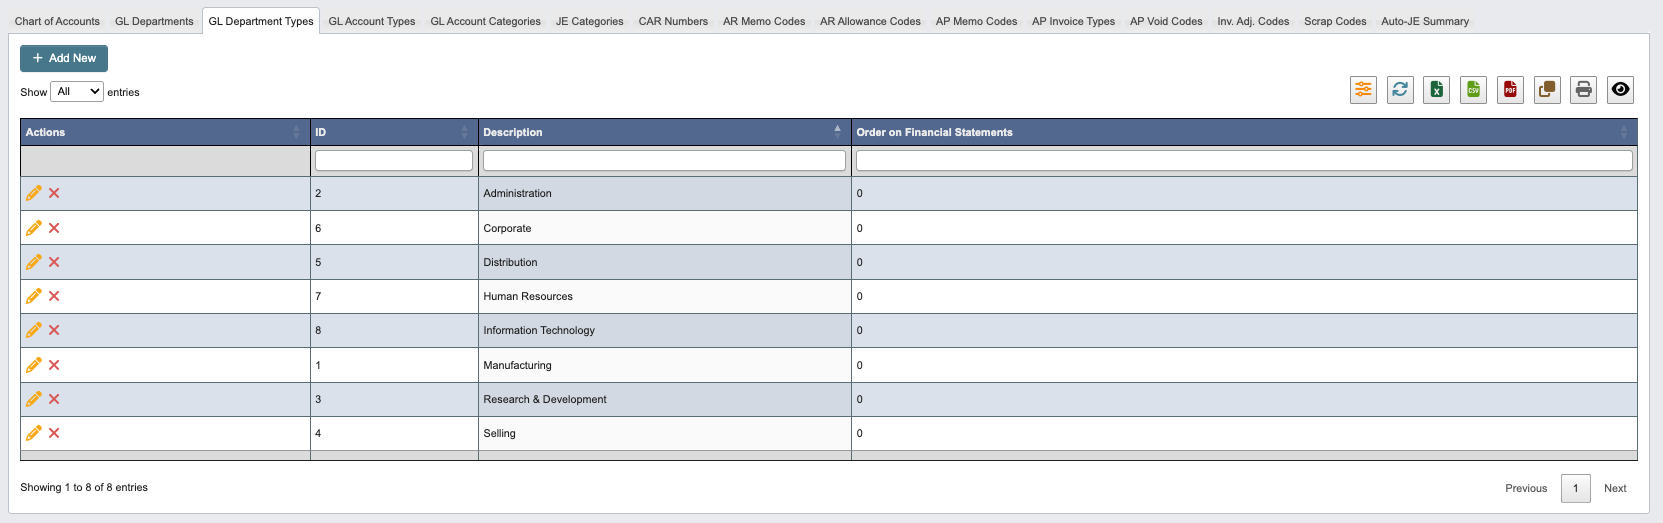 Department Types provide classifications for organizing departments in financial reporting.
### Adding New Department Types
1. Click `+ Add New` to create a new department type.
2. Enter the following department type details:
Department Types provide classifications for organizing departments in financial reporting.
### Adding New Department Types
1. Click `+ Add New` to create a new department type.
2. Enter the following department type details:
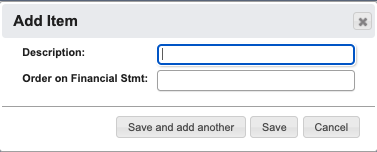 * `Description`: Name for the department type.
* `Order on Financial Stmt`: Sequence for financial statement presentation.
3. When you have filled in the details, click:
1. `Save and add another` to add another department type.
2. `Save` to save the details and go back to the table.
3. `Cancel` to close the window and go back to the table.
## GL Account Types
* `Description`: Name for the department type.
* `Order on Financial Stmt`: Sequence for financial statement presentation.
3. When you have filled in the details, click:
1. `Save and add another` to add another department type.
2. `Save` to save the details and go back to the table.
3. `Cancel` to close the window and go back to the table.
## GL Account Types
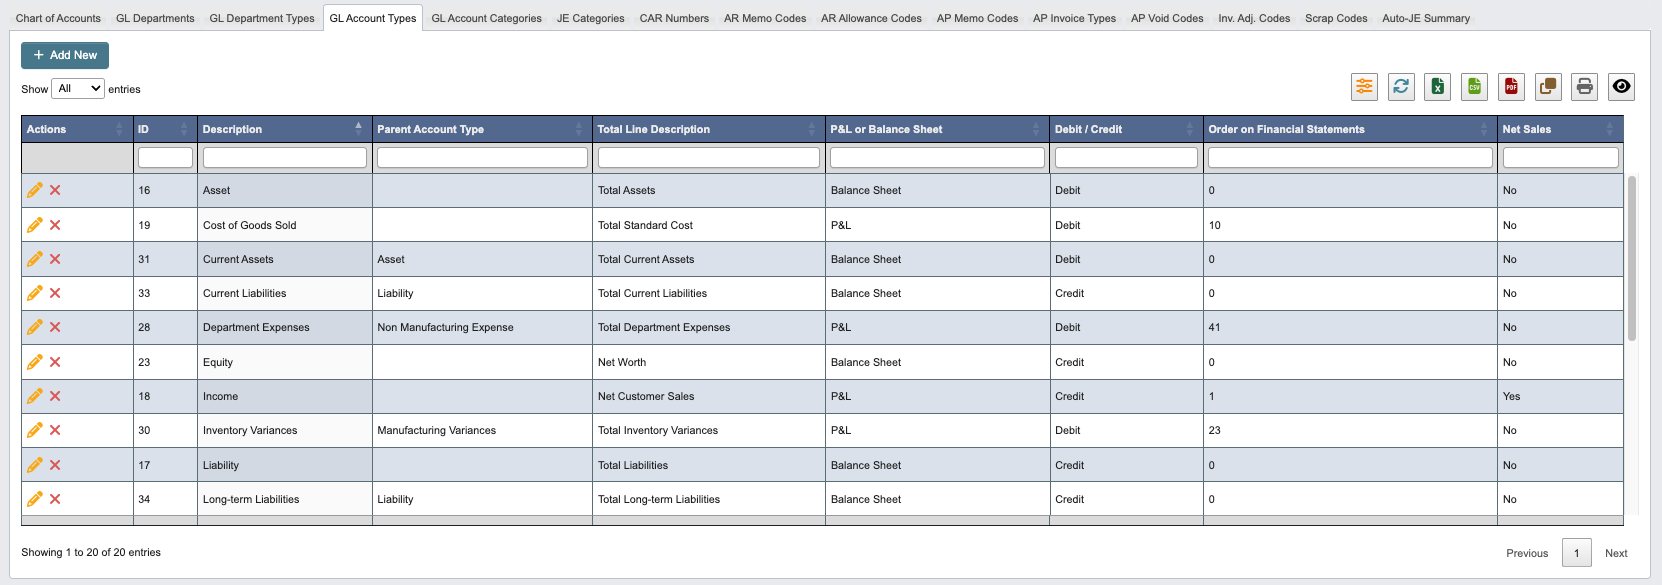 Account Types define the fundamental categories of accounts and their behavior in financial statements.
### Adding New Account Types
1. Click `+ Add New` to create a new account type
2. Enter the account type details. See [Accounting Reference](/accounting/accounting-reference) for definitions.
Account Types define the fundamental categories of accounts and their behavior in financial statements.
### Adding New Account Types
1. Click `+ Add New` to create a new account type
2. Enter the account type details. See [Accounting Reference](/accounting/accounting-reference) for definitions.
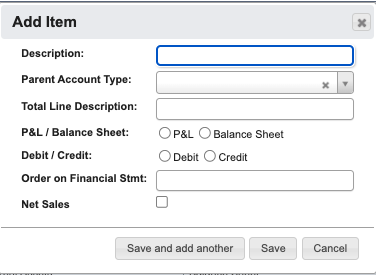 3. When you have filled in the details, click:
1. `Save and add another` to add another account type.
2. `Save` to save the details and go back to the table.
3. `Cancel` to close the window and go back to the table.
## GL Account Categories
3. When you have filled in the details, click:
1. `Save and add another` to add another account type.
2. `Save` to save the details and go back to the table.
3. `Cancel` to close the window and go back to the table.
## GL Account Categories
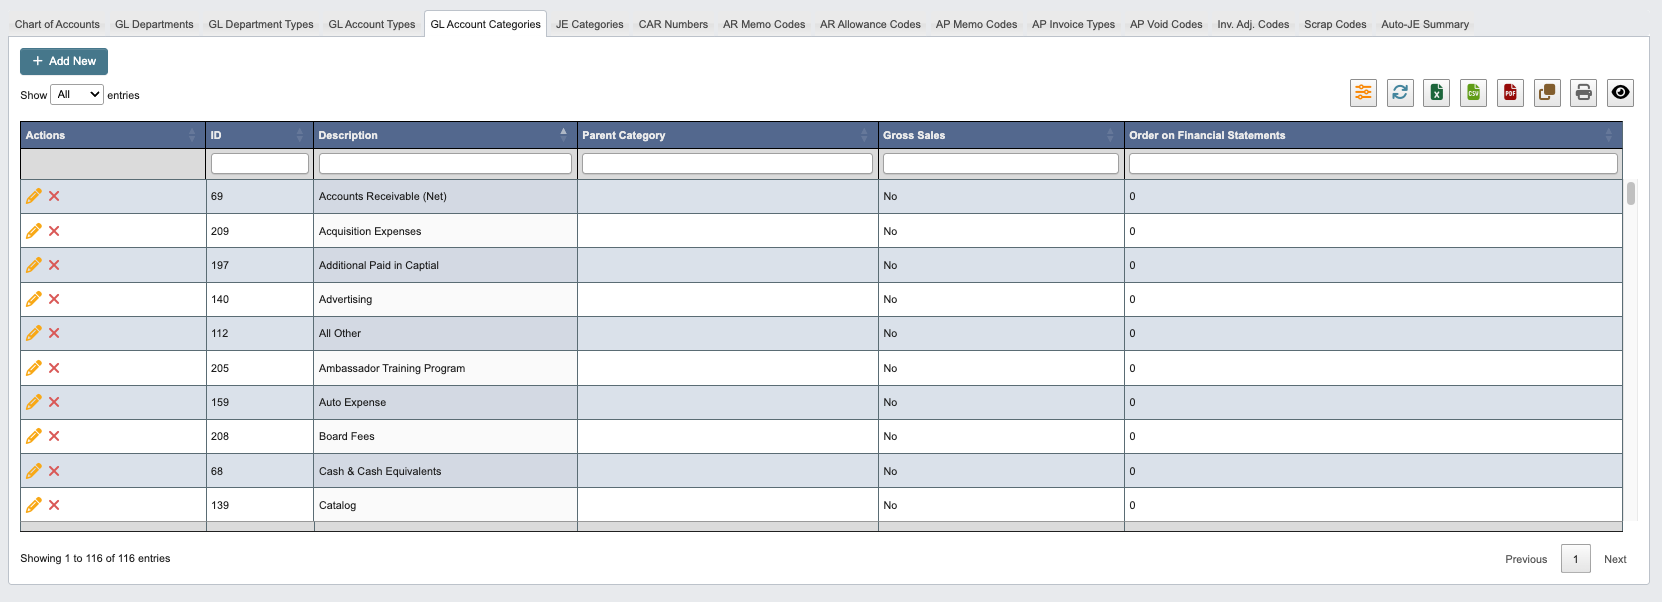 Account Categories provide additional groupings for detailed financial analysis and reporting.
### Adding New Account Categories
1. Click `+ Add New` to create a new category.
2. Enter the following account category details:
Account Categories provide additional groupings for detailed financial analysis and reporting.
### Adding New Account Categories
1. Click `+ Add New` to create a new category.
2. Enter the following account category details:
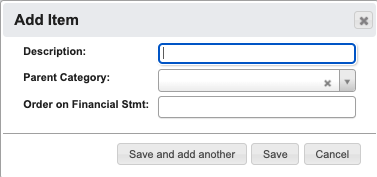 * `Description`: Name for the category.
* `Parent Category`: Select the parent category.
* `Order on Financial Stmt`: Set presentation sequence.
3. When you have filled in the details, click:
1. `Save and add another` to add another account category.
2. `Save` to save the details and go back to the table.
3. `Cancel` to close the window and go back to the table.
## JE Categories
* `Description`: Name for the category.
* `Parent Category`: Select the parent category.
* `Order on Financial Stmt`: Set presentation sequence.
3. When you have filled in the details, click:
1. `Save and add another` to add another account category.
2. `Save` to save the details and go back to the table.
3. `Cancel` to close the window and go back to the table.
## JE Categories
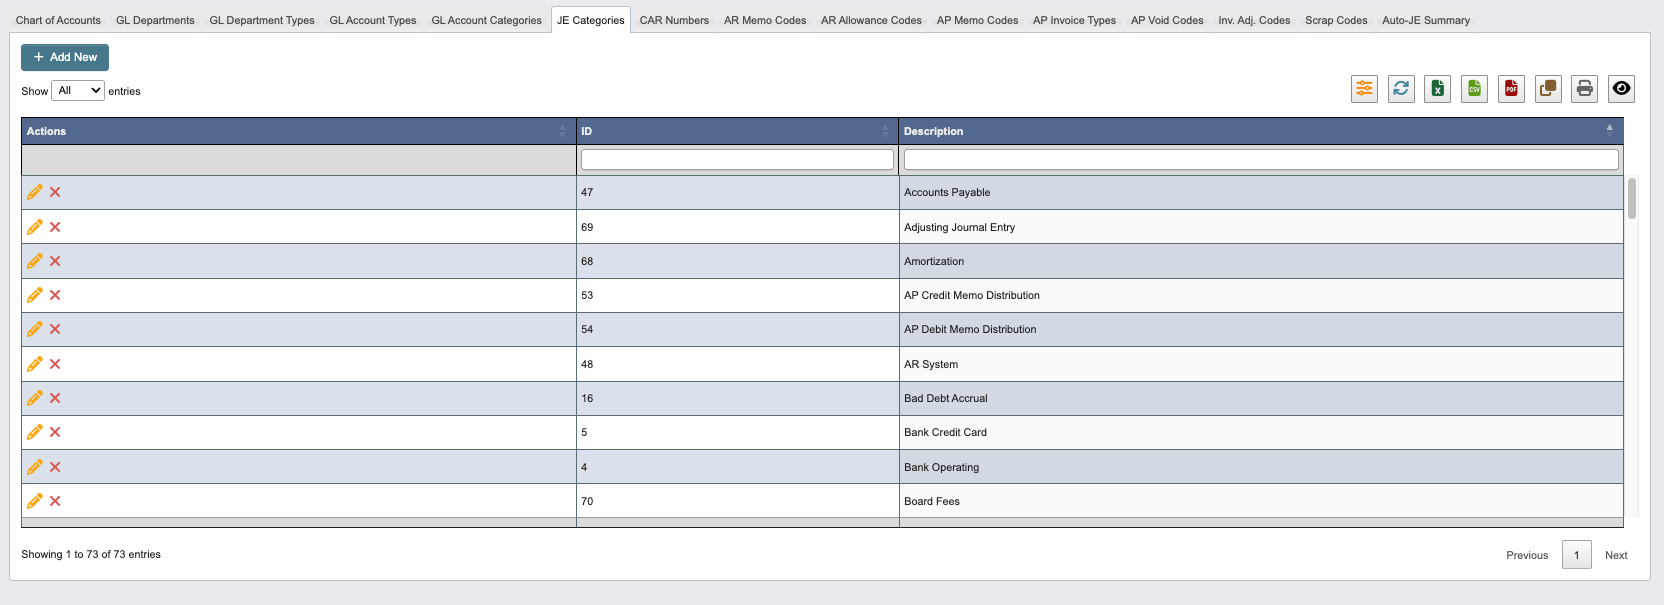 JE Categories classify journal entries (JE) for tracking and reporting purposes.
### Adding New JE Categories
1. Click `+ Add New` to create a new journal entry category.
2. Enter the `Description` for the category.
JE Categories classify journal entries (JE) for tracking and reporting purposes.
### Adding New JE Categories
1. Click `+ Add New` to create a new journal entry category.
2. Enter the `Description` for the category.
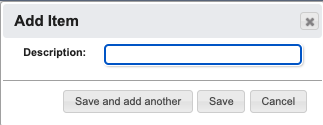 3. When you have filled in the details, click:
1. `Save and add another` to add another JE category.
2. `Save` to save the details and go back to the table.
3. `Cancel` to close the window and go back to the table.
## CAR Numbers
3. When you have filled in the details, click:
1. `Save and add another` to add another JE category.
2. `Save` to save the details and go back to the table.
3. `Cancel` to close the window and go back to the table.
## CAR Numbers
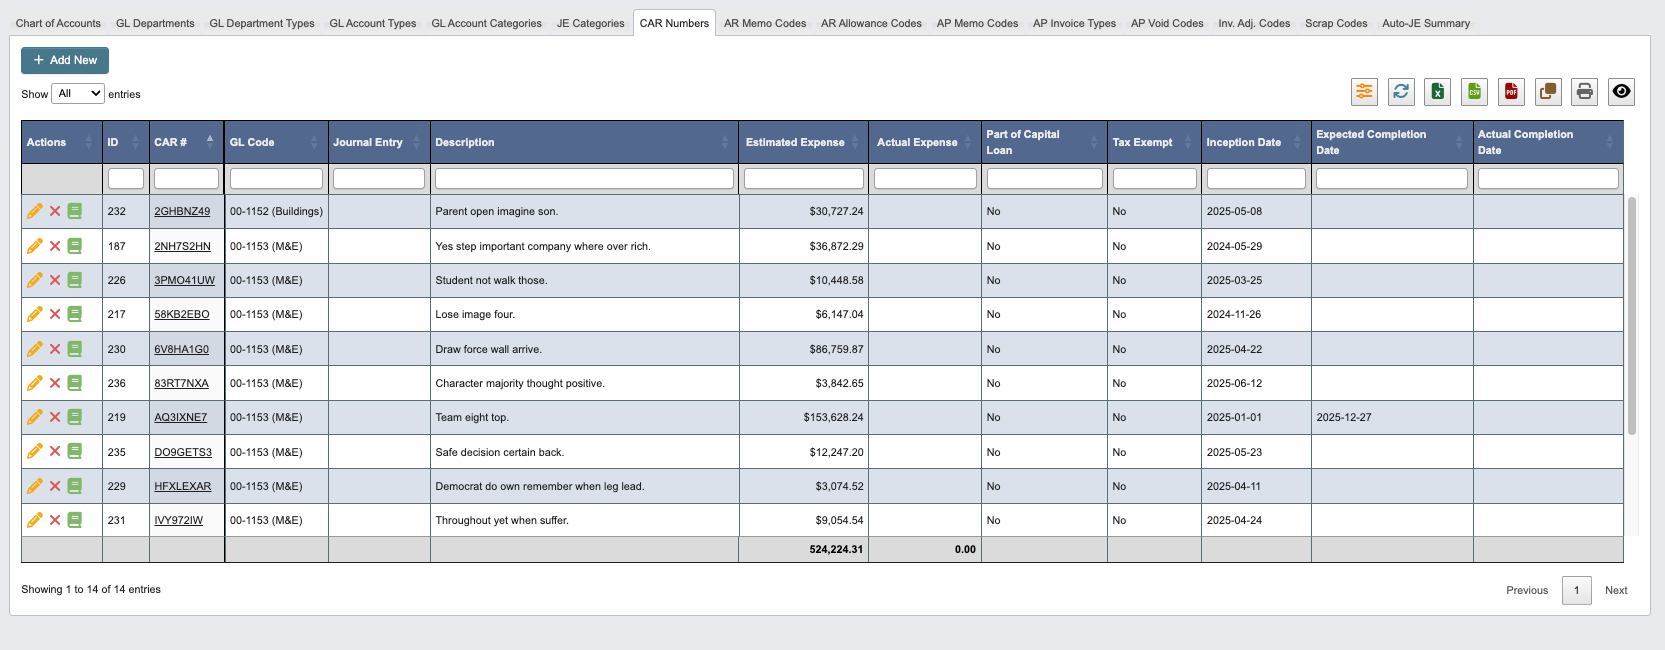 CAR (Capital Asset Request) Numbers track capital expenditure projects and asset acquisitions.
### Adding New CAR Numbers
1. Click `+ Add New` to create a new CAR number.
2. Enter the CAR number details. See [Accounting Reference](/accounting/accounting-reference) for definitions.
CAR (Capital Asset Request) Numbers track capital expenditure projects and asset acquisitions.
### Adding New CAR Numbers
1. Click `+ Add New` to create a new CAR number.
2. Enter the CAR number details. See [Accounting Reference](/accounting/accounting-reference) for definitions.
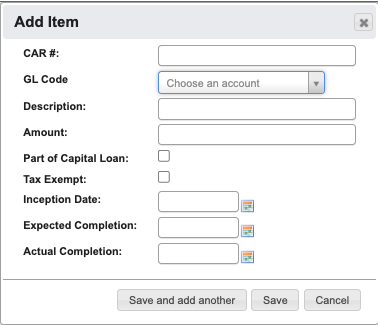 3. When you have filled in the details, click:
1. `Save and add another` to add another CAR number category.
2. `Save` to save the details and go back to the table.
3. `Cancel` to close the window and go back to the table.
### Completing a CAR Number
When a CAR project is finished, edit the CAR number and enter its `Actual Completion` date. Saving a completed CAR performs both closing steps automatically in one save:
* It creates a pending [Fixed Asset](/accounting/fixed-assets) entry so the asset can be finished out on the Fixed Assets screen.
* It posts the capital projects Journal Entry, moving the CAR's accumulated expense out of Capital Projects in Progress and into the CAR's fixed asset GL account. The JE is dated with the `Actual Completion` date, so that accounting period must still be open.
To complete a CAR:
1. Click the pencil icon to edit the CAR number.
2. Review the `Actual Expense` amount. It is pre-filled with the DASH-calculated total from the CAR's AP invoices, and you can adjust it up or down - for example, to include CC transactions or journal entries that were coded to Capital Projects in Progress without a CAR #. Any difference between your entered amount and the DASH-calculated amount posts as a separate `manual adjustment` line item on the same Journal Entry, between the CAR's fixed asset GL account and the capital projects expense account configured by the `gl_account_id_capital_projects_expenses` company attribute.
3. Enter the `Actual Completion` date. An alert appears listing exactly what will happen when you save.
3. When you have filled in the details, click:
1. `Save and add another` to add another CAR number category.
2. `Save` to save the details and go back to the table.
3. `Cancel` to close the window and go back to the table.
### Completing a CAR Number
When a CAR project is finished, edit the CAR number and enter its `Actual Completion` date. Saving a completed CAR performs both closing steps automatically in one save:
* It creates a pending [Fixed Asset](/accounting/fixed-assets) entry so the asset can be finished out on the Fixed Assets screen.
* It posts the capital projects Journal Entry, moving the CAR's accumulated expense out of Capital Projects in Progress and into the CAR's fixed asset GL account. The JE is dated with the `Actual Completion` date, so that accounting period must still be open.
To complete a CAR:
1. Click the pencil icon to edit the CAR number.
2. Review the `Actual Expense` amount. It is pre-filled with the DASH-calculated total from the CAR's AP invoices, and you can adjust it up or down - for example, to include CC transactions or journal entries that were coded to Capital Projects in Progress without a CAR #. Any difference between your entered amount and the DASH-calculated amount posts as a separate `manual adjustment` line item on the same Journal Entry, between the CAR's fixed asset GL account and the capital projects expense account configured by the `gl_account_id_capital_projects_expenses` company attribute.
3. Enter the `Actual Completion` date. An alert appears listing exactly what will happen when you save.
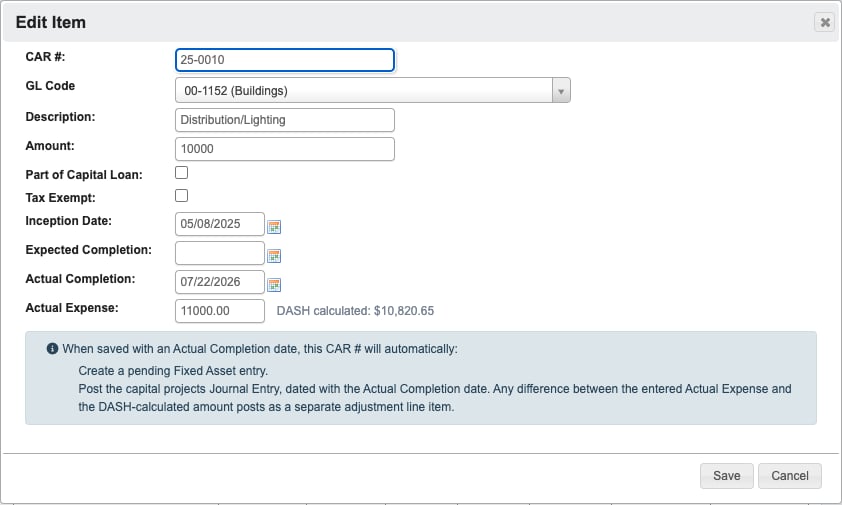 4. Click `Save`. The confirmation message notes that the pending Fixed Asset entry was created and links to the posted Journal Entry.
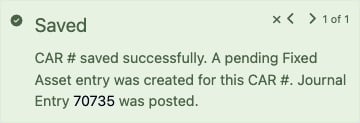 The new Fixed Asset entry starts with a `Pending` accounting status and copies the CAR's description, GL code, completion date (as the date acquired), and actual expense (as the total cost, using your adjusted amount when one was entered). Open the [Fixed Assets](/accounting/fixed-assets) screen to fill in the remaining details, such as the asset group, type, and depreciation settings.
Each step only ever happens once per CAR number: re-saving a completed CAR that already has an active fixed asset and a Journal Entry does not create duplicates. If the Journal Entry cannot be posted - for example, when the completion date falls in a closed accounting period or no GL Code is selected - the CAR and fixed asset still save, a notification explains why the JE was skipped, and the JE posts on the next save once the issue is fixed.
## AR Memo Codes
The new Fixed Asset entry starts with a `Pending` accounting status and copies the CAR's description, GL code, completion date (as the date acquired), and actual expense (as the total cost, using your adjusted amount when one was entered). Open the [Fixed Assets](/accounting/fixed-assets) screen to fill in the remaining details, such as the asset group, type, and depreciation settings.
Each step only ever happens once per CAR number: re-saving a completed CAR that already has an active fixed asset and a Journal Entry does not create duplicates. If the Journal Entry cannot be posted - for example, when the completion date falls in a closed accounting period or no GL Code is selected - the CAR and fixed asset still save, a notification explains why the JE was skipped, and the JE posts on the next save once the issue is fixed.
## AR Memo Codes
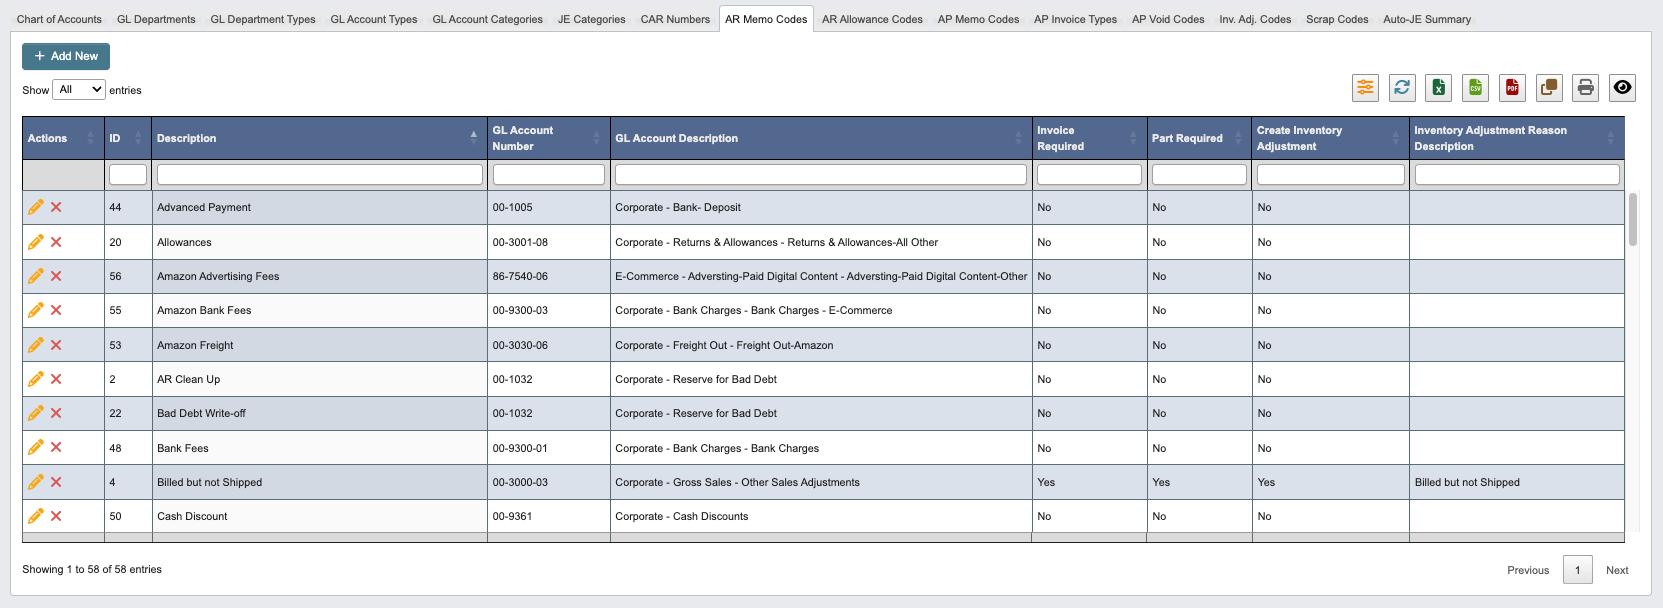 AR Memo Codes define the types of adjustments that can be made to customer accounts.
### Adding New AR Memo Codes
1. Click `+ Add New` to create a new AR memo code.
2. Enter the AR memo code details. See [Accounting Reference](/accounting/accounting-reference) for definitions.
AR Memo Codes define the types of adjustments that can be made to customer accounts.
### Adding New AR Memo Codes
1. Click `+ Add New` to create a new AR memo code.
2. Enter the AR memo code details. See [Accounting Reference](/accounting/accounting-reference) for definitions.
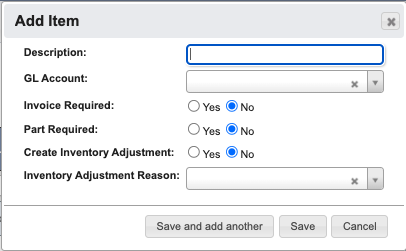 3. When you have filled in the details, click:
1. `Save and add another` to add another AR memo code.
2. `Save` to save the details and go back to the table.
3. `Cancel` to close the window and go back to the table.
## AR Allowance Codes
3. When you have filled in the details, click:
1. `Save and add another` to add another AR memo code.
2. `Save` to save the details and go back to the table.
3. `Cancel` to close the window and go back to the table.
## AR Allowance Codes
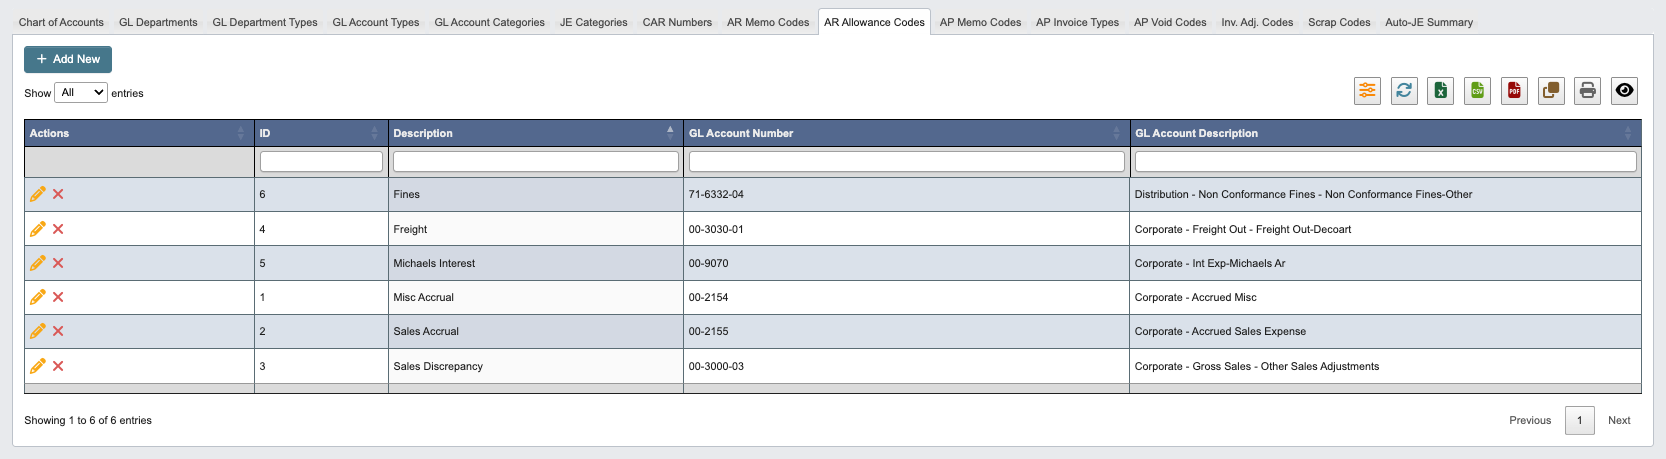 AR Allowance Codes define customer discounts and allowances.
### Adding New AR Allowance Codes
1. Click `+ Add New` to create a new allowance code.
2. Enter the following AR allowance code details:
AR Allowance Codes define customer discounts and allowances.
### Adding New AR Allowance Codes
1. Click `+ Add New` to create a new allowance code.
2. Enter the following AR allowance code details:
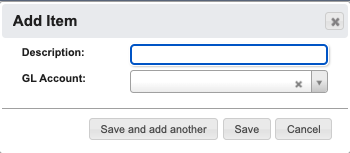 * `Description`: Description of the allowance code.
* `GL Account`: Associated general ledger account.
3. When you have filled in the details, click:
1. `Save and add another` to add another AR allowance code.
2. `Save` to save the details and go back to the table.
3. `Cancel` to close the window and go back to the table.
## AP Memo Codes
* `Description`: Description of the allowance code.
* `GL Account`: Associated general ledger account.
3. When you have filled in the details, click:
1. `Save and add another` to add another AR allowance code.
2. `Save` to save the details and go back to the table.
3. `Cancel` to close the window and go back to the table.
## AP Memo Codes
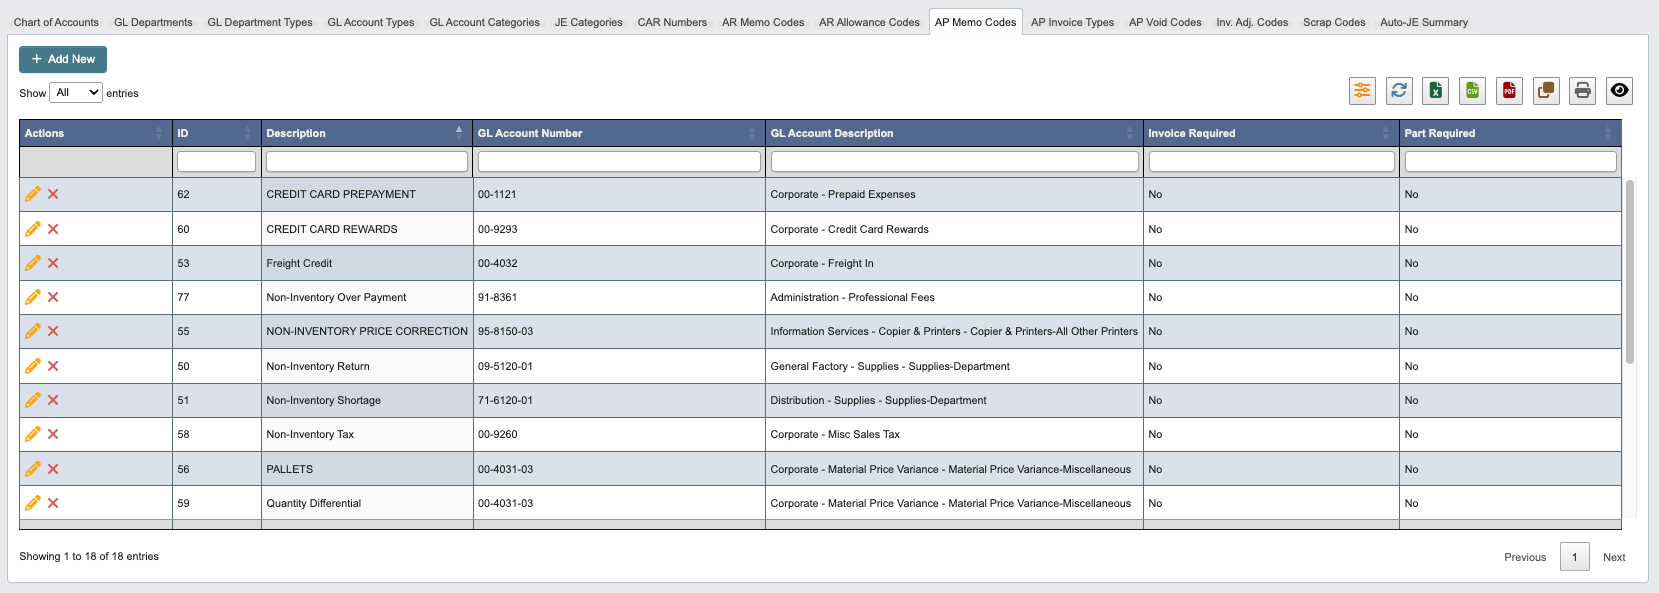 AP Memo Codes define the types of adjustments that can be made to vendor accounts.
### Adding New AP Memo Codes
1. Click `+ Add New` to create a new AP memo code.
AP Memo Codes define the types of adjustments that can be made to vendor accounts.
### Adding New AP Memo Codes
1. Click `+ Add New` to create a new AP memo code.
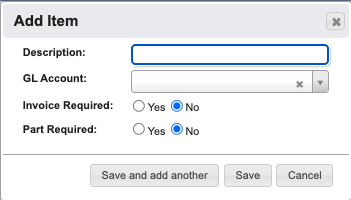 2. Enter the following AP memo code details:
* `Description`: Description of the memo code.
* `GL Account`: Associated general ledger account.
* `Invoice Required`(Yes/No): Require invoice reference.
* `Part Required`(Yes/No): Require part number reference.
3. When you have filled in the details, click:
1. `Save and add another` to add another AP memo code.
2. `Save` to save the details and go back to the table.
3. `Cancel` to close the window and go back to the table.
## AP Invoice Types
2. Enter the following AP memo code details:
* `Description`: Description of the memo code.
* `GL Account`: Associated general ledger account.
* `Invoice Required`(Yes/No): Require invoice reference.
* `Part Required`(Yes/No): Require part number reference.
3. When you have filled in the details, click:
1. `Save and add another` to add another AP memo code.
2. `Save` to save the details and go back to the table.
3. `Cancel` to close the window and go back to the table.
## AP Invoice Types
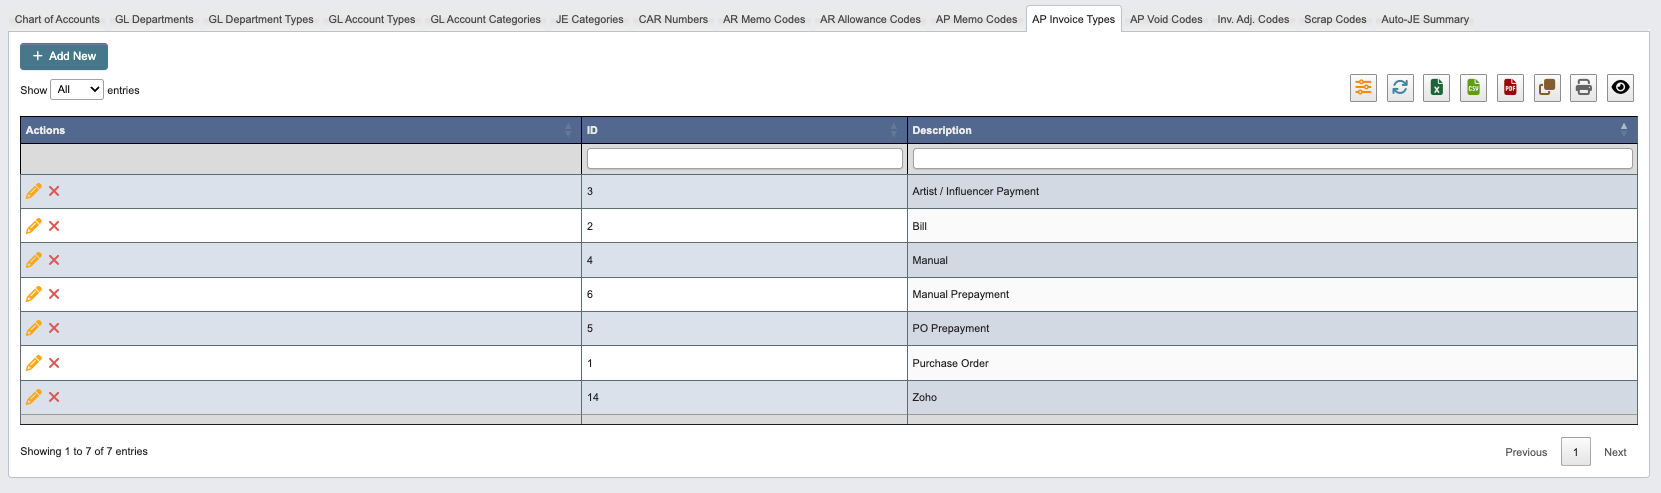 AP Invoice Types classify different categories of vendor invoices.
### Adding New AP Invoice Types
1. Click `+ Add New` to create a new invoice type.
2. Enter a `Description` of the invoice type.
AP Invoice Types classify different categories of vendor invoices.
### Adding New AP Invoice Types
1. Click `+ Add New` to create a new invoice type.
2. Enter a `Description` of the invoice type.
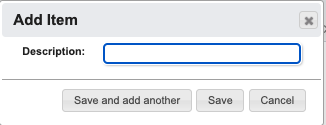 3. When you have filled in the details, click:
1. `Save and add another` to add another AP invoice type.
2. `Save` to save the details and go back to the table.
3. `Cancel` to close the window and go back to the table.
## AP Void Codes
3. When you have filled in the details, click:
1. `Save and add another` to add another AP invoice type.
2. `Save` to save the details and go back to the table.
3. `Cancel` to close the window and go back to the table.
## AP Void Codes
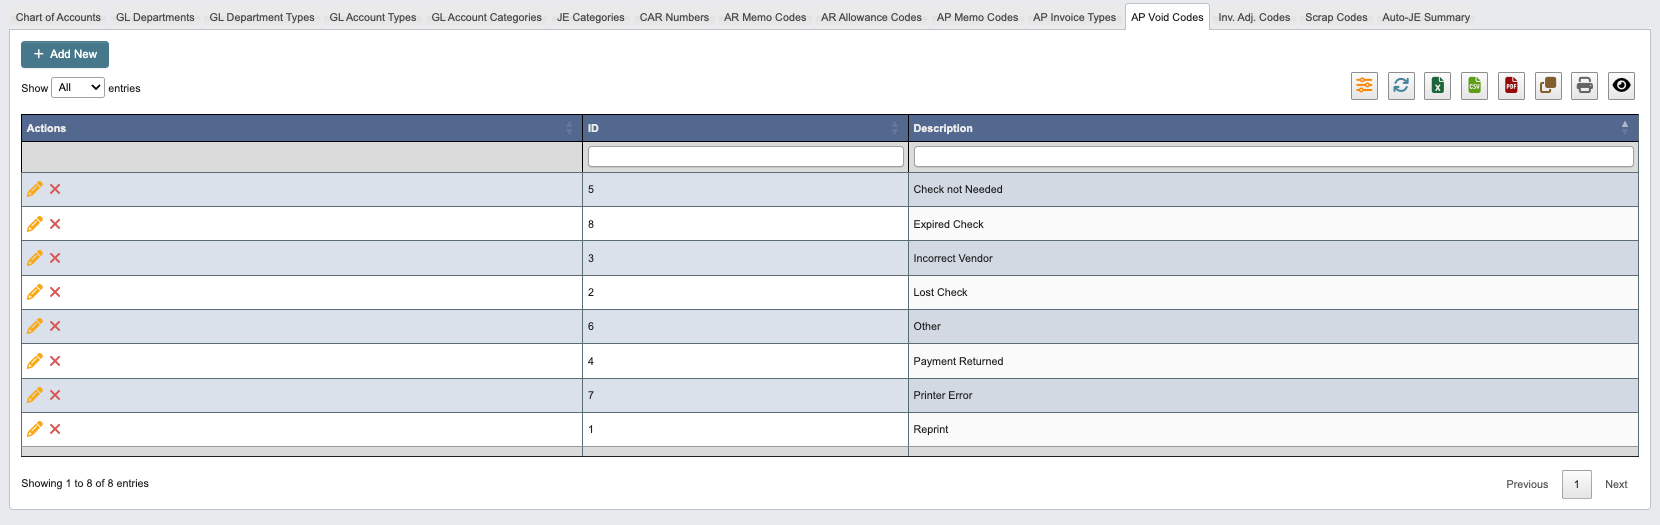 AP Void Codes define reasons for voiding vendor payments or invoices.
### Adding New AP Void Codes
1. Click `+ Add New` to create a new void code.
2. Enter a `Description` of the void code.
AP Void Codes define reasons for voiding vendor payments or invoices.
### Adding New AP Void Codes
1. Click `+ Add New` to create a new void code.
2. Enter a `Description` of the void code.
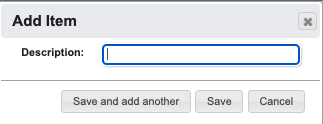 3. When you have filled in the details, click:
1. `Save and add another` to add another AP void code.
2. `Save` to save the details and go back to the table.
3. `Cancel` to close the window and go back to the table.
## Inv. Adj. Codes
3. When you have filled in the details, click:
1. `Save and add another` to add another AP void code.
2. `Save` to save the details and go back to the table.
3. `Cancel` to close the window and go back to the table.
## Inv. Adj. Codes
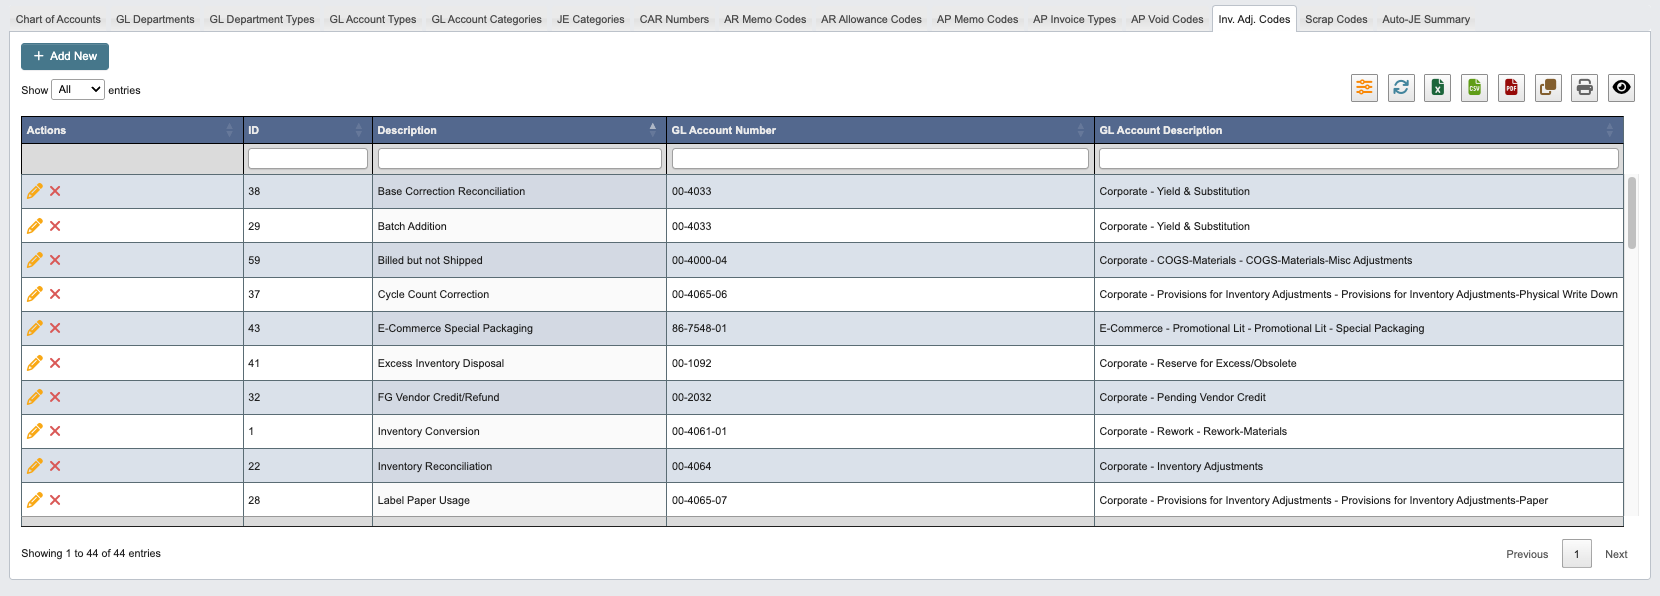 Inventory Adjustment Codes define reasons for inventory quantity adjustments.
### Adding New Inventory Adjustment Codes
1. Click `+ Add New` to create a new adjustment code.
2. Enter the following inventory adjustment code fields:
Inventory Adjustment Codes define reasons for inventory quantity adjustments.
### Adding New Inventory Adjustment Codes
1. Click `+ Add New` to create a new adjustment code.
2. Enter the following inventory adjustment code fields:
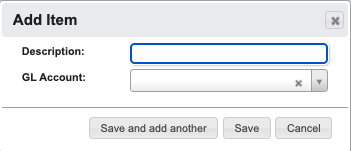 * `Description`: Description of the adjustment code.
* `GL Account`: Associated general ledger account for the adjustment.
3. When you have filled in the details, click:
1. `Save and add another` to add another inventory adjustment code.
2. `Save` to save the details and go back to the table.
3. `Cancel` to close the window and go back to the table.
## Scrap Codes
* `Description`: Description of the adjustment code.
* `GL Account`: Associated general ledger account for the adjustment.
3. When you have filled in the details, click:
1. `Save and add another` to add another inventory adjustment code.
2. `Save` to save the details and go back to the table.
3. `Cancel` to close the window and go back to the table.
## Scrap Codes
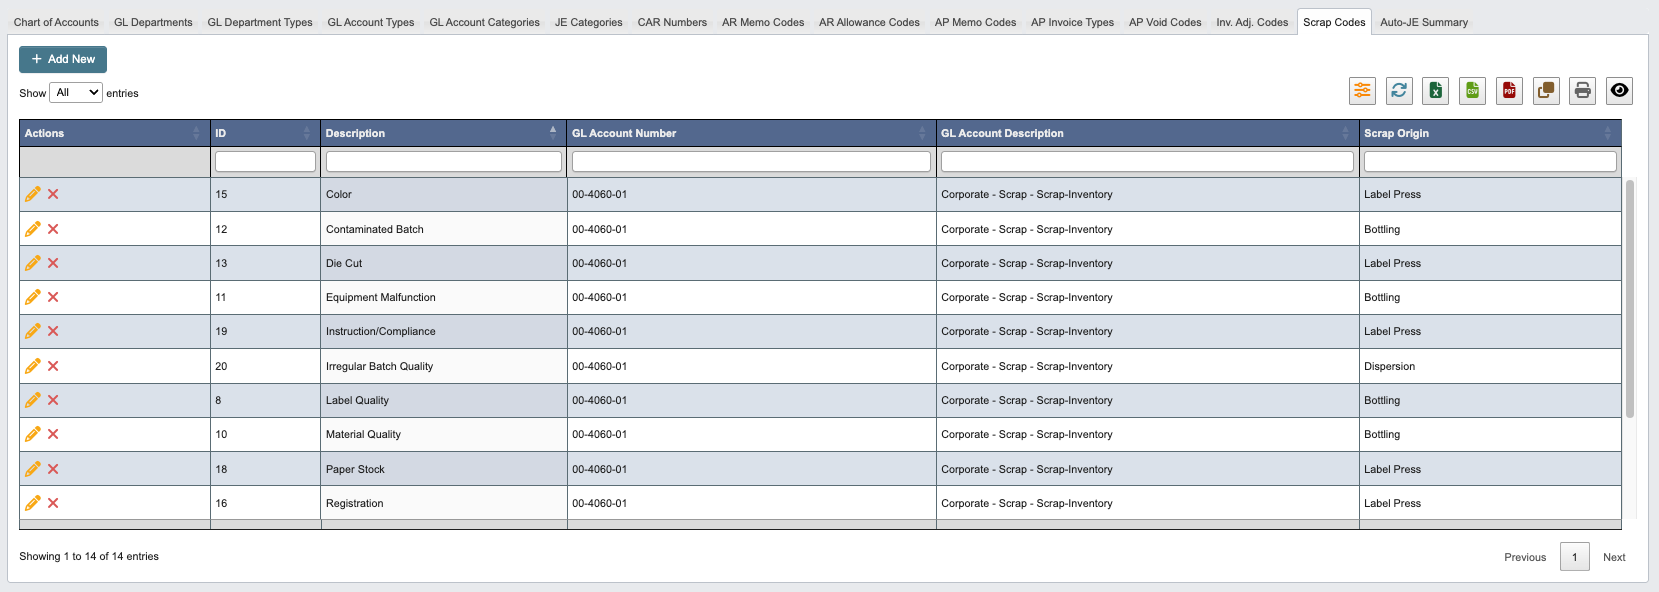 Scrap Codes track waste and scrap materials in production processes.
### Adding New Scrap Codes
1. Click `+ Add New` to create a new scrap code.
2. Enter the following scrap code fields:
Scrap Codes track waste and scrap materials in production processes.
### Adding New Scrap Codes
1. Click `+ Add New` to create a new scrap code.
2. Enter the following scrap code fields:
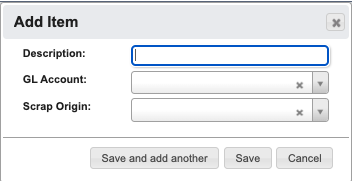 * `Description`: Description of the scrap code.
* `GL Account`: Associated general ledger account.
* `Scrap Origin`: Source or cause of the scrap.
3. When you have filled in the details, click:
1. `Save and add another` to add another scrap code.
2. `Save` to save the details and go back to the table.
3. `Cancel` to close the window and go back to the table.
## Auto-JE Summary
* `Description`: Description of the scrap code.
* `GL Account`: Associated general ledger account.
* `Scrap Origin`: Source or cause of the scrap.
3. When you have filled in the details, click:
1. `Save and add another` to add another scrap code.
2. `Save` to save the details and go back to the table.
3. `Cancel` to close the window and go back to the table.
## Auto-JE Summary
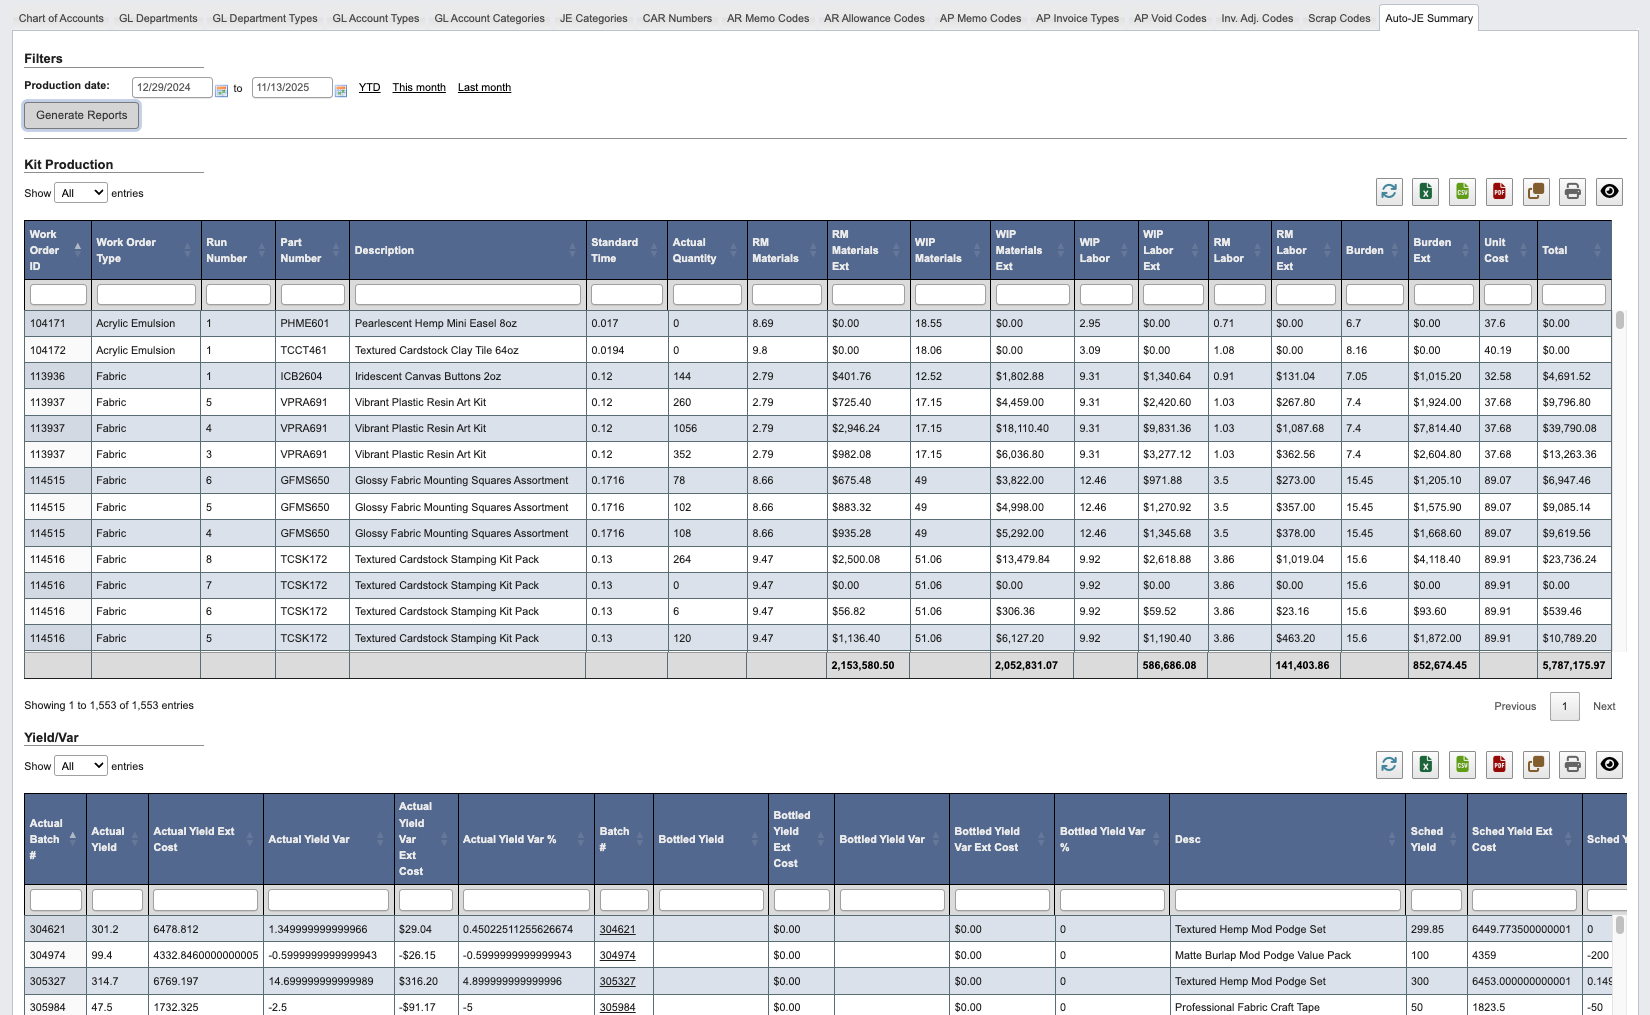
 The Auto-JE Summary generates automatic journal entries based on production activity.
### Generating Auto-JE Reports
1. Select the `Production date` for the journal entries.
2. Set the required fields:
* `Kit Production`: Journal entries for kit assembly activities.
* `Yield/Var`: Yield variance entries for production efficiency.
* `Bottling Usage Sub Var`: Bottling material usage variances.
* `Dispersion Usage`: Material usage in dispersion processes.
* `Gross Variance`: Overall production variances.
* `COP WIP`: Cost of production for work-in-process.
* `COP FG`: Cost of production for finished goods.
3. Click `Generate Reports` to create automatic journal entries.
The Auto-JE Summary generates automatic journal entries based on production activity.
### Generating Auto-JE Reports
1. Select the `Production date` for the journal entries.
2. Set the required fields:
* `Kit Production`: Journal entries for kit assembly activities.
* `Yield/Var`: Yield variance entries for production efficiency.
* `Bottling Usage Sub Var`: Bottling material usage variances.
* `Dispersion Usage`: Material usage in dispersion processes.
* `Gross Variance`: Overall production variances.
* `COP WIP`: Cost of production for work-in-process.
* `COP FG`: Cost of production for finished goods.
3. Click `Generate Reports` to create automatic journal entries.