> ## Documentation Index
> Fetch the complete documentation index at: https://docs.decoart.com/llms.txt
> Use this file to discover all available pages before exploring further.
# Manage Companies Submodule
## Overview
The **Administration → Manage Companies** submodule provides administrators with comprehensive tools for configuring and maintaining company structures, user management, and system-wide settings within DASH. This submodule handles multi-company setups, user permissions, organizational structures, and system configurations that support business operations across different entities.
## Companies
 The Companies tab allows administrators to configure multiple business entities within a single DASH system while maintaining separate financial records and operational configurations. Each company can have distinct accounting periods, work order types, and business processes.
When setting up companies, administrators can configure company-specific settings that determine how each entity operates within the shared system infrastructure while maintaining proper financial and operational separation.
### Add New Company
1. Click `+ Add New` to create a new company.
2. Enter the company details. See [Administration Reference](/administration/reference) for definitions.
The Companies tab allows administrators to configure multiple business entities within a single DASH system while maintaining separate financial records and operational configurations. Each company can have distinct accounting periods, work order types, and business processes.
When setting up companies, administrators can configure company-specific settings that determine how each entity operates within the shared system infrastructure while maintaining proper financial and operational separation.
### Add New Company
1. Click `+ Add New` to create a new company.
2. Enter the company details. See [Administration Reference](/administration/reference) for definitions.
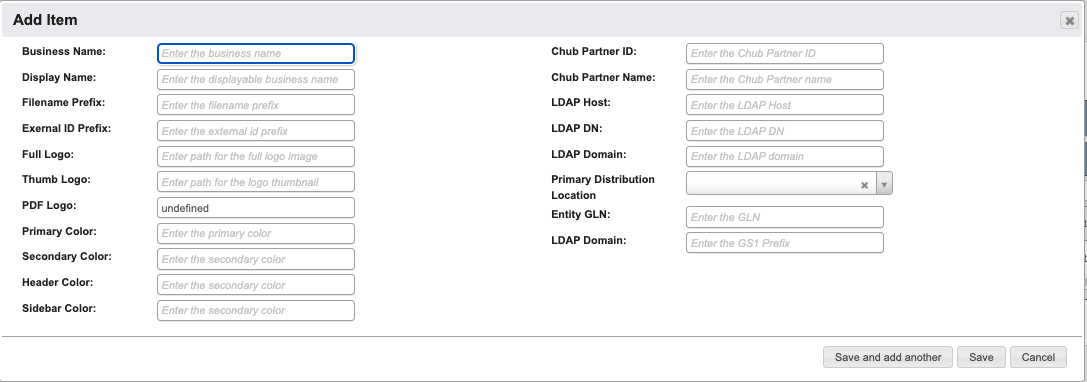 3. When you have filled in the details, click:
1. `Save and add another` to add another company.
2. `Save` to save the details and go back to the table.
3. `Cancel` to close the window and go back to the table.
## Departments
3. When you have filled in the details, click:
1. `Save and add another` to add another company.
2. `Save` to save the details and go back to the table.
3. `Cancel` to close the window and go back to the table.
## Departments
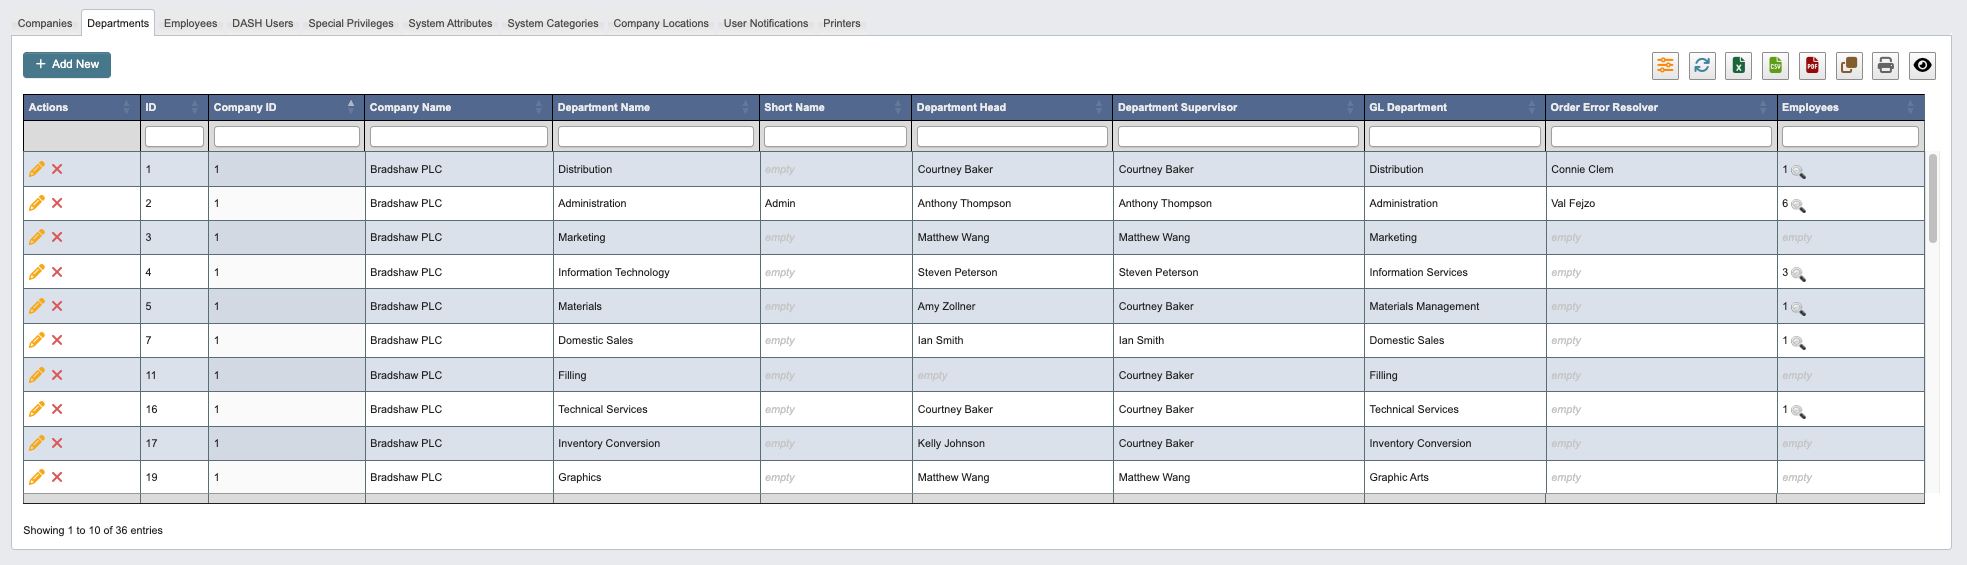 The Departments tab manages department configurations within companies.
### Add New Department
1. Click `+ Add New` to create a new department.
2. Enter the department details. See [Administration Reference](/administration/reference) for definitions.
The Departments tab manages department configurations within companies.
### Add New Department
1. Click `+ Add New` to create a new department.
2. Enter the department details. See [Administration Reference](/administration/reference) for definitions.
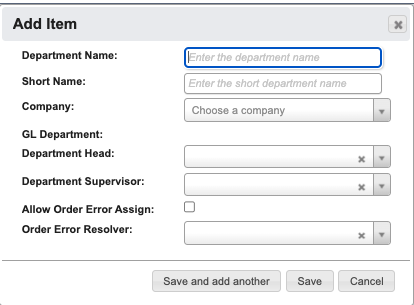 3. When you have filled in the details, click:
1. `Save and add another` to add another department.
2. `Save` to save the details and go back to the table.
3. `Cancel` to close the window and go back to the table.
## Employees
3. When you have filled in the details, click:
1. `Save and add another` to add another department.
2. `Save` to save the details and go back to the table.
3. `Cancel` to close the window and go back to the table.
## Employees
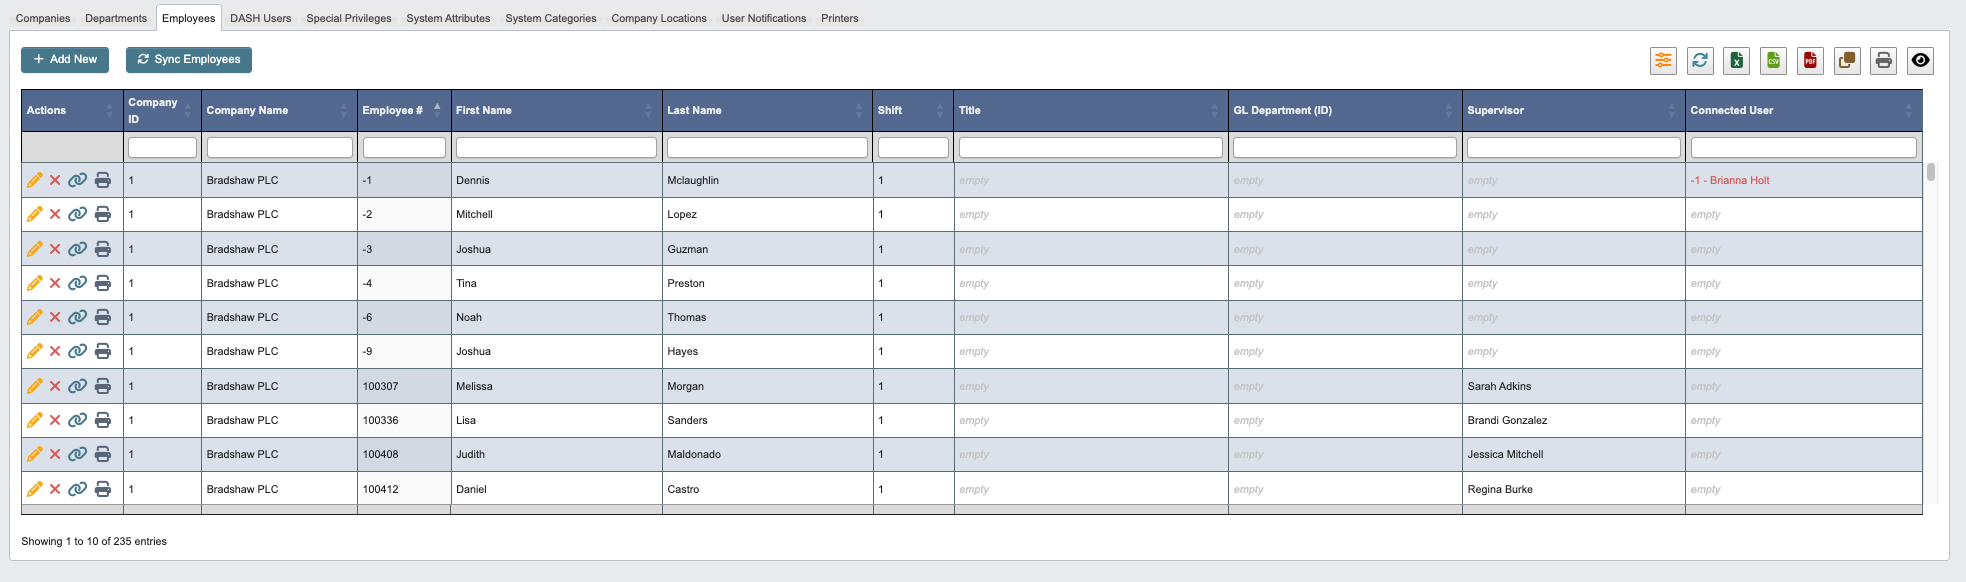 The Employees tab maintains records for all company personnel, regardless of whether they have DASH system access. The key distinction is that not all employees need DASH accounts; only those who require system access are set up as DASH Users.
Use `Sync Employees` to import new employees from external systems or bulk upload employee data when setting up the system or during organizational changes.
### Add New Employee
1. Click `+ Add New` to create a new employee.
2. Enter the following employee details:
The Employees tab maintains records for all company personnel, regardless of whether they have DASH system access. The key distinction is that not all employees need DASH accounts; only those who require system access are set up as DASH Users.
Use `Sync Employees` to import new employees from external systems or bulk upload employee data when setting up the system or during organizational changes.
### Add New Employee
1. Click `+ Add New` to create a new employee.
2. Enter the following employee details:
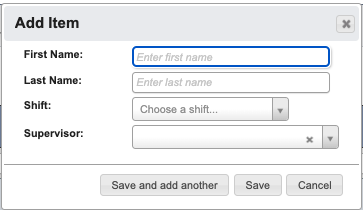 * `First Name`: Enter employee’s first name.
* `Last Name`: Enter employee’s last name.
* `Shift`: Choose shift from dropdown.
* `Supervisor`: Choose employee’s supervisor.
3. When you have filled in the details, click:
1. `Save and add another` to add another employee.
2. `Save` to save the details and go back to the table.
3. `Cancel` to close the window and go back to the table.
## DASH Users
* `First Name`: Enter employee’s first name.
* `Last Name`: Enter employee’s last name.
* `Shift`: Choose shift from dropdown.
* `Supervisor`: Choose employee’s supervisor.
3. When you have filled in the details, click:
1. `Save and add another` to add another employee.
2. `Save` to save the details and go back to the table.
3. `Cancel` to close the window and go back to the table.
## DASH Users
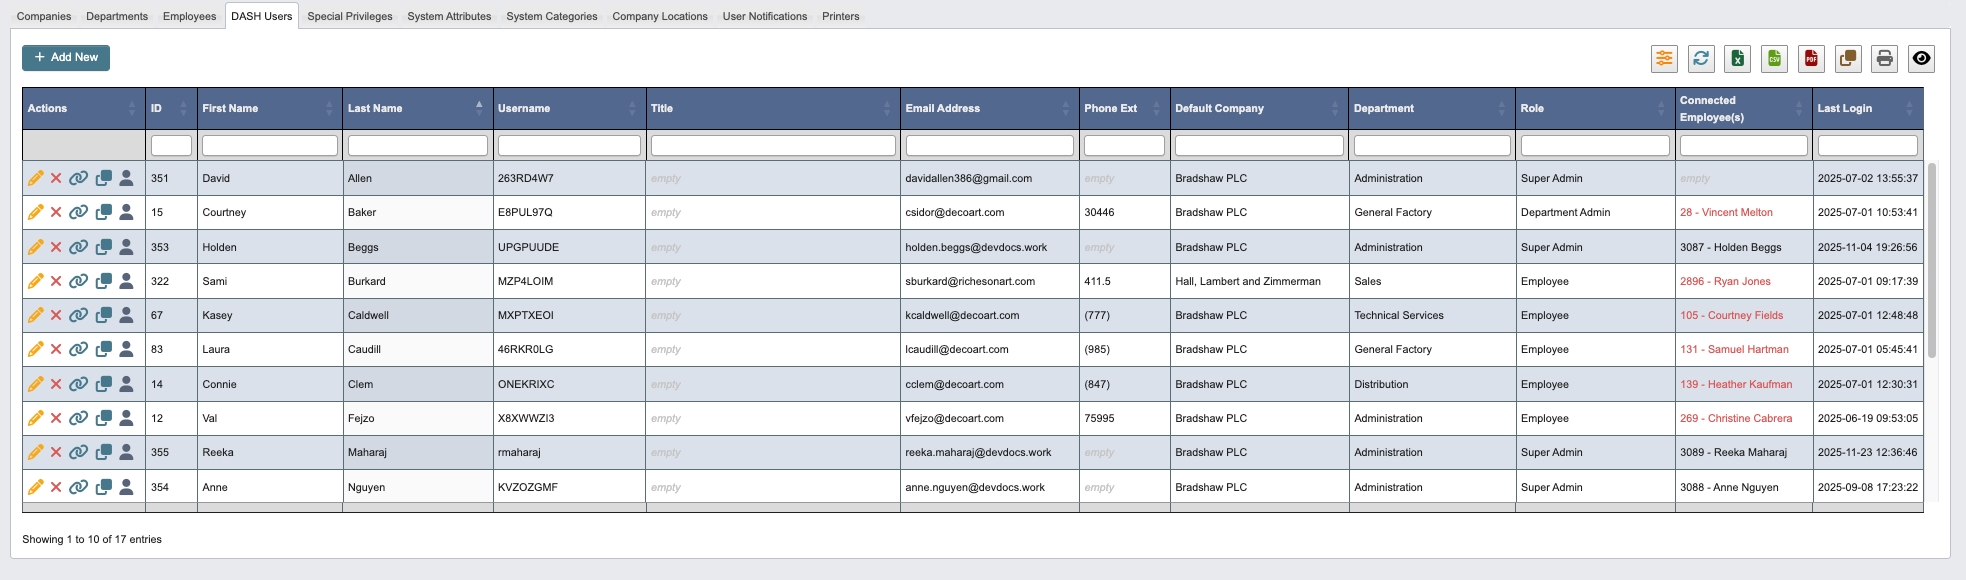 The DASH Users tab manages system access for employees who need to use DASH. This is a subset of all employees, only those who require system access are configured as DASH Users. Each DASH User can be configured with specific navigation privileges and permissions that control which modules and features they can access.
DASH Users can be granted access to multiple companies if needed. The system uses navigation privileges to control what each user can see and do within each company they have access to.
### Add New DASH User
1. Click `+ Add New` to create a new DASH User.
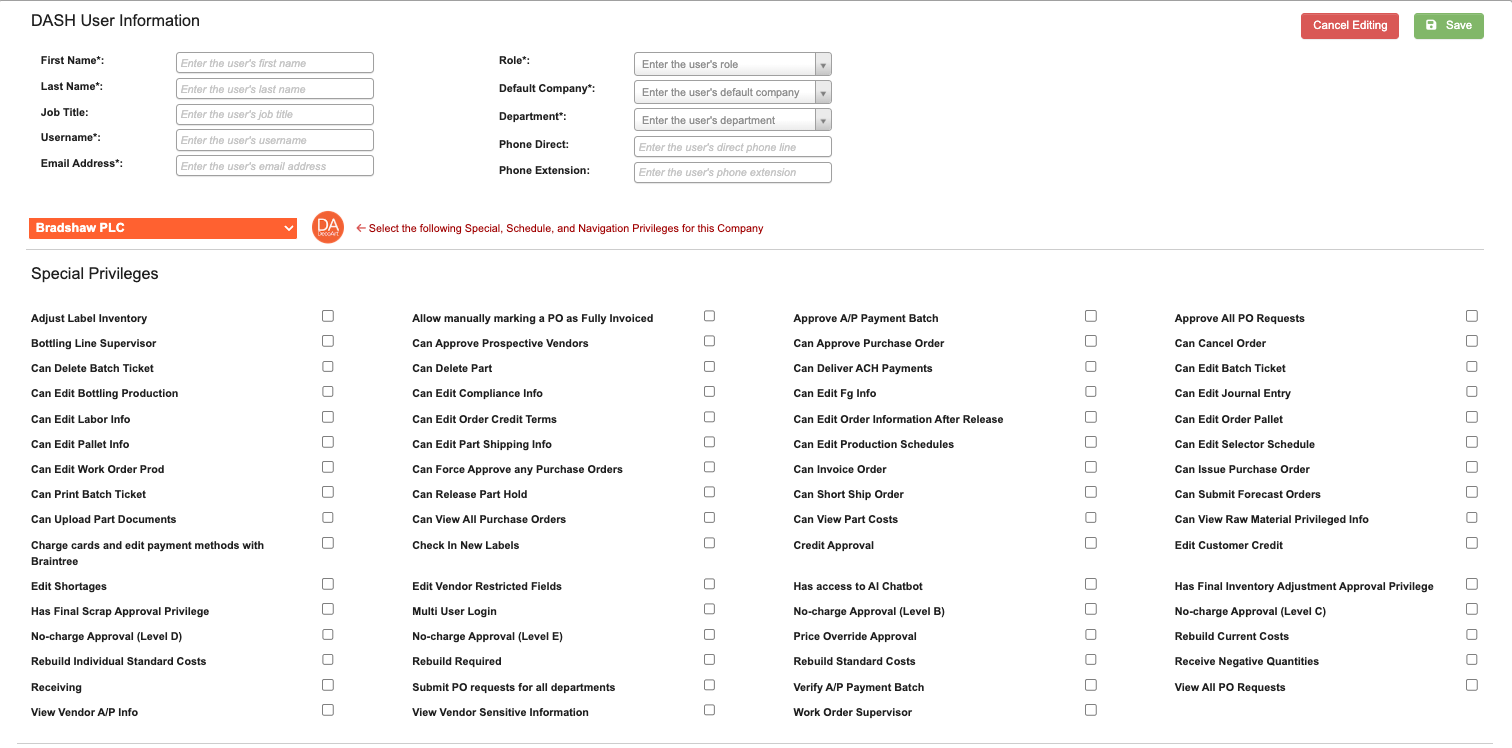
2. Enter the DASH User details. You will also need to assign navigational access and any special privileges the user requires. Use the **Company** dropdown to apply these settings to one or more companies as needed.
The DASH Users tab manages system access for employees who need to use DASH. This is a subset of all employees, only those who require system access are configured as DASH Users. Each DASH User can be configured with specific navigation privileges and permissions that control which modules and features they can access.
DASH Users can be granted access to multiple companies if needed. The system uses navigation privileges to control what each user can see and do within each company they have access to.
### Add New DASH User
1. Click `+ Add New` to create a new DASH User.
2. Enter the DASH User details. You will also need to assign navigational access and any special privileges the user requires. Use the **Company** dropdown to apply these settings to one or more companies as needed.
 3. When you have filled in the details, click:
1. `Save and add another` to add another DASH User.
2. `Save` to save the details and go back to the table.
3. `Cancel` to close the window and go back to the table.
### Copy Privileges to Another Company
When a user should have the same access in another company that they already have in one company, you can copy their settings between companies instead of re-selecting every option by hand. This is useful as employees take on work across companies and when onboarding additional companies.
You can start the copy from either place:
* In the **DASH Users** table, click the **Copy Privileges to Another Company** action (the building icon) on the user's row, or
* While editing a user, click **Copy from another company…** next to the company selector. This copies into the company currently selected in the editor, and the form reloads to show the result.
3. When you have filled in the details, click:
1. `Save and add another` to add another DASH User.
2. `Save` to save the details and go back to the table.
3. `Cancel` to close the window and go back to the table.
### Copy Privileges to Another Company
When a user should have the same access in another company that they already have in one company, you can copy their settings between companies instead of re-selecting every option by hand. This is useful as employees take on work across companies and when onboarding additional companies.
You can start the copy from either place:
* In the **DASH Users** table, click the **Copy Privileges to Another Company** action (the building icon) on the user's row, or
* While editing a user, click **Copy from another company…** next to the company selector. This copies into the company currently selected in the editor, and the form reloads to show the result.
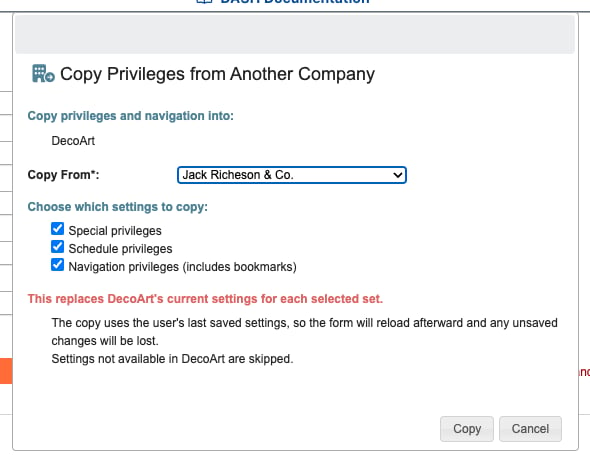 1. Choose the settings for the copy:
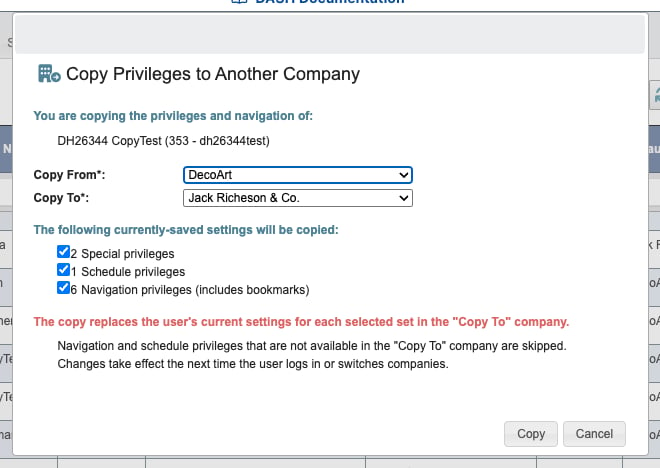 * `Copy From`: The company whose current settings should be copied. The counts below update to show how many settings that company currently has.
* `Copy To`: The company that should receive the copied settings.
* Select which sets to copy: **Special privileges**, **Schedule privileges**, and/or **Navigation privileges** (navigation also copies the user's bookmarks).
2. Click `Copy`.
The copy replaces the user's existing settings for each selected set in the **Copy To** company. Navigation and schedule privileges that are not available in the **Copy To** company are skipped, so a user only receives access that the target company actually offers. Changes take effect the next time the user logs in or switches to the target company.
## Special Privileges
* `Copy From`: The company whose current settings should be copied. The counts below update to show how many settings that company currently has.
* `Copy To`: The company that should receive the copied settings.
* Select which sets to copy: **Special privileges**, **Schedule privileges**, and/or **Navigation privileges** (navigation also copies the user's bookmarks).
2. Click `Copy`.
The copy replaces the user's existing settings for each selected set in the **Copy To** company. Navigation and schedule privileges that are not available in the **Copy To** company are skipped, so a user only receives access that the target company actually offers. Changes take effect the next time the user logs in or switches to the target company.
## Special Privileges
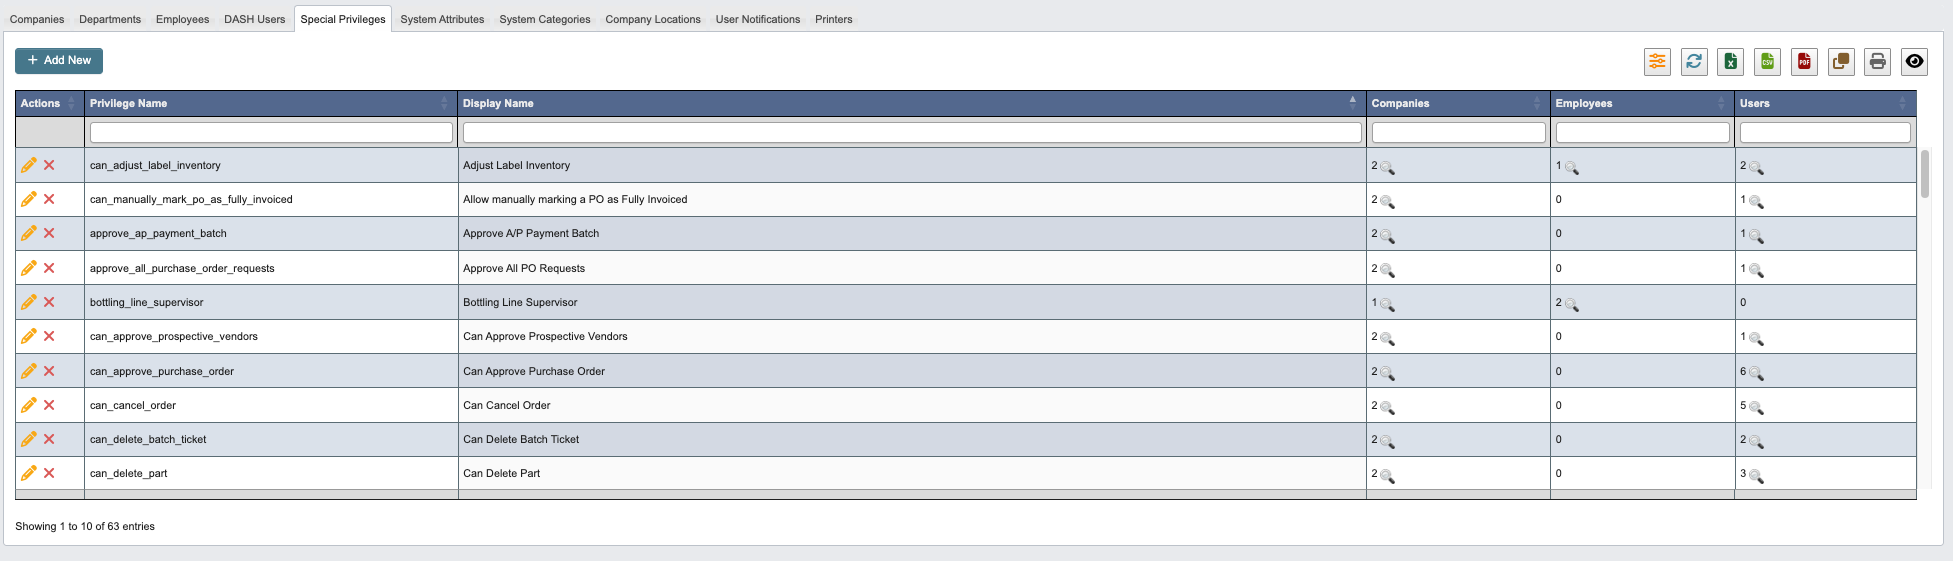 The Special Privileges tab defines custom permission sets that can be assigned to users beyond standard navigation privileges. Many special privileges have non-obvious backend functionality, so administrators should consult with the development team for detailed explanations of specific privilege effects.
Special privileges allow for fine-grained control over system access, enabling administrators to grant specific capabilities to users based on their roles and responsibilities.
### Add New Special Privilege
1. Click `+ Add New` to create a new Special Privilege.
2. Enter the following Special Privilege details.
The Special Privileges tab defines custom permission sets that can be assigned to users beyond standard navigation privileges. Many special privileges have non-obvious backend functionality, so administrators should consult with the development team for detailed explanations of specific privilege effects.
Special privileges allow for fine-grained control over system access, enabling administrators to grant specific capabilities to users based on their roles and responsibilities.
### Add New Special Privilege
1. Click `+ Add New` to create a new Special Privilege.
2. Enter the following Special Privilege details.
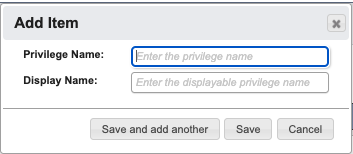 * `Privilege Name`: Enter the privilege name.
* `Display Name`: Enter the displayable privilege name.
3. When you have filled in the details, click:
1. `Save and add another` to add another Special Privilege.
2. `Save` to save the details and go back to the table.
3. `Cancel` to close the window and go back to the table.
## System Attributes
* `Privilege Name`: Enter the privilege name.
* `Display Name`: Enter the displayable privilege name.
3. When you have filled in the details, click:
1. `Save and add another` to add another Special Privilege.
2. `Save` to save the details and go back to the table.
3. `Cancel` to close the window and go back to the table.
## System Attributes
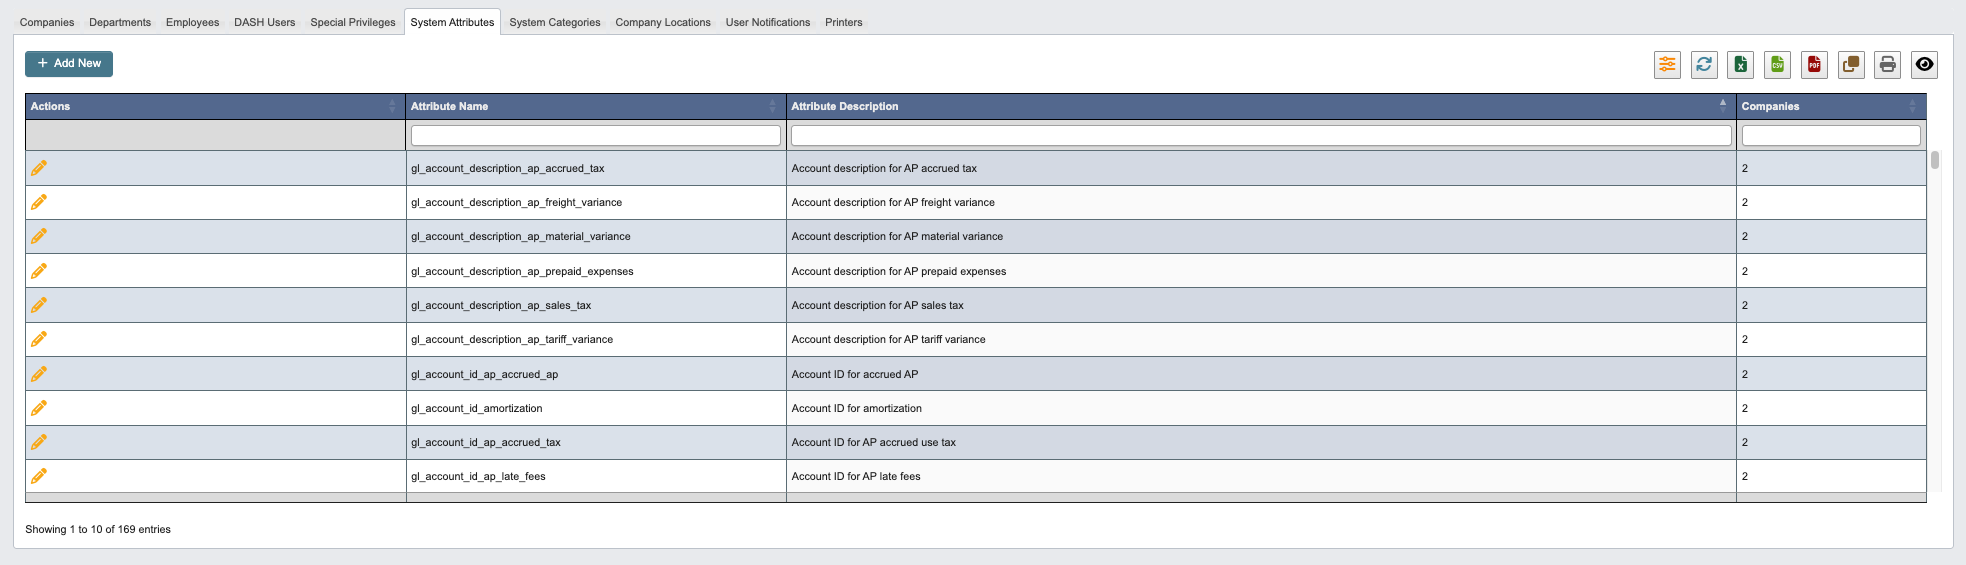 The System Attributes tab manages system attribute configurations.
### Add New System Attribute
1. Click `+ Add New` to create a new System Attribute.
2. Enter the following System Attribute details.
The System Attributes tab manages system attribute configurations.
### Add New System Attribute
1. Click `+ Add New` to create a new System Attribute.
2. Enter the following System Attribute details.
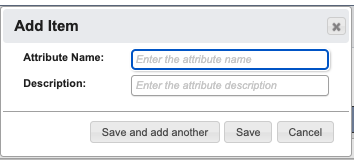 * `Attribute Name`: Enter the attribute name.
* `Description`: Enter the attribute description.
3. When you have filled in the details, click:
1. `Save and add another` to add another System Attribute.
2. `Save` to save the details and go back to the table.
3. `Cancel` to close the window and go back to the table.
## System Categories
* `Attribute Name`: Enter the attribute name.
* `Description`: Enter the attribute description.
3. When you have filled in the details, click:
1. `Save and add another` to add another System Attribute.
2. `Save` to save the details and go back to the table.
3. `Cancel` to close the window and go back to the table.
## System Categories
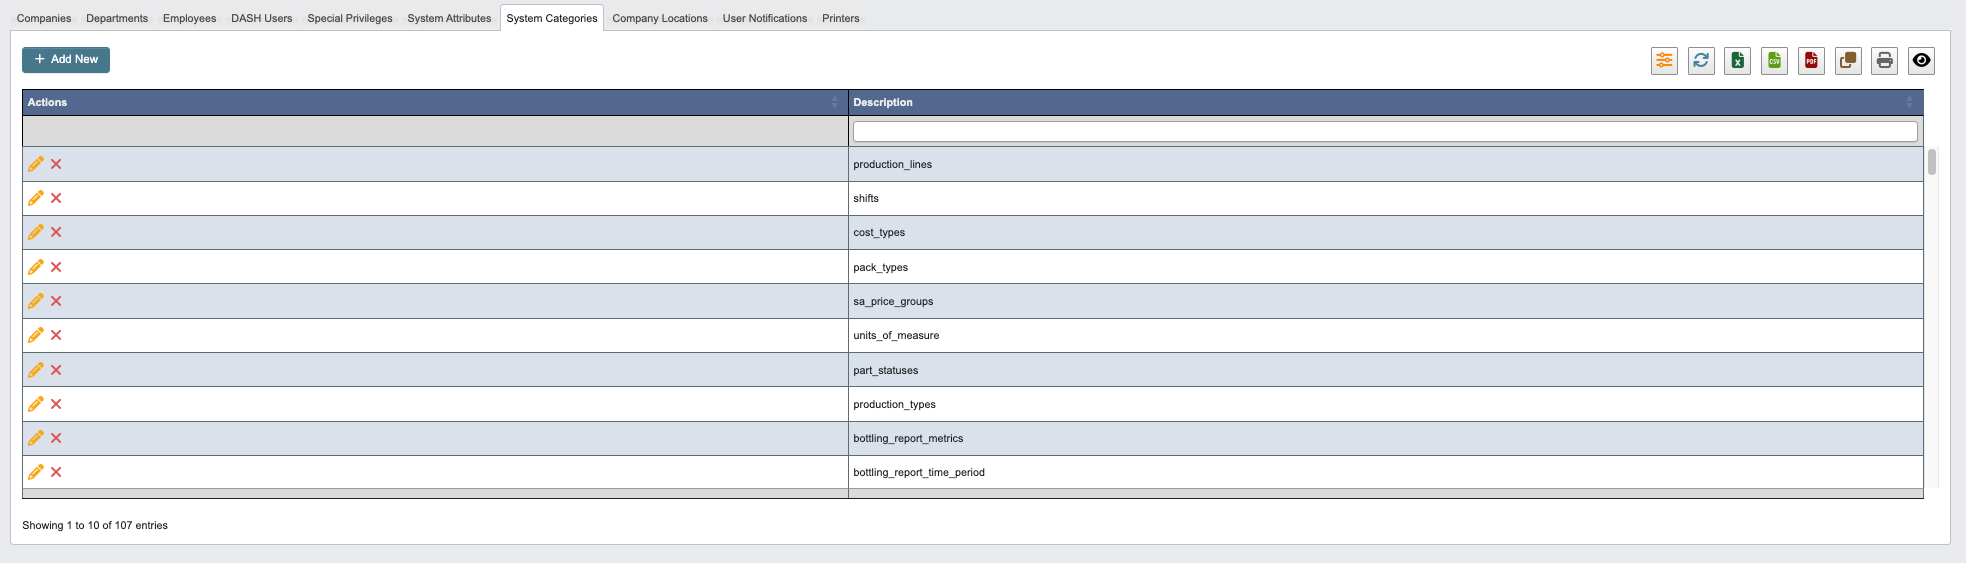 The System Categories tab manages system category configurations within the administration module.
### Add New System Category
1. Click `+ Add New` to create a new System Category.
2. Enter the `Description` of the System Category.
The System Categories tab manages system category configurations within the administration module.
### Add New System Category
1. Click `+ Add New` to create a new System Category.
2. Enter the `Description` of the System Category.
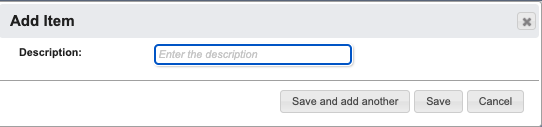 3. When you have filled in the details, click:
1. `Save and add another` to add another System Category.
2. `Save` to save the details and go back to the table.
3. `Cancel` to close the window and go back to the table.
## Company Locations
3. When you have filled in the details, click:
1. `Save and add another` to add another System Category.
2. `Save` to save the details and go back to the table.
3. `Cancel` to close the window and go back to the table.
## Company Locations
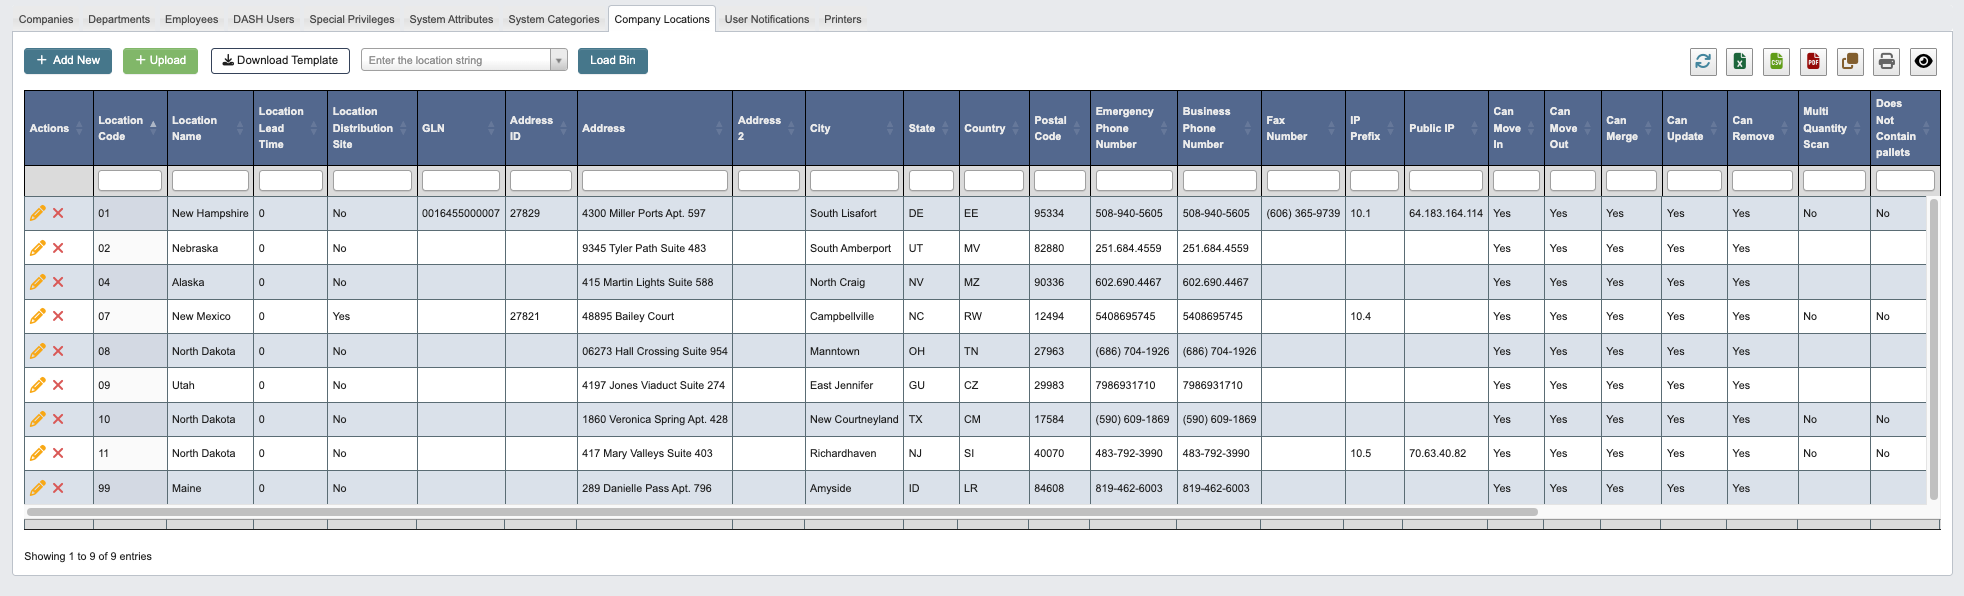 The Company Locations tab manages location configurations within the administration system. This section provides tools for setting up and maintaining location data that supports various operational needs across the organization.
### Company Locations Toolbar
The Company Locations tab manages location configurations within the administration system. This section provides tools for setting up and maintaining location data that supports various operational needs across the organization.
### Company Locations Toolbar
 * Click `+ Add New` to add a new location, see steps below.
* Click `+ Upload` to upload multiple locations at once.
* Click `Download Template` to get the Excel template format with proper column headers.
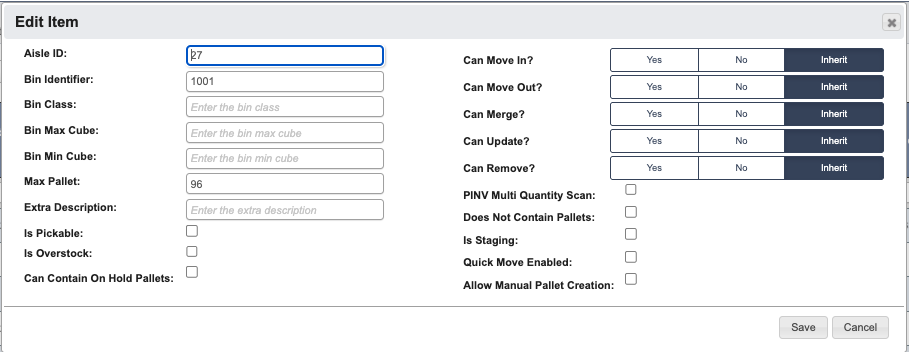
* Use the dropdown to select a location string, then click `Load Bin` to jump directly to the BIN popup for that location. This option skips the usual navigation steps (location → area → aisle → bin) and opens the final bin-editing window immediately. Click `Save` or `Cancel` when finished. See the \[Administration reference] for field definitions.
* Click `+ Add New` to add a new location, see steps below.
* Click `+ Upload` to upload multiple locations at once.
* Click `Download Template` to get the Excel template format with proper column headers.
* Use the dropdown to select a location string, then click `Load Bin` to jump directly to the BIN popup for that location. This option skips the usual navigation steps (location → area → aisle → bin) and opens the final bin-editing window immediately. Click `Save` or `Cancel` when finished. See the \[Administration reference] for field definitions.
 ### Add New Company Location
1. Click `+ Add New` to create a new Company Location.
2. Enter the Company Location details. See [Administration Reference](/administration/reference) for definitions.
### Add New Company Location
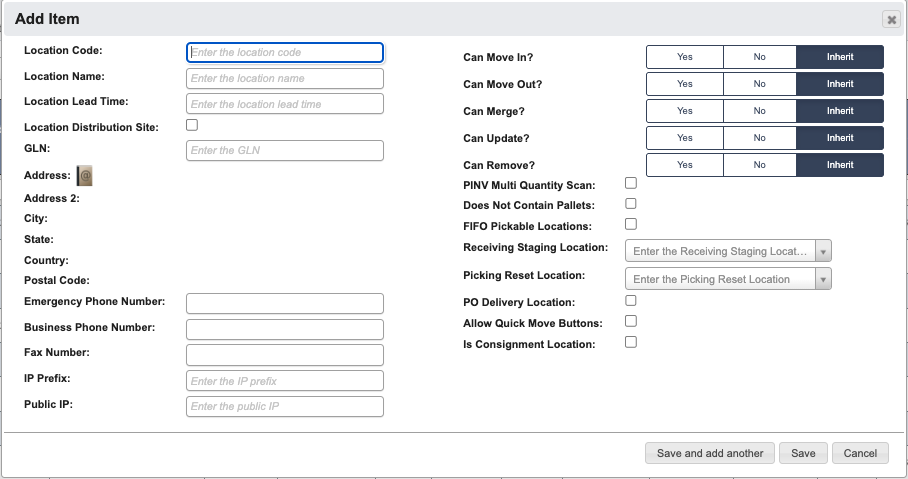
1. Click `+ Add New` to create a new Company Location.
2. Enter the Company Location details. See [Administration Reference](/administration/reference) for definitions.
 3. When you have filled in the details, click:
1. `Save and add another` to add another Company Location.
2. `Save` to save the details and go back to the table.
3. `Cancel` to close the window and go back to the table.
## User Notifications
3. When you have filled in the details, click:
1. `Save and add another` to add another Company Location.
2. `Save` to save the details and go back to the table.
3. `Cancel` to close the window and go back to the table.
## User Notifications
 The User Notifications tab manages User Notification configurations.
### Add New User Notification
1. Click `+ Add New` to create a new User Notification.
2. Enter the User Notification details. See [Administration Reference](/administration/reference) for definitions.
The User Notifications tab manages User Notification configurations.
### Add New User Notification
1. Click `+ Add New` to create a new User Notification.
2. Enter the User Notification details. See [Administration Reference](/administration/reference) for definitions.
 3. When you have filled in the details, click:
1. `Save and add another` to add another User Notification.
2. `Save` to save the details and go back to the table.
3. `Cancel` to close the window and go back to the table.
## Printers
3. When you have filled in the details, click:
1. `Save and add another` to add another User Notification.
2. `Save` to save the details and go back to the table.
3. `Cancel` to close the window and go back to the table.
## Printers
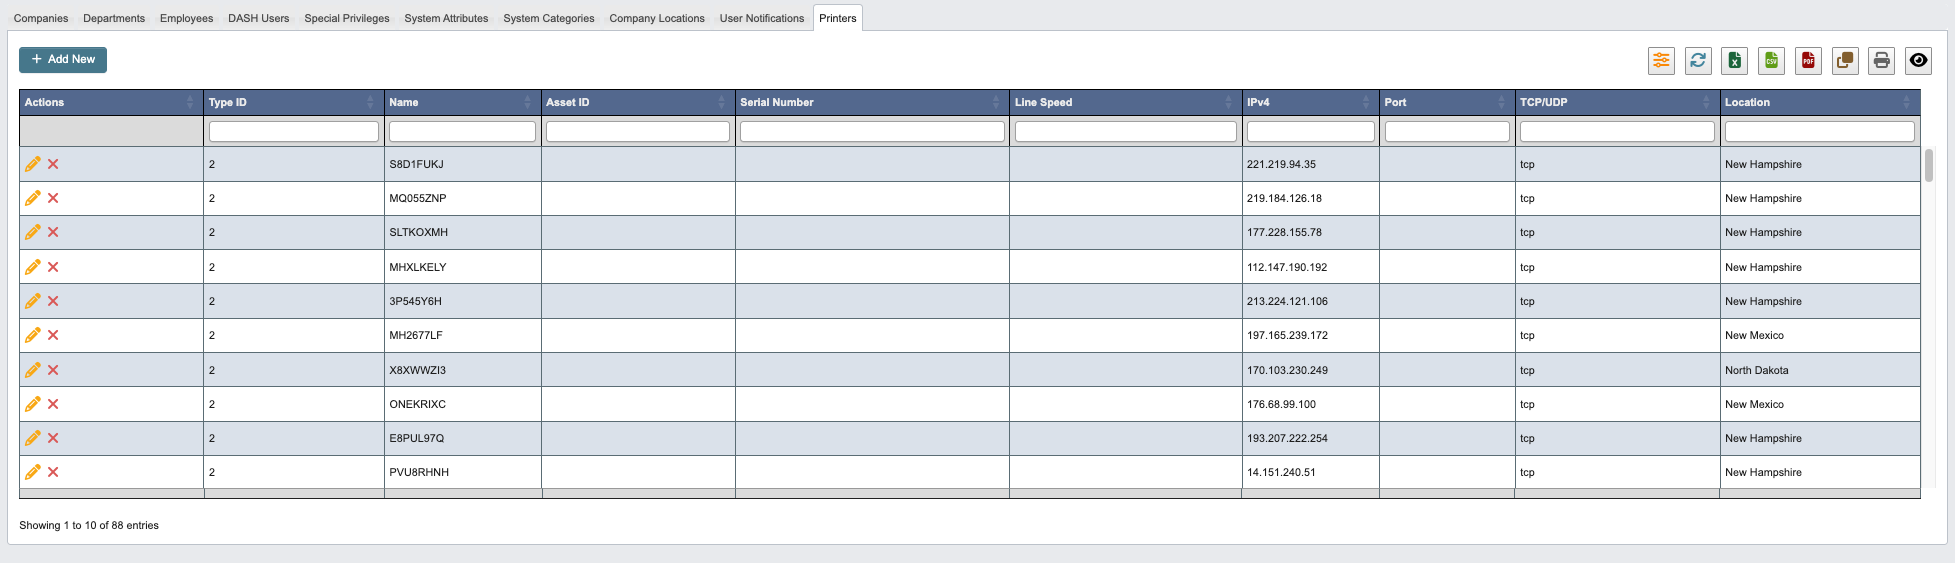 The Printers section manages printer configurations within the system.
### Add New Printer
1. Click `+ Add New` to create a new printer.
2. Enter the printer details. See [Administration Reference](/administration/reference) for definitions.
The Printers section manages printer configurations within the system.
### Add New Printer
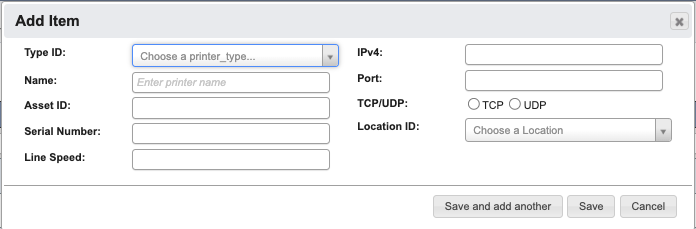
1. Click `+ Add New` to create a new printer.
2. Enter the printer details. See [Administration Reference](/administration/reference) for definitions.
 3. When you have filled in the details, click:
1. `Save and add another` to add another printer.
2. `Save` to save the details and go back to the table.
3. `Cancel` to close the window and go back to the table.
3. When you have filled in the details, click:
1. `Save and add another` to add another printer.
2. `Save` to save the details and go back to the table.
3. `Cancel` to close the window and go back to the table.