> ## Documentation Index
> Fetch the complete documentation index at: https://docs.decoart.com/llms.txt
> Use this file to discover all available pages before exploring further.
# Manage Entities Submodule
## Overview
The **Administration → Manage Entities** submodule provides tools for configuring entity structures and attributes within the administration system.
## Entity Types
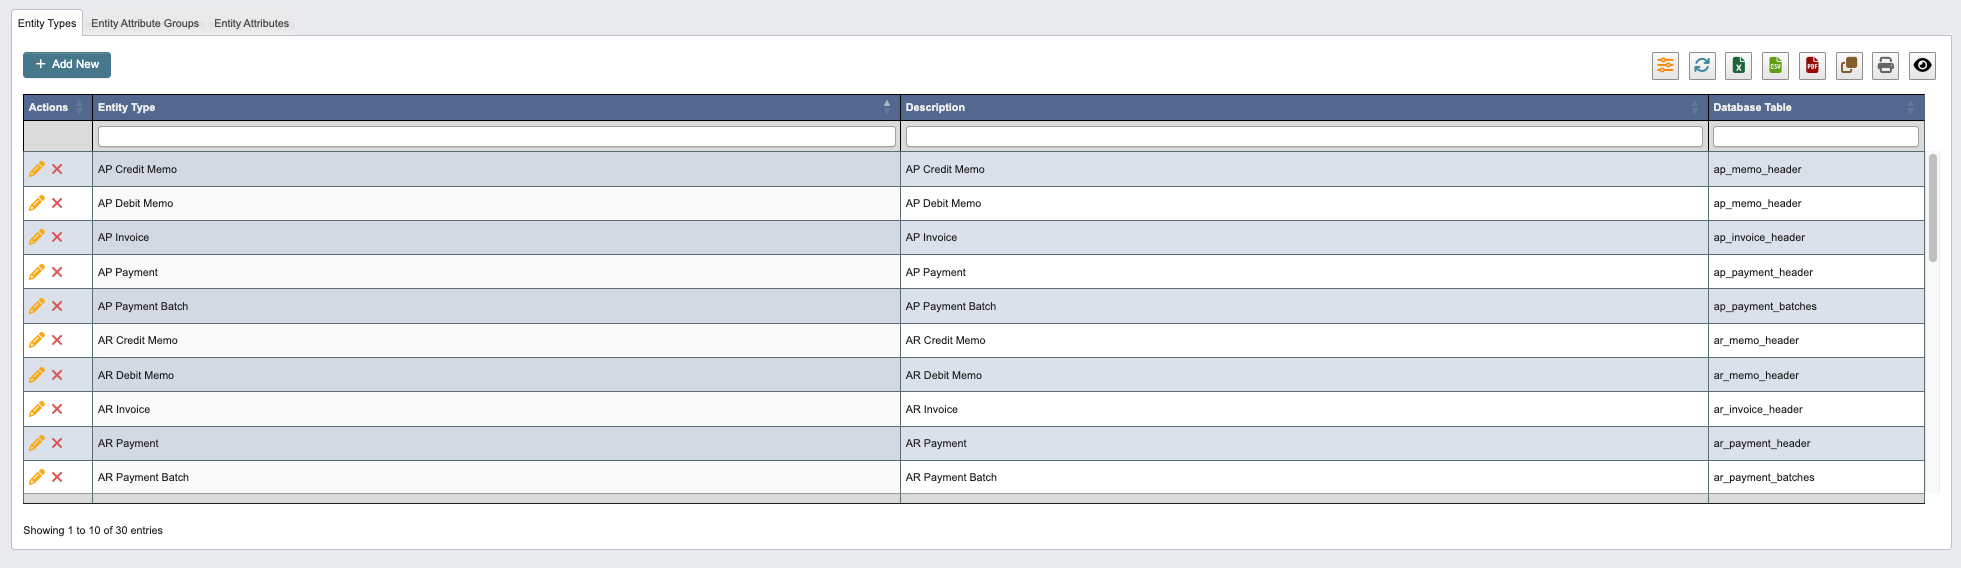 The Entity Types tab manages the different types of entities that can be configured within the system. Entity types represent various business objects and transactions throughout DASH, including accounting documents (AP/AR invoices, payments, journal entries), operational items (orders, work orders, purchase orders), and master data (customers, vendors, parts, formulas).
### Add a New Entity Type
1. Click `+ Add New` to create a new Entity Type.
The Entity Types tab manages the different types of entities that can be configured within the system. Entity types represent various business objects and transactions throughout DASH, including accounting documents (AP/AR invoices, payments, journal entries), operational items (orders, work orders, purchase orders), and master data (customers, vendors, parts, formulas).
### Add a New Entity Type
1. Click `+ Add New` to create a new Entity Type.
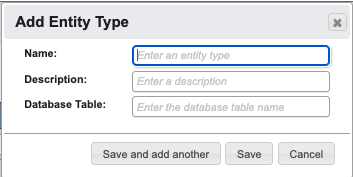 2. Enter the following Entity Type details:
* `Name`: Enter an entity type.
* `Description`: Enter a description.
* `Database Table`: Enter the database table name.
3. When you have filled in the details, click:
1. `Save and add another` to add another Entity Type.
2. `Save` to save the details and go back to the table.
3. `Cancel` to close the window and go back to the table.
## Entity Attribute Groups
2. Enter the following Entity Type details:
* `Name`: Enter an entity type.
* `Description`: Enter a description.
* `Database Table`: Enter the database table name.
3. When you have filled in the details, click:
1. `Save and add another` to add another Entity Type.
2. `Save` to save the details and go back to the table.
3. `Cancel` to close the window and go back to the table.
## Entity Attribute Groups
 The Entity Attribute Groups tab organizes entity attributes into logical groupings for better organization and management. These groups help categorize related attributes within specific entity types and control their display order through sort weights.
### Add a New Entity Attribute Group
1. Click `+ Add New` to create a new Entity Attribute Group.
The Entity Attribute Groups tab organizes entity attributes into logical groupings for better organization and management. These groups help categorize related attributes within specific entity types and control their display order through sort weights.
### Add a New Entity Attribute Group
1. Click `+ Add New` to create a new Entity Attribute Group.
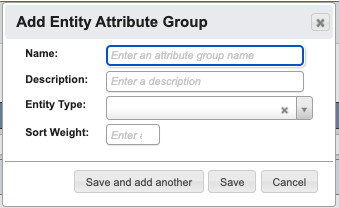 2. Enter the following Entity Attribute Group details:
* `Name`: Enter an attribute group name.
* `Description`: Enter a description.
* `Entity Type`: Select the entity type.
* `Sort Weight`: Enter a sort weight.
3. When you have filled in the details, click:
1. `Save and add another` to add another Entity Attribute Group.
2. `Save` to save the details and go back to the table.
3. `Cancel` to close the window and go back to the table.
## Entity Attributes
The Entity Attributes tab defines specific attributes that can be assigned to entities within the system. These attributes provide additional data fields for different entity types and are organized within attribute groups.
### Add New Entity Attribute
1. Click `+ Add New` to create a new Entity Attribute.
2. Enter the following Entity Attribute Group details:
* `Name`: Enter an attribute group name.
* `Description`: Enter a description.
* `Entity Type`: Select the entity type.
* `Sort Weight`: Enter a sort weight.
3. When you have filled in the details, click:
1. `Save and add another` to add another Entity Attribute Group.
2. `Save` to save the details and go back to the table.
3. `Cancel` to close the window and go back to the table.
## Entity Attributes
The Entity Attributes tab defines specific attributes that can be assigned to entities within the system. These attributes provide additional data fields for different entity types and are organized within attribute groups.
### Add New Entity Attribute
1. Click `+ Add New` to create a new Entity Attribute.
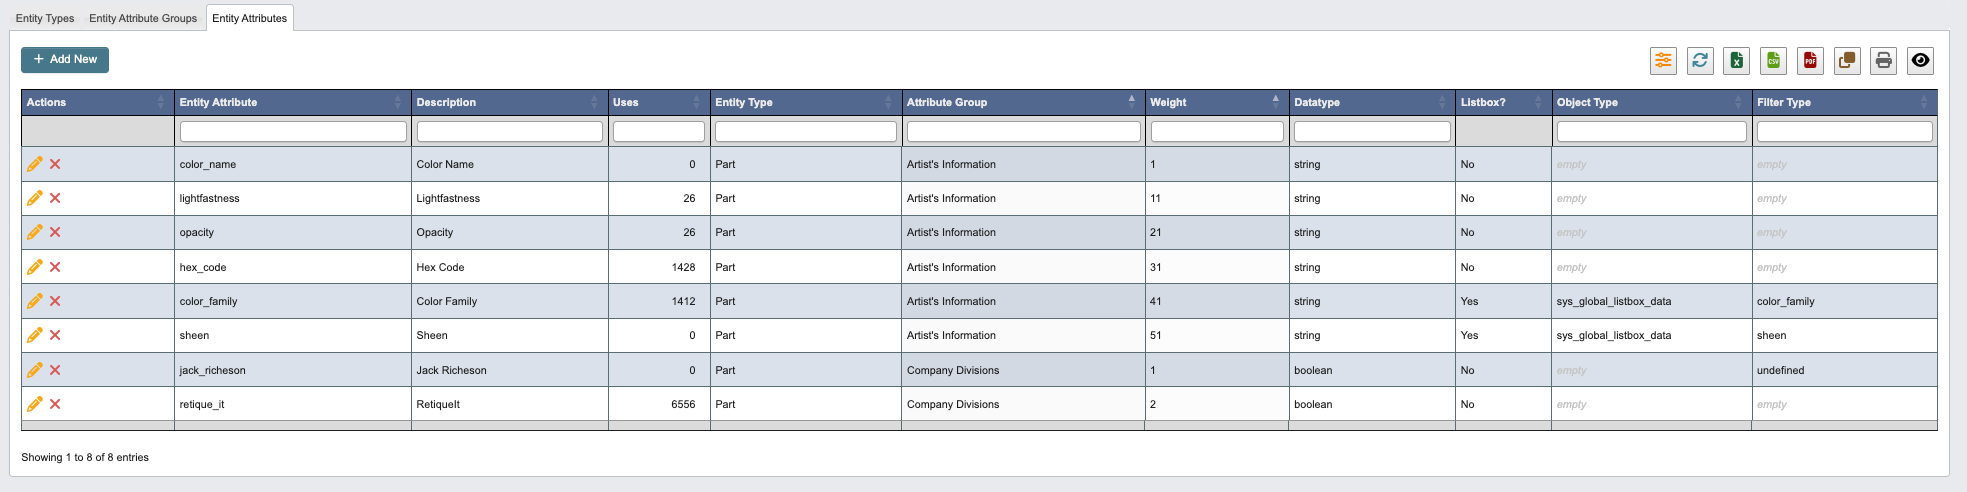 2. Enter the following Entity Attribute details:
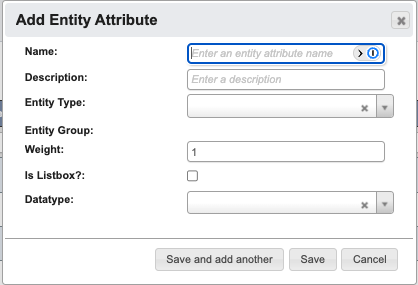 * `Name`: Enter the attribute name.
* `Description`: Enter a description of the attribute.
* `Entity Type`: Select the entity type this attribute applies to.
* `Entity Group`: Select the attribute group this attribute belongs to.
* `Weight`: Enter a sorting value that determines the order in which the item appears. Lower weights appear first (e.g., a weight of 10 displays before 20).
* `Is Listbox?`: Check if this attribute should display as a dropdown list.
* `Datatype`: Select the data type for this attribute from the dropdown.
3. When you have filled in the details, click:
1. `Save and add another` to add another Entity Attribute.
2. `Save` to save the details and go back to the table.
3. `Cancel` to close the window and go back to the table.
* `Name`: Enter the attribute name.
* `Description`: Enter a description of the attribute.
* `Entity Type`: Select the entity type this attribute applies to.
* `Entity Group`: Select the attribute group this attribute belongs to.
* `Weight`: Enter a sorting value that determines the order in which the item appears. Lower weights appear first (e.g., a weight of 10 displays before 20).
* `Is Listbox?`: Check if this attribute should display as a dropdown list.
* `Datatype`: Select the data type for this attribute from the dropdown.
3. When you have filled in the details, click:
1. `Save and add another` to add another Entity Attribute.
2. `Save` to save the details and go back to the table.
3. `Cancel` to close the window and go back to the table.