> ## Documentation Index
> Fetch the complete documentation index at: https://docs.decoart.com/llms.txt
> Use this file to discover all available pages before exploring further.
# Manage Navigation Submodule
## Overview
The **Administration → Manage Navigation** submodule is used to define and organize the pages (URLs) that appear within DASH. Administrators can create navigation entries, nest them under parent categories, and structure them across different hierarchy levels.
This page also provides visibility into which companies and users currently have access to each navigation item.
## Navigation Tab
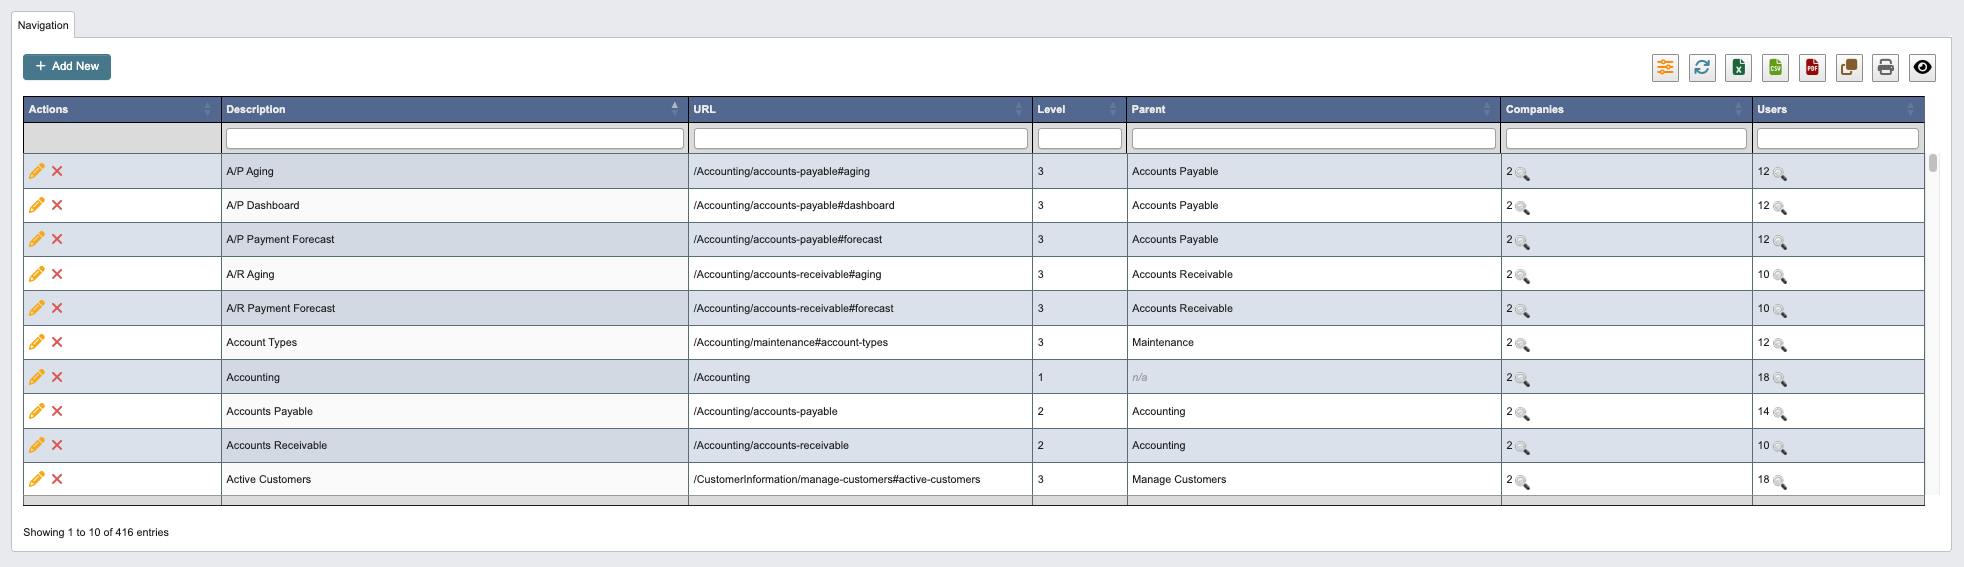 The Navigation Tab manages the navigation structure of DASH, defining the menu items, URLs, and access levels throughout the system. Navigation items are organized in a three-level hierarchy where Level 1 represents main modules, Level 2 represents submodules, and Level 3 represents specific pages or functions.
Examples of navigation structure:
* **Level 1 (Main Modules)**: Accounting, Administration, Order Processing, Part Information, Work Orders
* **Level 2 (Submodules)**: Accounts Payable, Manage Companies, Manage Orders, Manage Parts, Manage Work Orders
* **Level 3 (Specific Pages)**: A/P Dashboard, Add Customer, Add Order, Add Part, Active Work Orders
Each navigation item can be assigned to specific companies and made available to selected users based on their role and permissions. This allows administrators to create customized navigation experiences for different user groups while maintaining proper access control across multiple business entities.
### Add New Navigation
1. Click `+ Add New` to create a new Navigation.
2. Enter the following Navigation details:
The Navigation Tab manages the navigation structure of DASH, defining the menu items, URLs, and access levels throughout the system. Navigation items are organized in a three-level hierarchy where Level 1 represents main modules, Level 2 represents submodules, and Level 3 represents specific pages or functions.
Examples of navigation structure:
* **Level 1 (Main Modules)**: Accounting, Administration, Order Processing, Part Information, Work Orders
* **Level 2 (Submodules)**: Accounts Payable, Manage Companies, Manage Orders, Manage Parts, Manage Work Orders
* **Level 3 (Specific Pages)**: A/P Dashboard, Add Customer, Add Order, Add Part, Active Work Orders
Each navigation item can be assigned to specific companies and made available to selected users based on their role and permissions. This allows administrators to create customized navigation experiences for different user groups while maintaining proper access control across multiple business entities.
### Add New Navigation
1. Click `+ Add New` to create a new Navigation.
2. Enter the following Navigation details:
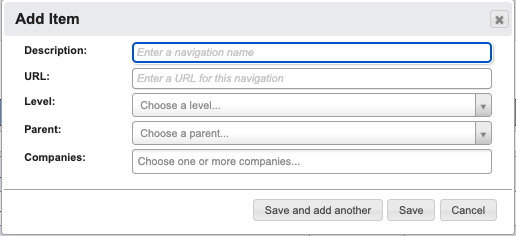 * `Description`: Enter a descriptive name for the navigation item.
* `URL`: Enter the URL path for this navigation item.
* `Level`: Select the hierarchy level.
* `Parent`: Select the parent navigation item for levels 2 and 3.
* `Companies`: Choose one or more companies that should have access to this navigation item.
3. When you have filled in the details, click:
1. `Save and add another` to add another Navigation.
2. `Save` to save the details and go back to the table.
3. `Cancel` to close the window and go back to the table.
* `Description`: Enter a descriptive name for the navigation item.
* `URL`: Enter the URL path for this navigation item.
* `Level`: Select the hierarchy level.
* `Parent`: Select the parent navigation item for levels 2 and 3.
* `Companies`: Choose one or more companies that should have access to this navigation item.
3. When you have filled in the details, click:
1. `Save and add another` to add another Navigation.
2. `Save` to save the details and go back to the table.
3. `Cancel` to close the window and go back to the table.