> ## Documentation Index
> Fetch the complete documentation index at: https://docs.decoart.com/llms.txt
> Use this file to discover all available pages before exploring further.
# Receiving Submodule
## Overview
This tutorial helps you **receive a purchase order (PO)** and print/apply tags in the DASH **Purchase Orders → Receiving** submodule. Use it when a shipment arrives and you have the **packing list** and **bill of lading (BOL)** in hand.
After you select the PO and complete the Delivery Information, you’ll enter received quantities, configure how many tags to print, upload the packing list/BOL to the PO, and finish receiving the order. DASH will create license-plate tags for you to apply to each pallet/piece.
## Receive a PO
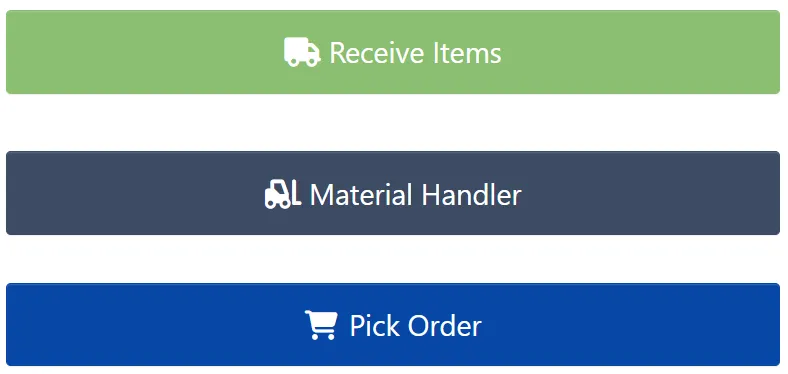
1. Go to **Purchase Orders → Receiving → Receive Items**.
 2. On **Delivery Information**, fill in:
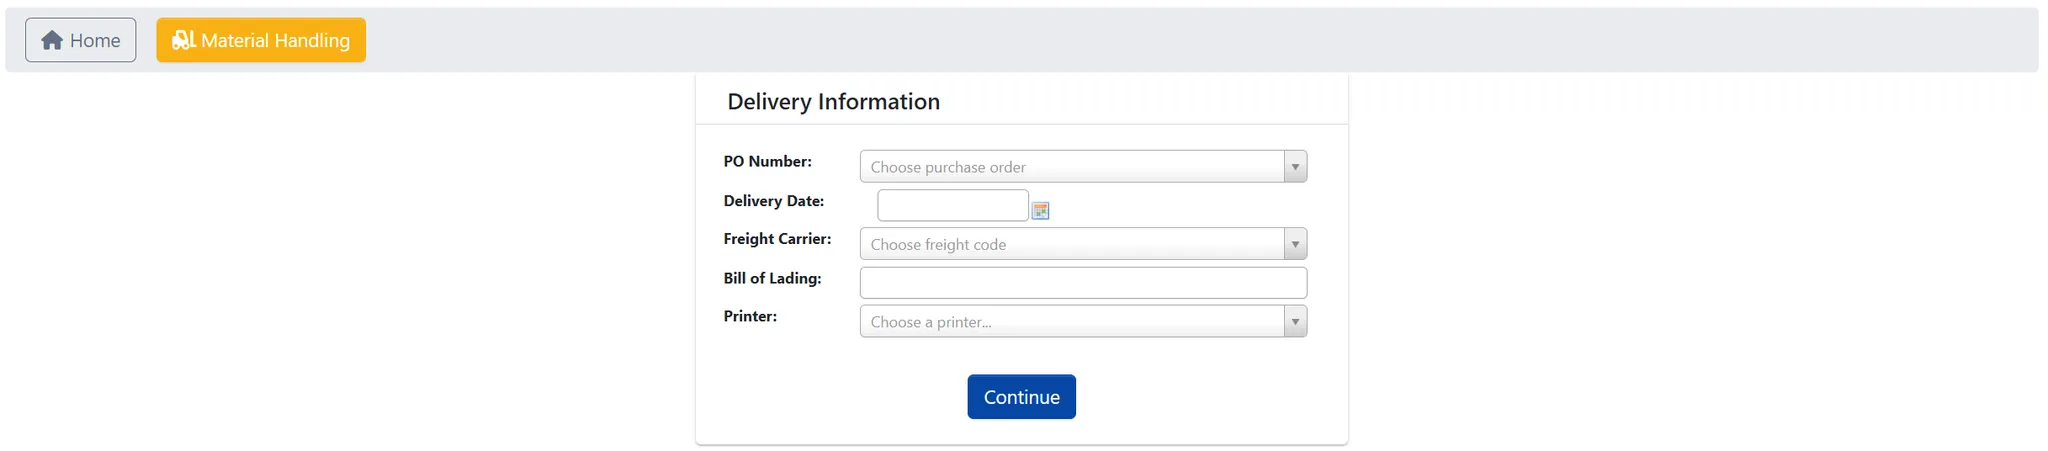
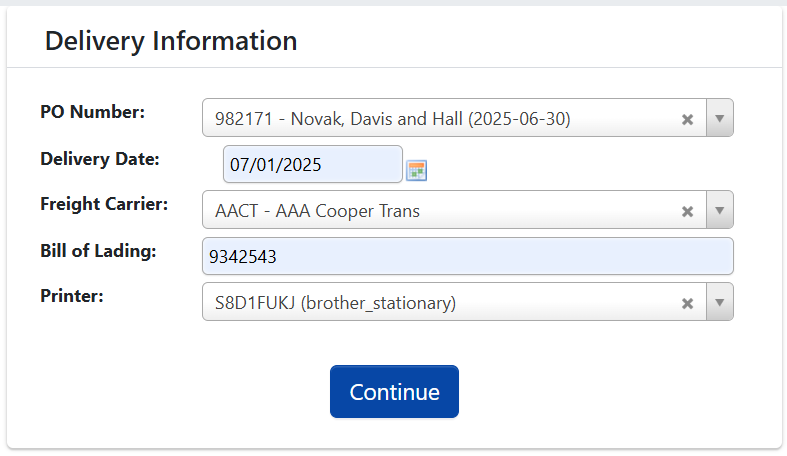 * `PO Number` from packing list.
* `Delivery Date` defaults to today; you can adjust as needed.
* `Freight Carrier` type to filter.
* `Bill of Lading` from paperwork - usually the delivery driver hands you this.
* `Printer` select your label printer.
3. Click `Continue` to open the PO.
4. After the PO opens, select and verify the item:
1. Pick the `Part #` from the dropdown (this shows the item(s) on the PO).
2. Verify `Description` and part match the packing list.
5. Enter the quantity:
* `PO Number` from packing list.
* `Delivery Date` defaults to today; you can adjust as needed.
* `Freight Carrier` type to filter.
* `Bill of Lading` from paperwork - usually the delivery driver hands you this.
* `Printer` select your label printer.
3. Click `Continue` to open the PO.
4. After the PO opens, select and verify the item:
1. Pick the `Part #` from the dropdown (this shows the item(s) on the PO).
2. Verify `Description` and part match the packing list.
5. Enter the quantity:
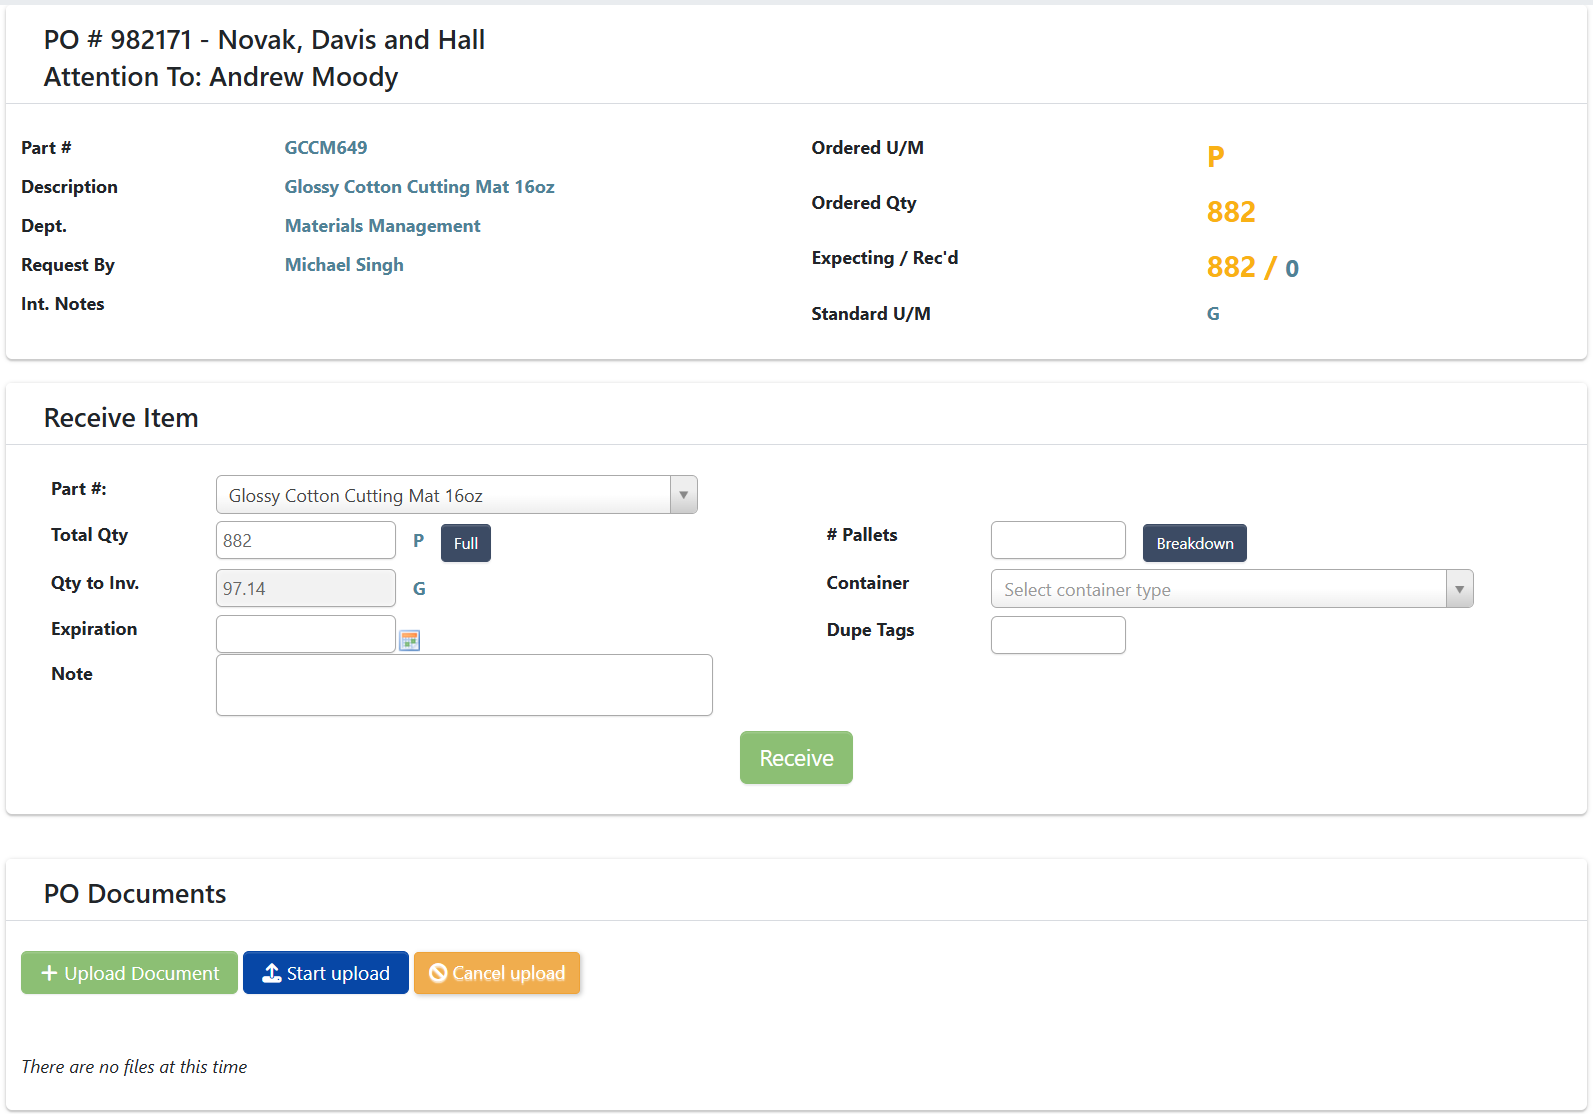 1. If you received the full amount, click `Full`; otherwise type the partial `Total Qty`.
2. **Make sure the unit shown on screen is the unit you enter.** Convert first if needed. The system will convert to storage gallons for liquids.
3. Enter a date in `Expiration` if applicable.
If you’ve accidentally entered a larger amount than you meant to while receiving, you can enter a negative number to correct that entry. You have to add a Note before continuing.
For example, let’s imagine you were receiving a PO with an `Ordered Qty` of 5, but you accidentally entered 7 in `Total Qty` and clicked `Receive` .
In this situation, you can go back to this PO and follow steps 1 to 5, but this time you would enter -2 for `Total Qty`. Then, you would type in a `Note` explaining how you entered too much and this edit is to back it out.
6. Configure tag printing - the right side of the screen shows how many tags print and how quantities split per tag:
1. If you received the full amount, click `Full`; otherwise type the partial `Total Qty`.
2. **Make sure the unit shown on screen is the unit you enter.** Convert first if needed. The system will convert to storage gallons for liquids.
3. Enter a date in `Expiration` if applicable.
If you’ve accidentally entered a larger amount than you meant to while receiving, you can enter a negative number to correct that entry. You have to add a Note before continuing.
For example, let’s imagine you were receiving a PO with an `Ordered Qty` of 5, but you accidentally entered 7 in `Total Qty` and clicked `Receive` .
In this situation, you can go back to this PO and follow steps 1 to 5, but this time you would enter -2 for `Total Qty`. Then, you would type in a `Note` explaining how you entered too much and this edit is to back it out.
6. Configure tag printing - the right side of the screen shows how many tags print and how quantities split per tag:
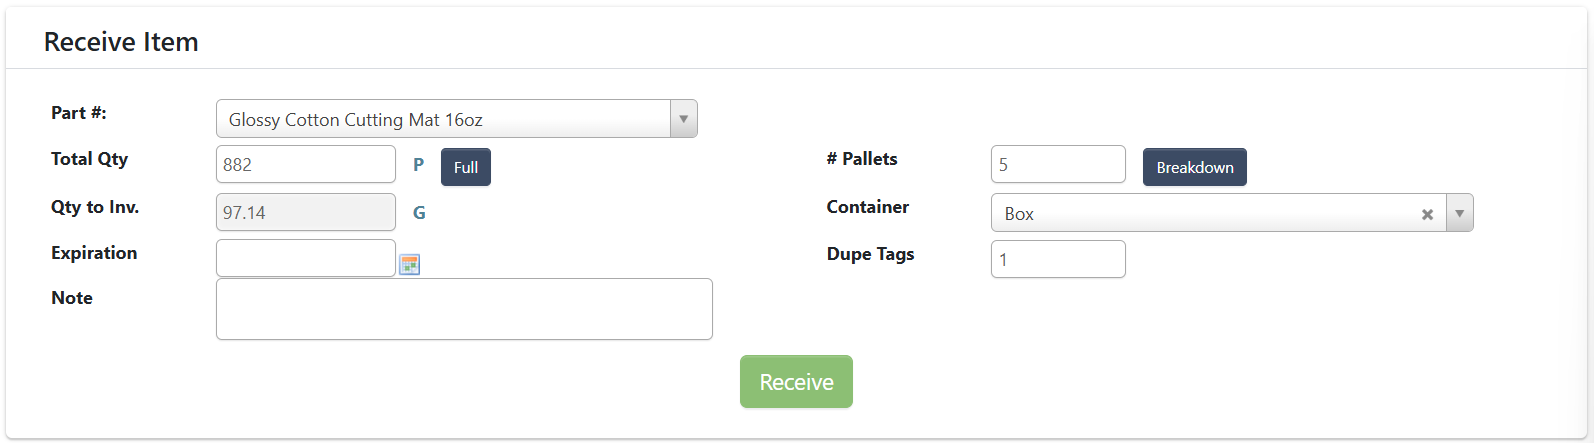 1. `# of pallets`: number of tags to print (use 1 per pallet/drum/pail/etc.; e.g., 18 pails → 18 tags).
2. `Breakdown` (optional): split uneven pallets; **all lines must sum to the total** or you’ll get an error.
3. `Container`: select what type of container you’re printing tags for.
1. This controls duplicate copies per tag: the system defaults to 3 `Dupe Tags` for drums and 2 for totes, and 1 for every other type.
2. You can also manually enter a `Dupe Tags` number.
7. Attach required documents
1. `# of pallets`: number of tags to print (use 1 per pallet/drum/pail/etc.; e.g., 18 pails → 18 tags).
2. `Breakdown` (optional): split uneven pallets; **all lines must sum to the total** or you’ll get an error.
3. `Container`: select what type of container you’re printing tags for.
1. This controls duplicate copies per tag: the system defaults to 3 `Dupe Tags` for drums and 2 for totes, and 1 for every other type.
2. You can also manually enter a `Dupe Tags` number.
7. Attach required documents
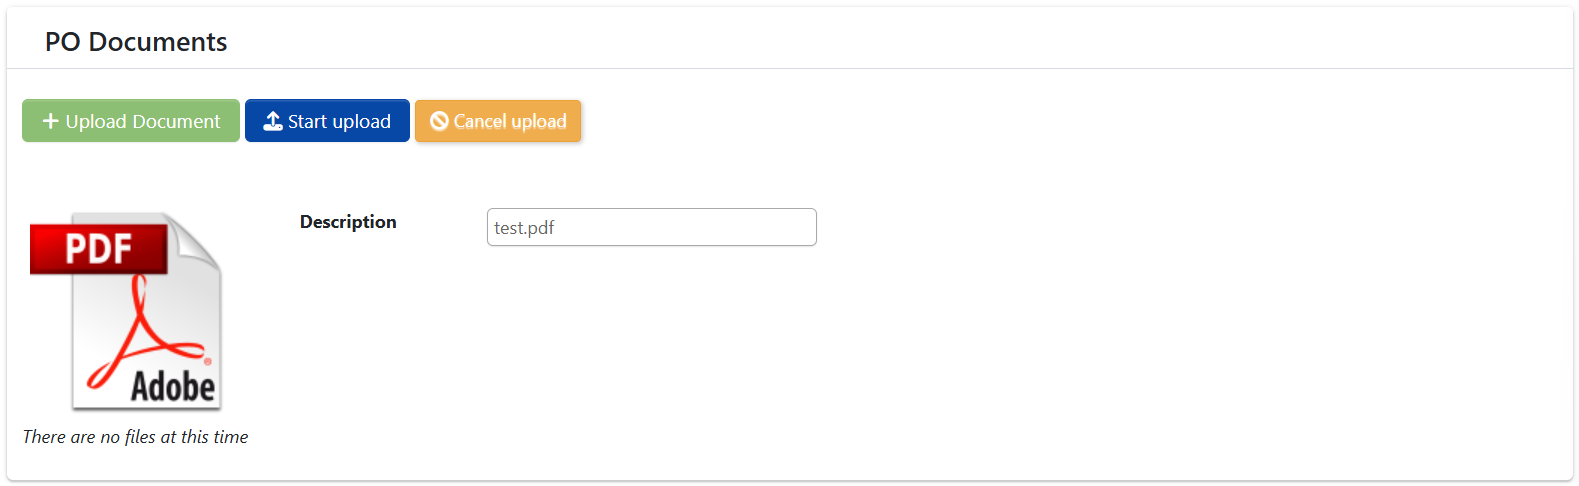 1. Under **PO Documents**, click `Upload Document`.
2. Select your scanned **packing list** and **BOL**.
3. Click `Start upload`.
8. Click `Receive`. Your selected printer will print the tags (e.g., 18 tags for 18 boxes).
1. At the bottom right of your screen, you’ll see a notification saying “Part successfully received”.
1. Under **PO Documents**, click `Upload Document`.
2. Select your scanned **packing list** and **BOL**.
3. Click `Start upload`.
8. Click `Receive`. Your selected printer will print the tags (e.g., 18 tags for 18 boxes).
1. At the bottom right of your screen, you’ll see a notification saying “Part successfully received”.
 9. Tag the product & move to storage:
1. Take printed tags to the product. Double check the description on the tag matches the vendor label on the item; also check the quantity.
2. If there’s no vendor description or it doesn’t match, escalate (lab may test/verify) before tagging.
3. After tagging, use **Inventory → Material Handler** to scan the tag and move it to a rack location (scan location barcode; Check In).
To learn more about this process, check out [Material Handler](/inventory/material-handler).
## Toll-Manufactured Parts
When you receive a PO line for a **toll-manufactured** part, DASH automatically consumes the part's toll BOM components at the moment of receipt — no extra steps in the Receiving screen:
* Each component's perpetual quantity on hand is reduced by the component quantity times the received amount.
* The consumed quantity is also deducted from the component's license plates in the vendor's consignment location (set on the vendor under **Purchase Orders → Manage Vendors**), oldest plate first. Only the vendor's own consignment location is touched — plates in other consignment locations are never used. Plates never go negative: if there isn't enough on the plates, they stop at zero, which just means consignment inventory was a bit off.
* Entering a **negative** quantity to correct a receipt reverses the consumption: the components are added back to perpetual inventory and returned to the consignment plate. If no active consignment plate exists, DASH creates a new one in the vendor's consignment location.
* If the vendor has no consignment location configured, only perpetual inventory is adjusted — no license plates are touched.
## Troubleshooting
* **Tags didn’t print:** Reprint from **Manage Purchase Orders → View/Edit PO** and click `Print Tags` on the delivery (this sometimes happens if your printer disconnects after a Wi-Fi drop).
9. Tag the product & move to storage:
1. Take printed tags to the product. Double check the description on the tag matches the vendor label on the item; also check the quantity.
2. If there’s no vendor description or it doesn’t match, escalate (lab may test/verify) before tagging.
3. After tagging, use **Inventory → Material Handler** to scan the tag and move it to a rack location (scan location barcode; Check In).
To learn more about this process, check out [Material Handler](/inventory/material-handler).
## Toll-Manufactured Parts
When you receive a PO line for a **toll-manufactured** part, DASH automatically consumes the part's toll BOM components at the moment of receipt — no extra steps in the Receiving screen:
* Each component's perpetual quantity on hand is reduced by the component quantity times the received amount.
* The consumed quantity is also deducted from the component's license plates in the vendor's consignment location (set on the vendor under **Purchase Orders → Manage Vendors**), oldest plate first. Only the vendor's own consignment location is touched — plates in other consignment locations are never used. Plates never go negative: if there isn't enough on the plates, they stop at zero, which just means consignment inventory was a bit off.
* Entering a **negative** quantity to correct a receipt reverses the consumption: the components are added back to perpetual inventory and returned to the consignment plate. If no active consignment plate exists, DASH creates a new one in the vendor's consignment location.
* If the vendor has no consignment location configured, only perpetual inventory is adjusted — no license plates are touched.
## Troubleshooting
* **Tags didn’t print:** Reprint from **Manage Purchase Orders → View/Edit PO** and click `Print Tags` on the delivery (this sometimes happens if your printer disconnects after a Wi-Fi drop).
 1. This reprints the tags that should have been printed from Receiving.
* **Non-inventory items (e.g., maintenance parts):** You don’t need to print labels; just enter quantity, upload paperwork, and click **`Receive`**.
* **Wrong unit entered:** Back it out with a **negative** quantity and add a **Note** explaining the correction; re-enter with the correct unit.
1. This reprints the tags that should have been printed from Receiving.
* **Non-inventory items (e.g., maintenance parts):** You don’t need to print labels; just enter quantity, upload paperwork, and click **`Receive`**.
* **Wrong unit entered:** Back it out with a **negative** quantity and add a **Note** explaining the correction; re-enter with the correct unit.