Overview
The Work Orders → Manage Work Orders submodule lets you view and manage work orders (WOs) used across the DASH system for internal manufacturing. The submodule contains the following tabs:- View / Edit Work Order: Manage your existing work orders.
- Add Work Order: Create a new work order and save it in the database for use across DASH.
- Active Work Orders: View work orders that are currently being processed, or mark active work orders as complete.
- Pending QC Work Orders: View Work Orders that have been completed, but still must be checked by quality control (QC) for accuracy and compliance with quality standards.
- Complete Work Orders: View completed work orders, filtered by their completed date.
View / Edit Work Order
From within the View / Edit Work Order tab, you can explore and manage existing work order information.Step 1: Pull up a Work Order
- From the Work Orders → Manage Work Orders submodule, click on the
View / Edit Work Ordertab. - Click the dropdown menu next to the Work Order field.
- Enter the Work Order ID number or name you’re looking for, then click to select it.
- You can now view the work order’s general information, calculated metrics such as labor and efficiency, transactions log, and more.
Step 2: Use the toolbar to manage the Work Order’s records
Once you’ve pulled up a work order, you can manage its information with the following features located in the toolbar:
Edit: Edit this work order’s information. Once in the edit view:- Click
Cancel Editingto cancel editing. - Click
Saveto save your changes.
- Click
Copy: Copy this work order’s information.Print ID Tag: Print this work order’s ID tag.Recalculate Values: Recalculate and update values in the Overall Metrics information section.
Add Work Order
-
From the Work Orders → Manage Work Orders submodule, click on the
Add Work Ordertab.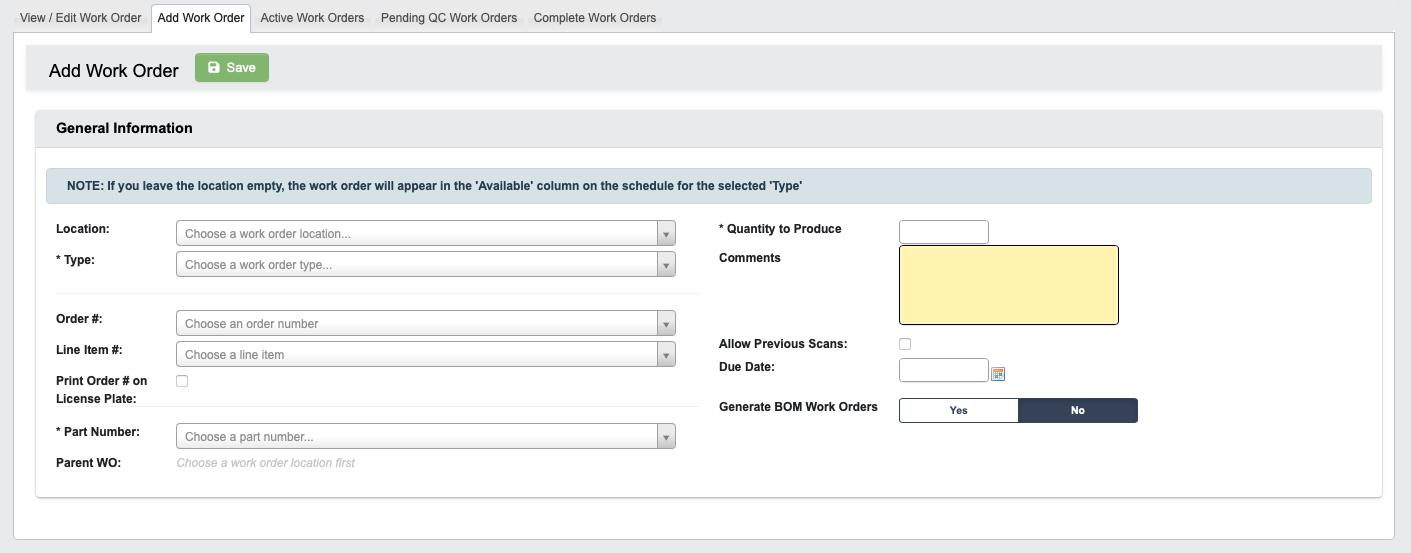
-
Fill in required information:
- Choose the
Typeof work order with the dropdown menu. - Choose the
Part Numberfrom the dropdown menu to associate with this work order. - Enter a
Quantity to Produce(in units).
- Choose the
-
(Optional) Fill in additional information not marked by
*. See the following section of this page “Understand Work Order Inputs” for an explanation of each field.-
(Optional) Select
YesorNoforGenerate BOM Work Orders.SelectingYesautomatically creates and schedules work orders for all components in the Bill of Materials (BOM), based on current quantity on hand (QOH).In the example below, red rows show components whereTracking QOHis lower than theQuantity Per. These items must be produced to meet the requirements of this work order.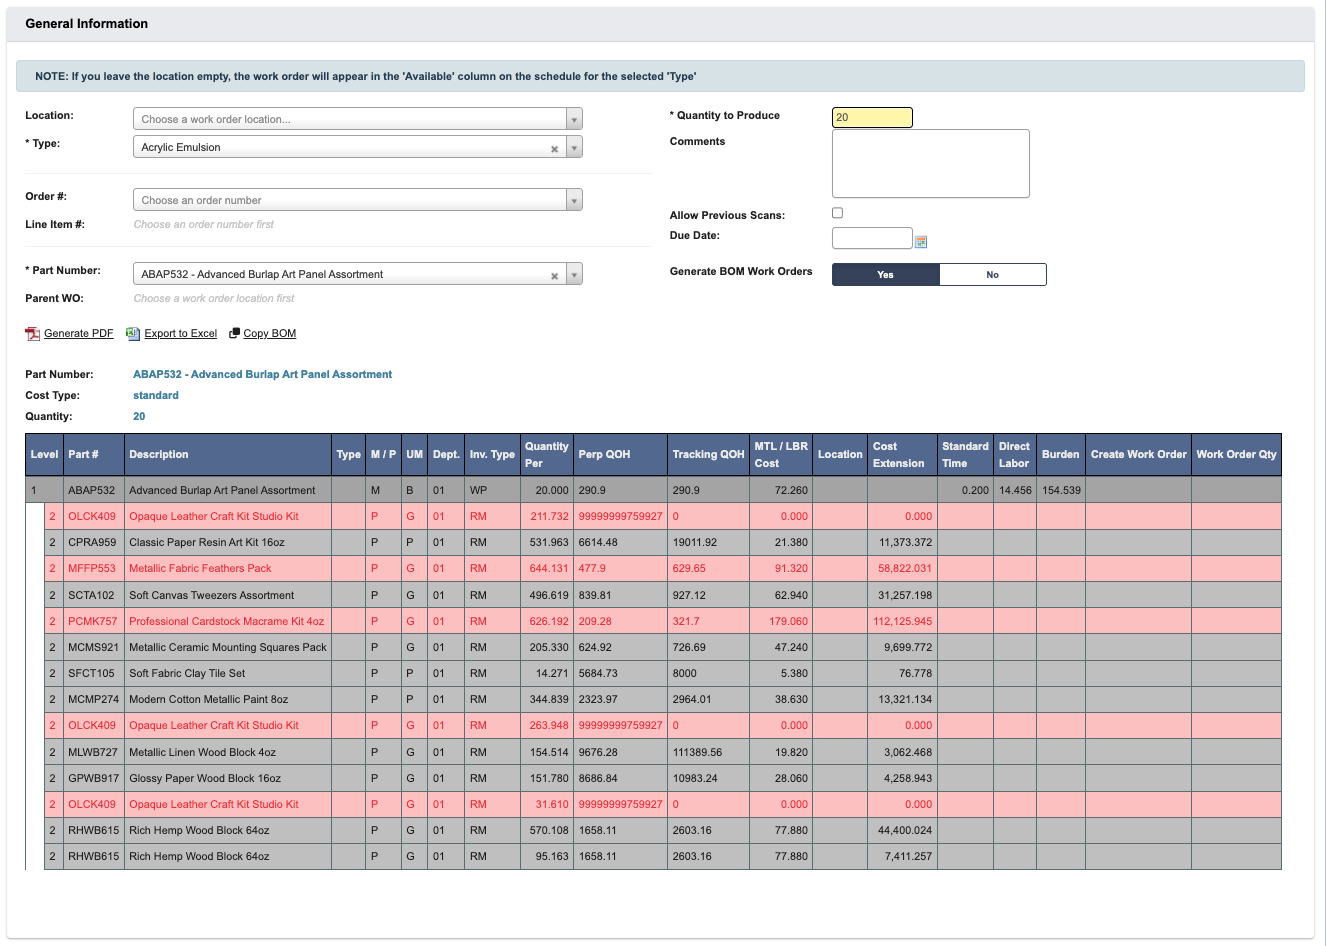
-
(Optional) Select
-
Click
Saveto save the new work order, adding it to DASH for processing.
Understand Work Order Inputs
Each work order is broken into cards that group related information. Below is a guide to each card and some of the fields within it that have special behaviors or system-wide effects.General Information:
This card contains basic identity and classification fields for the work order. For definitions of these fields, see Work Order Reference.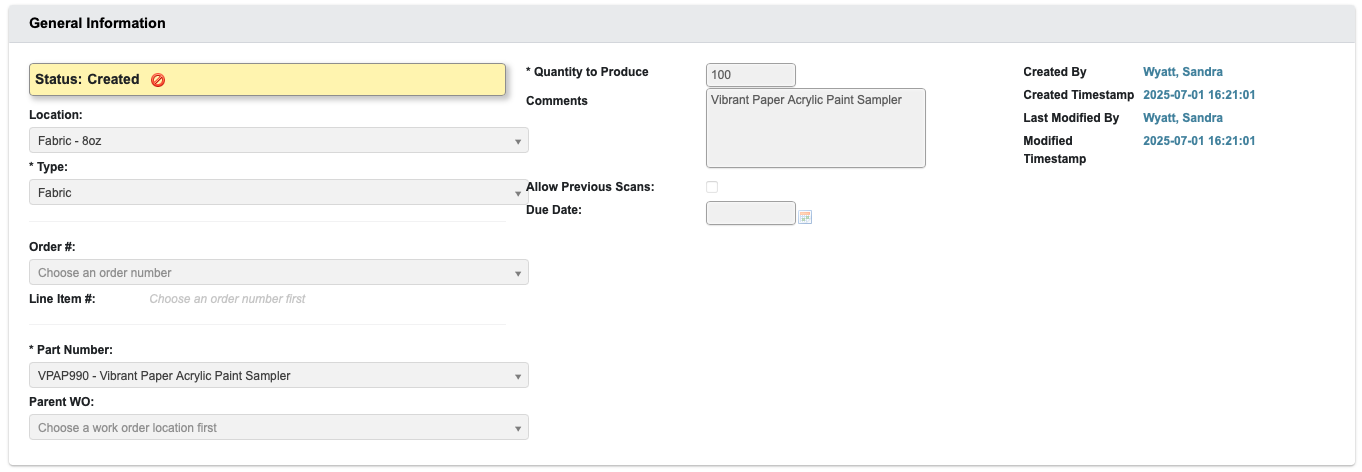
Overall Metrics
This card summarizes operational performance once production begins. For definitions of these fields, see Work Order Reference
Components
This card tracks the individual materials or sub-items required to complete a work order. Components represent the building blocks of kits, paint mixes, and finished goods, and their availability directly impacts production scheduling. For definitions of these fields, see Work Order Reference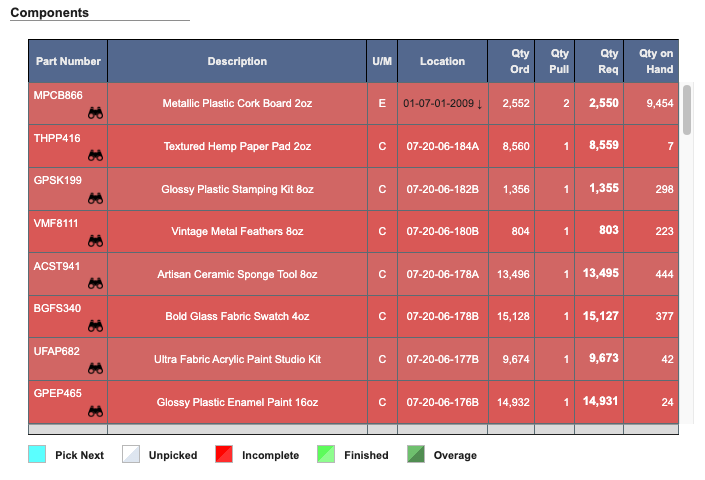
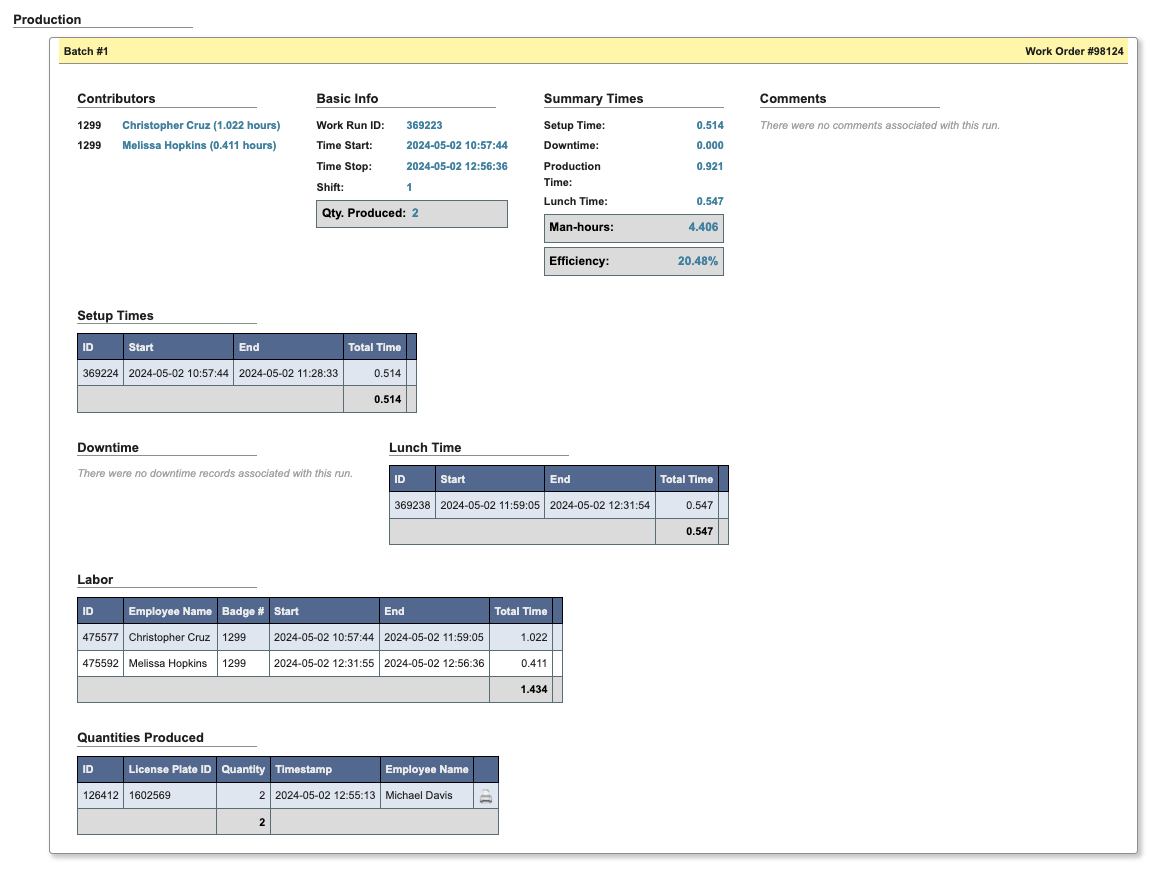
Production Info
This card logs the actual execution history of the work order. For definitions of these fields, see Work Order Reference- If no runs have been started, the card states “No production runs have been started.”
-
Once runs are logged, this section will display detailed records including timestamps, operator names, and run-specific data.
Transactions
This card records key system events linked to the work order. It is useful as an audit trail for system-level actions.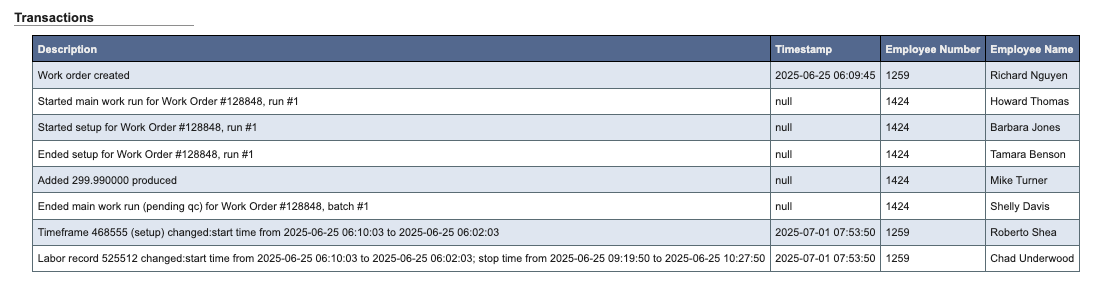
Description: Notes the event (e.g., Work order created).Timestamp: Exact date and time of the event.Employee NumberandEmployee Name: Who performed the transaction.
Changelogs
This card captures edits or modifications to the work order after its creation.
- If no edits have been made, the card states “No changelogs have been recorded.”
- Once edits occur, this section will log the change history with details on who modified the work order and when.
Active Work Orders
From the Work Orders → Manage Work Orders submodule, click on theActive Work Orders tab. This contains a table of summarized records for every “active” work order.
Within this tab, you can:
- Click on an attribute heading (such as Status) to sort in ascending order. Click again to sort in descending order.
- Click on an ID # to view or manage the associated work order records in the
View / Edit Work Ordertab.- You can also edit records by scrolling to the far right of the table, and clicking the View (”magnify”) or Edit (’pencil”) buttons.
- Refresh, export, print, or filter data with the toolbar.
How to mark a work order as inactive
- Scroll to the far right of the table and find the
Actionscolumn. - Click the
Deactivate Work Order(red ”no”) button. - Click “YES, deactivate” when prompted.
Pending QC Work Orders
From the Work Orders → Manage Work Orders submodule, click on thePending QC Work Orders tab. This contains a table of summarized records for every active work order that has been flagged as needing quality control (QC) review.
Just like the Active Work Orders tab, you can:
- Click on an attribute heading (such as Status) to sort in ascending order. Click again to sort in descending order.
- Click on an ID # to view or manage the associated work order records in the
View / Edit Work Ordertab.- You can also edit records by scrolling to the far right of the table, and clicking the View (”magnify”) or Edit (’pencil”) buttons.
- Refresh, export, print, or filter data with the toolbar.
Complete Work Orders
From the Work Orders → Manage Work Orders submodule, click on theComplete Work Orders tab. This allows you to generate a table of summarized records for work order completed within a time window.
You can enter specific Start and End dates for the time window, or select an automatic filter such as MTD (Month-to-date), YTD (Year-to-date), or Previous Month.
Just like the Active Work Orders tab, you can:
- Click on an attribute heading (such as Status) to sort in ascending order. Click again to sort in descending order.
- Click on an ID # to view or manage the associated work order records in the
View / Edit Work Ordertab.- You can also edit records by scrolling to the far right of the table, and clicking the View (”magnify”) or Edit (’pencil”) buttons.
- Refresh, export, print, or filter data with the toolbar.