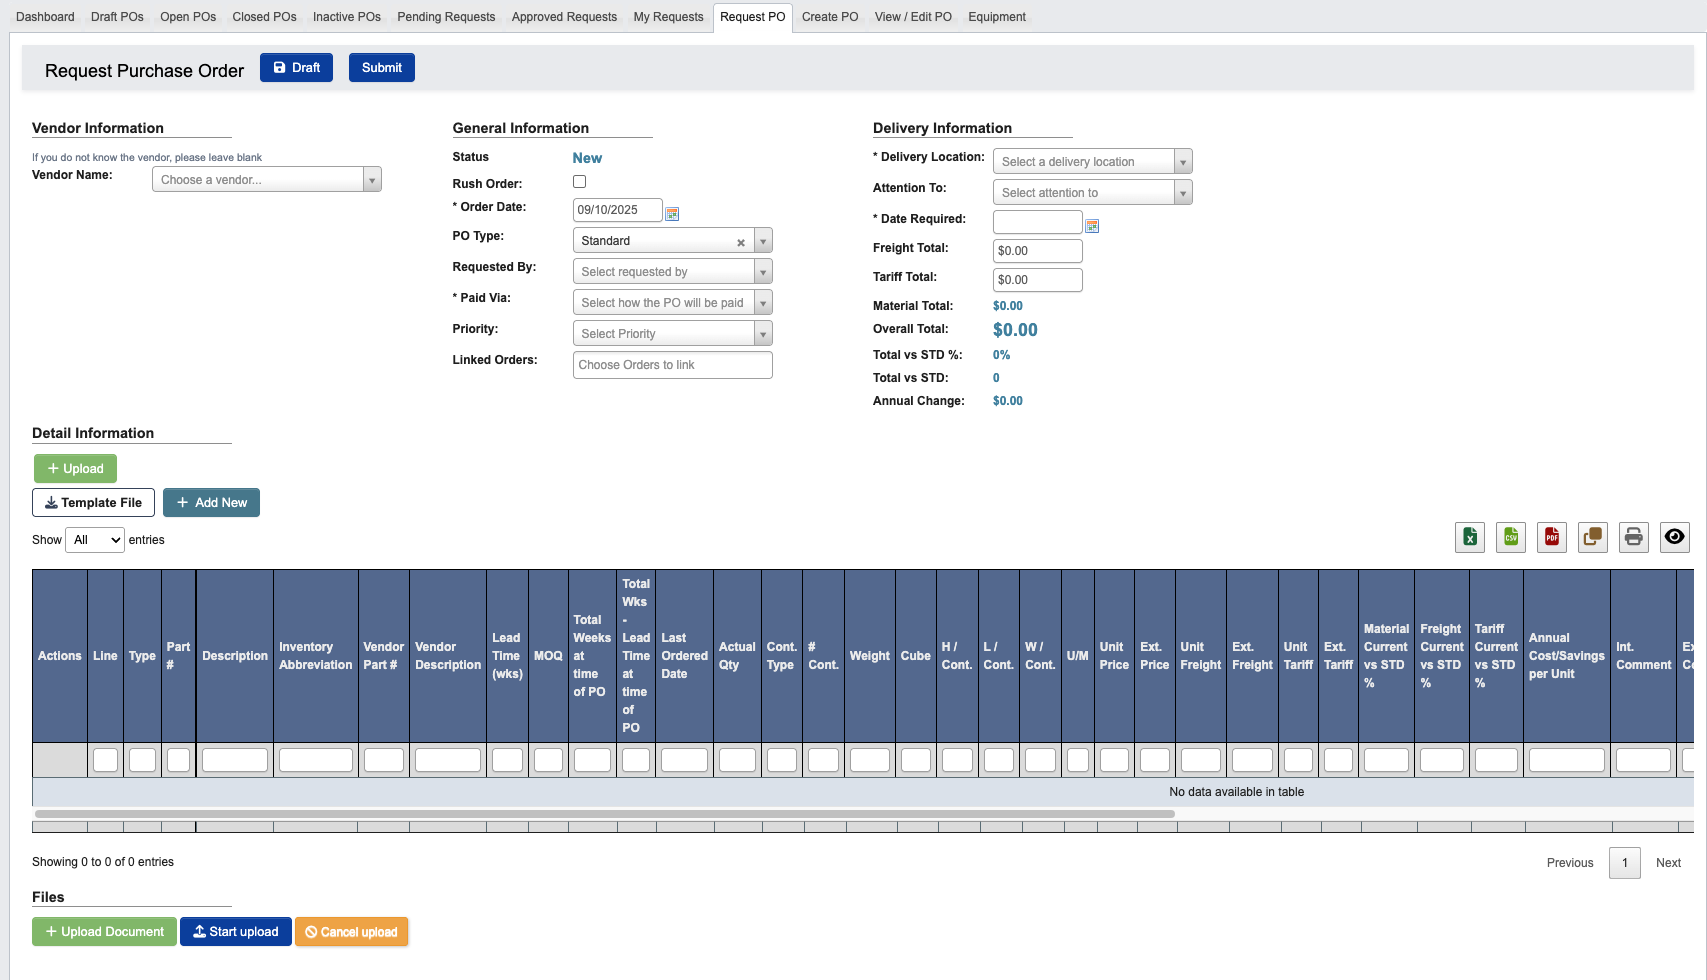
Overview
This tutorial helps you request a Purchase Order (PO) in the DASH Purchase Order → Manage Purchase Orders submodule. Requesting a PO is used when you need a PO created. In the request you enter the vendor, item, and quantity details and submit for PO creation.Request a Purchase Order
Step 1: Start a Request PO
-
Go to Purchase Order → Manage Purchase Orders → Request PO.
-
From the
Vendor Namedropdown, search for the vendor.
Step 2: Add Parts to PO
-
Click
+ Add Newunder “Detail information” to add parts to order.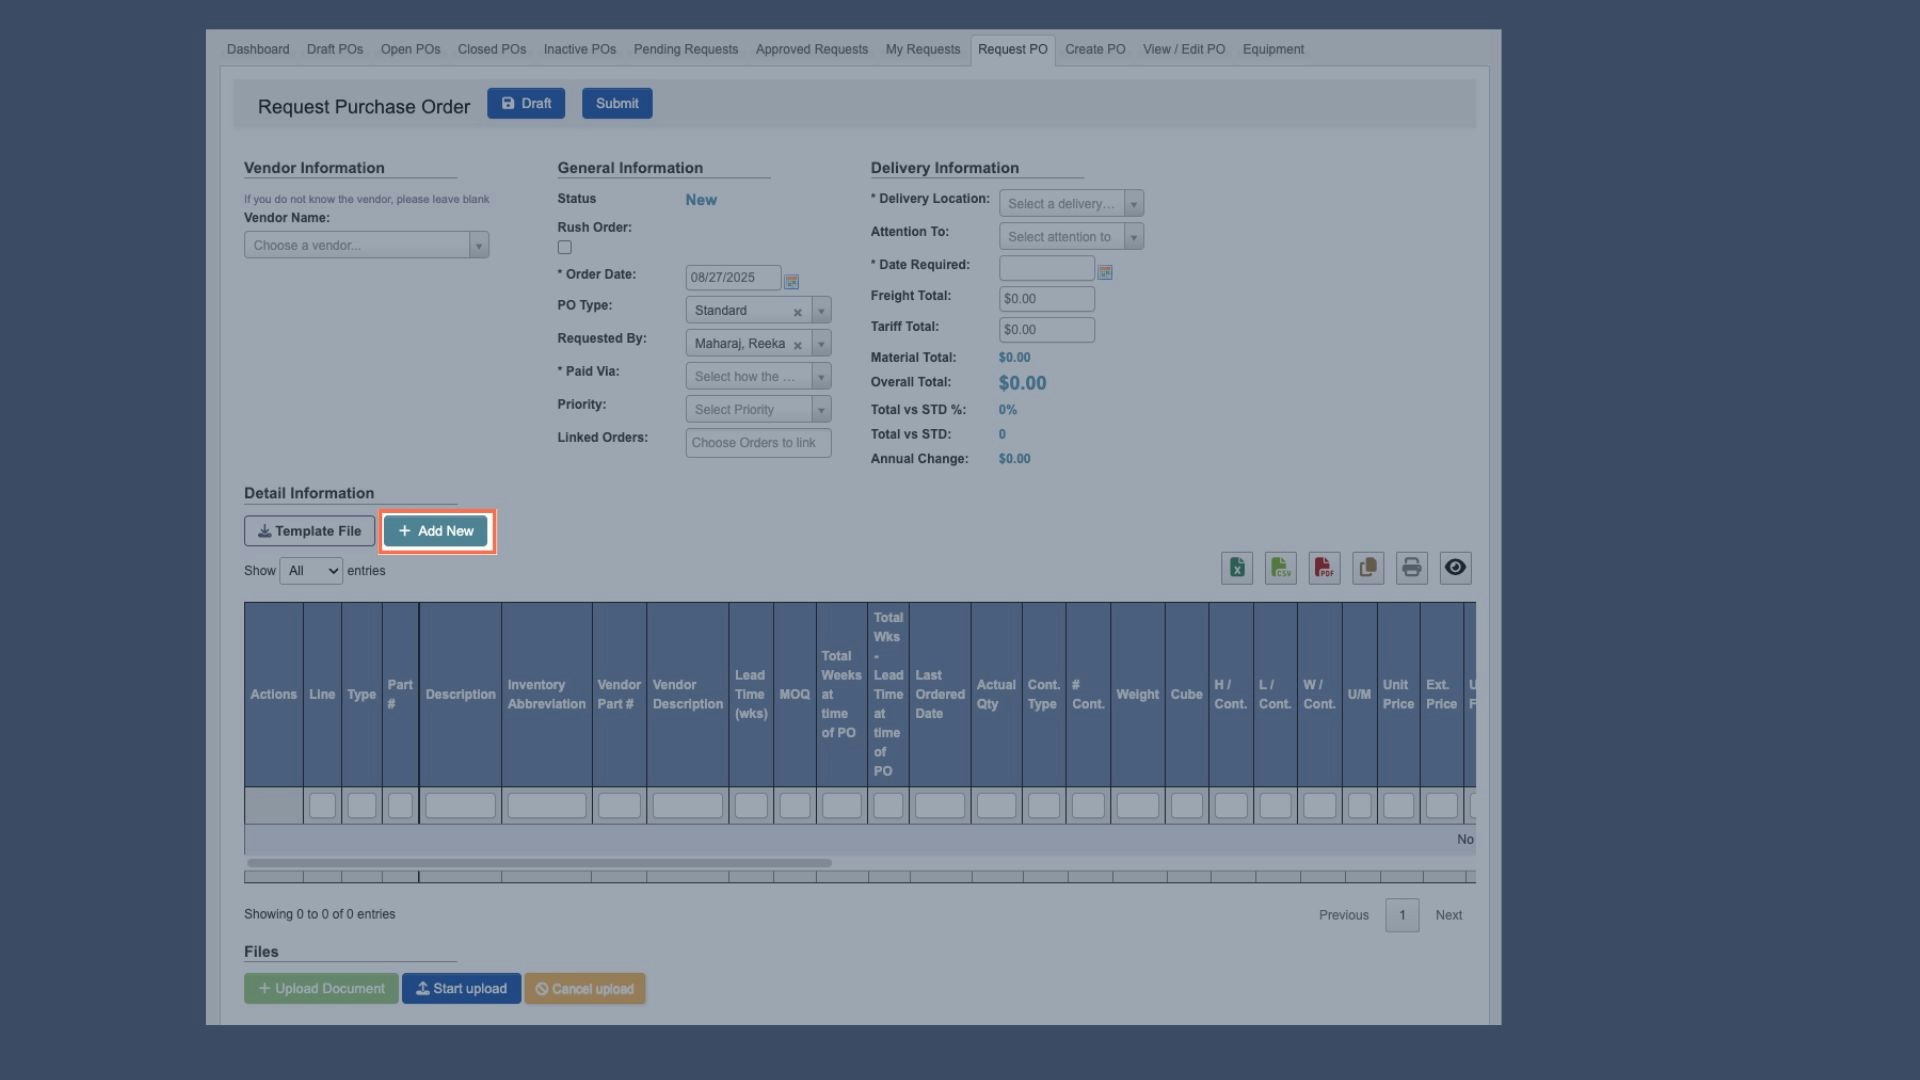
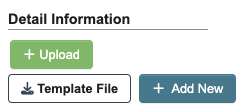
Template File: Download an Excel template that shows the available columns and an example row. Fill out the template.+ Upload: Attach the template file to mass-enter PO line items.
-
A new window will pop up, fill in as much information as possible:
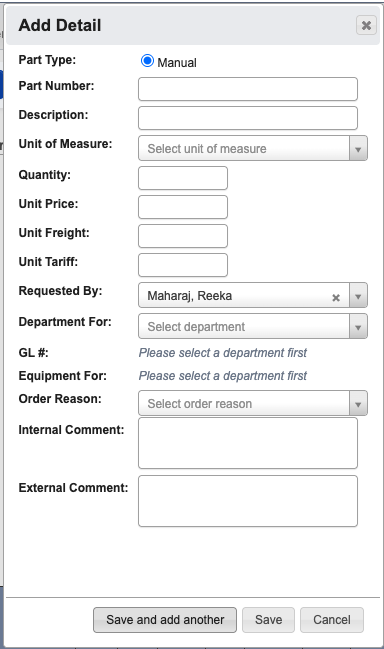
Part Number: Enter the Part ID corresponding to your Part.Description: Enter a description of the Part, must be different than Part number.Unit of Measure: Specifies how the item is quantified for ordering purposes.Quantity: Enter the number to order (use Vendor Part Information to confirm min/max range)Unit Price,Unit Freight,Unit Tariff: The price and transportation costs for this Part.Requested By: Autofills with the person who creates the PO.Department For: The department the PO is for.GL #: General ledger (GL) account number, with options filtered by the selected department.Equipment For: Equipment for, with options filtered by the selected department.Order Reason: Select a pre-defined reason for the PO from the drop down menu.Internal Comment(Optional): Notes for approvers or any information that may be relevant to this PO in the future. These notes are only visible internally.External Comment(Optional): Notes for vendor that will appear on the PO.
-
When you have filled in all Part Details, click:
Save and add anotherto add another part number to this PO.Saveto save the details and go back to the PO creation page.Cancelto close the window and take you back to the PO creation page.
Step 3: Upload Supporting Document (Optional)
Use this step to attach relevant documents to the PO, such as vendor quotes or email correspondence. Uploaded documents will appear on the PO.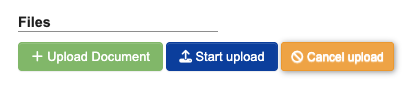
- Click
+ Upload Documentunder “Files” to open a file browser and select the document you want to attach. - Click
Start uploadto begin uploading. - Click
Cancel uploadif you need to cancel the upload.
Step 4: Review PO information
After adding parts, you will be returned to the Request PO creation page to finish filling out General and Delivery information.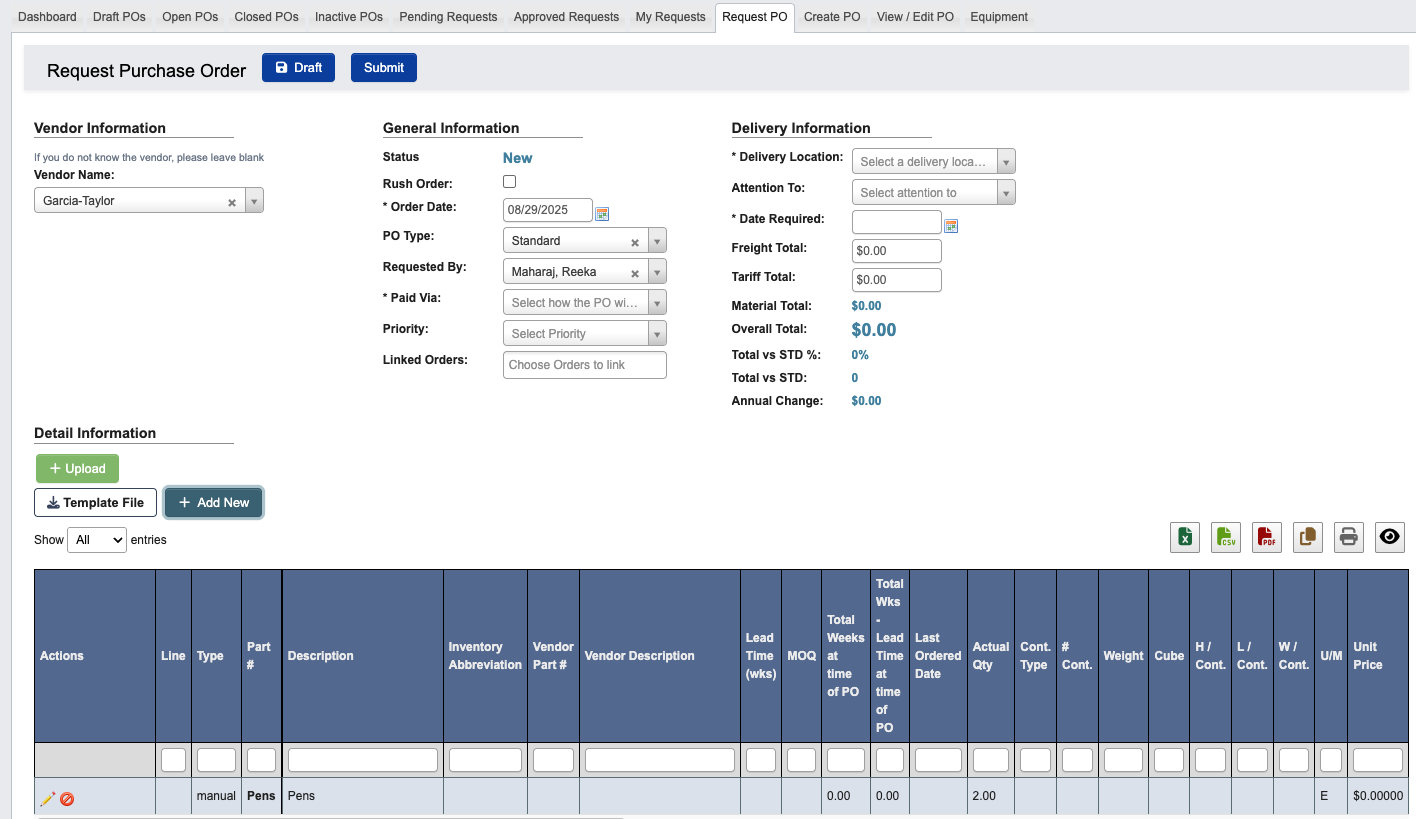
-
The following fields are below General Information:
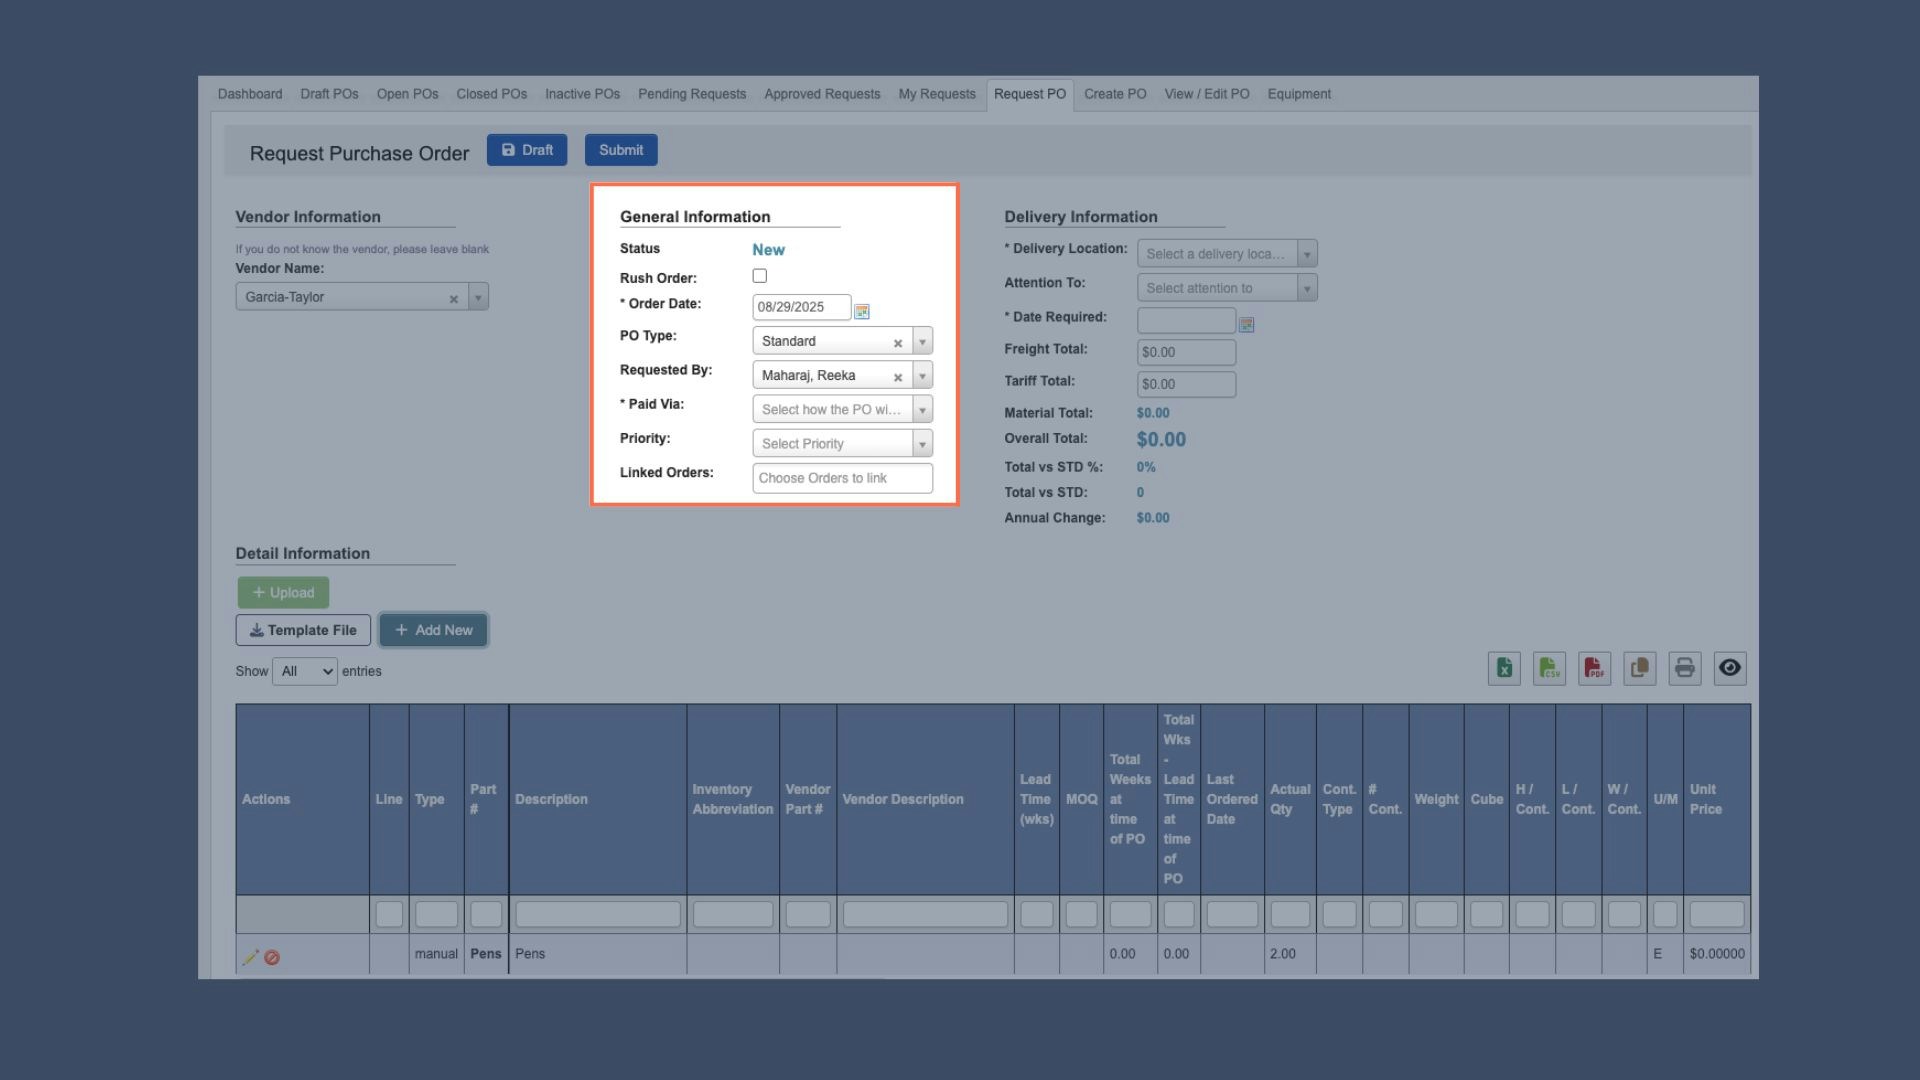
Rush Order(Optional): Check the box if the PO should be a rush order.Order Date: Defaults to the date you began creating the PO.PO Type(Optional): Choose either Service or Standard.Requested By: Autofills with the person who creates the PO.Paid Via: Choose the PO’s payment method.Priority: Signals this PO as Low, Medium, High, or Urgent priority. This provides visibility for other teams to prioritize or track processing accordingly.
-
The following fields are below Delivery Information:
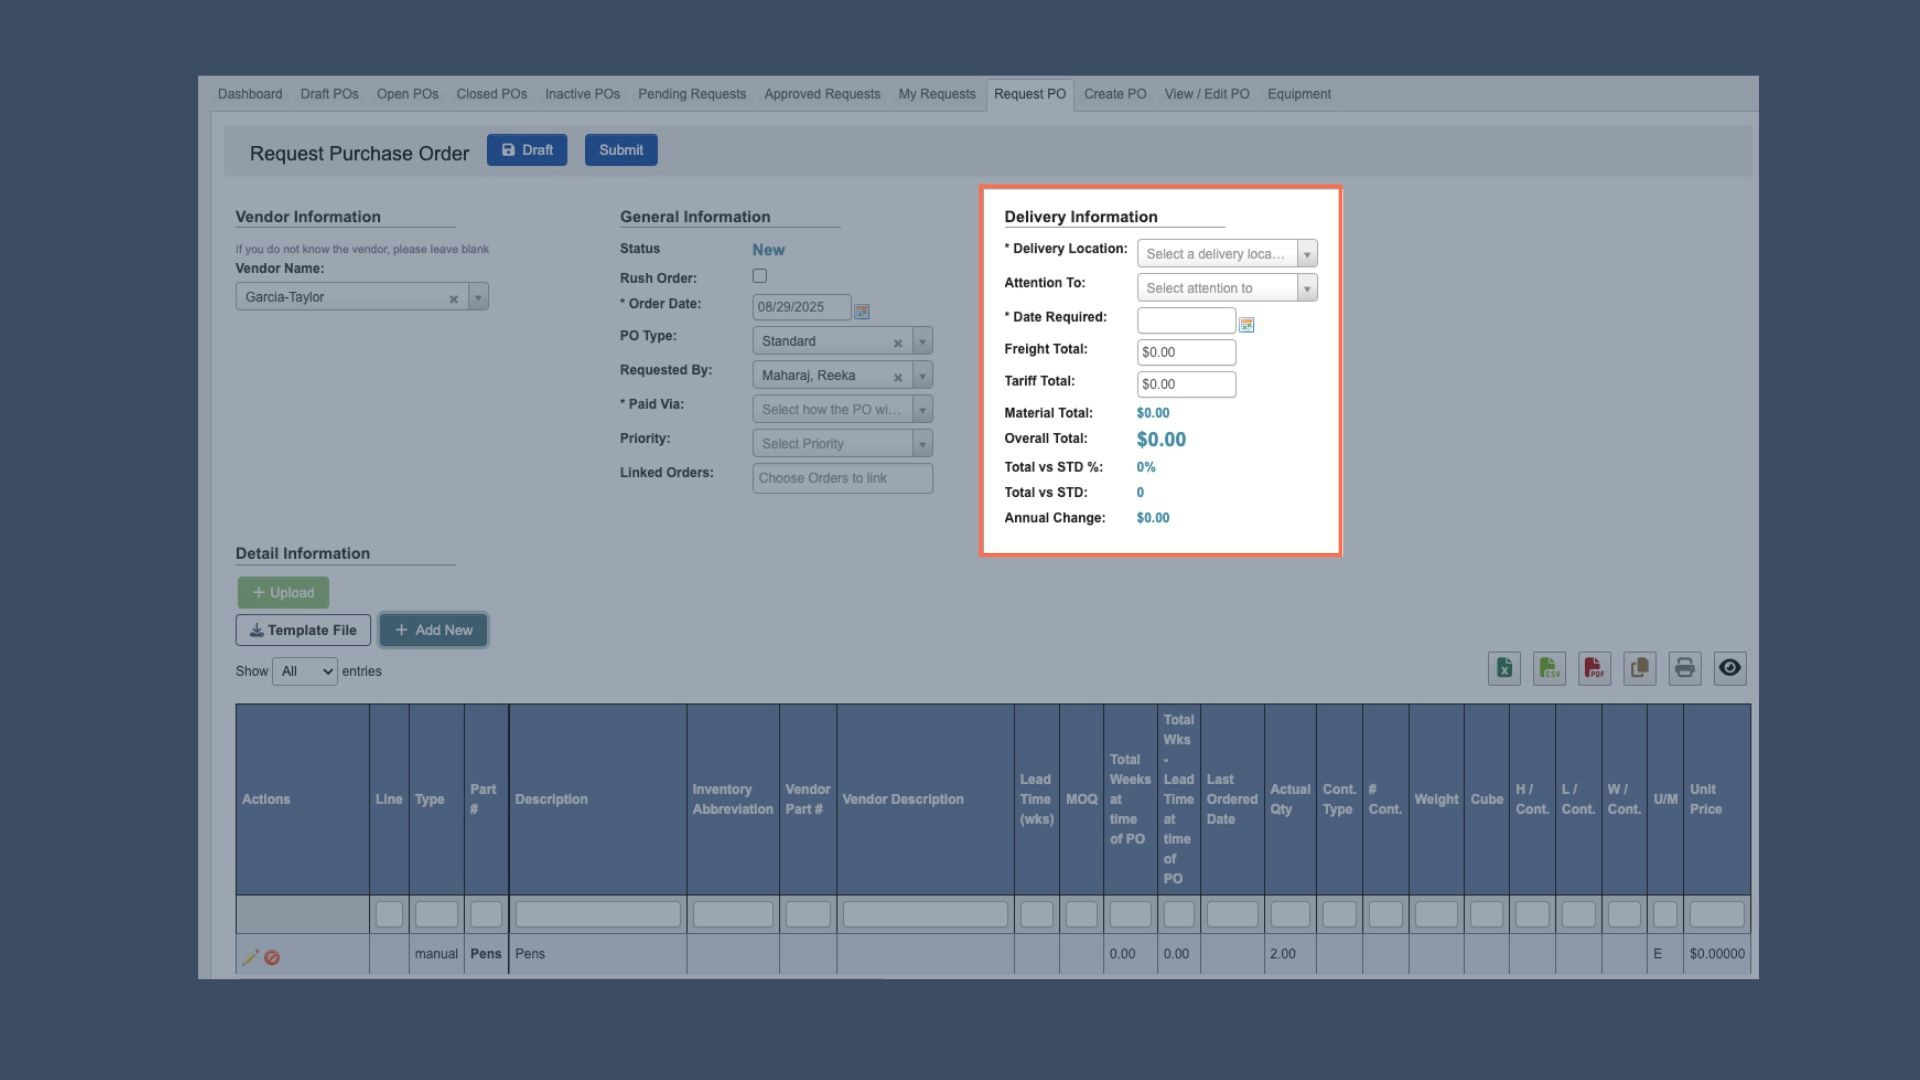
Delivery Location: Choose a PO delivery location from the list of available options.Attention to(Optional): Input the direct recipient’s name, if applicable.Date Required: Input the requested delivery date.Freight Total: Total freight costs paid for this PO. Autofills based on vendor details.Tariff Total: Total tariffs paid for this PO. Autofills based on vendor details.Material Total: Total material cost (all ordered items) for this PO.Overal Total: Sum of Tax + Freight + Tariff + Material totals.Total vs STD %,Total vs STD,Annual Change: These fields will display as zero for PO requests. They only populate when creating POs for stock part numbers that have costs in the system.
- Complete all required fields in the General and Delivery information sections. Also fill in any optional fields that apply to your specific PO.
Step 5: Finalize & Submit the PO
-
At the top of the Request Purchase Order page, click
Submitto send the PO into the approval process, orDraftto save the PO and return later to complete it.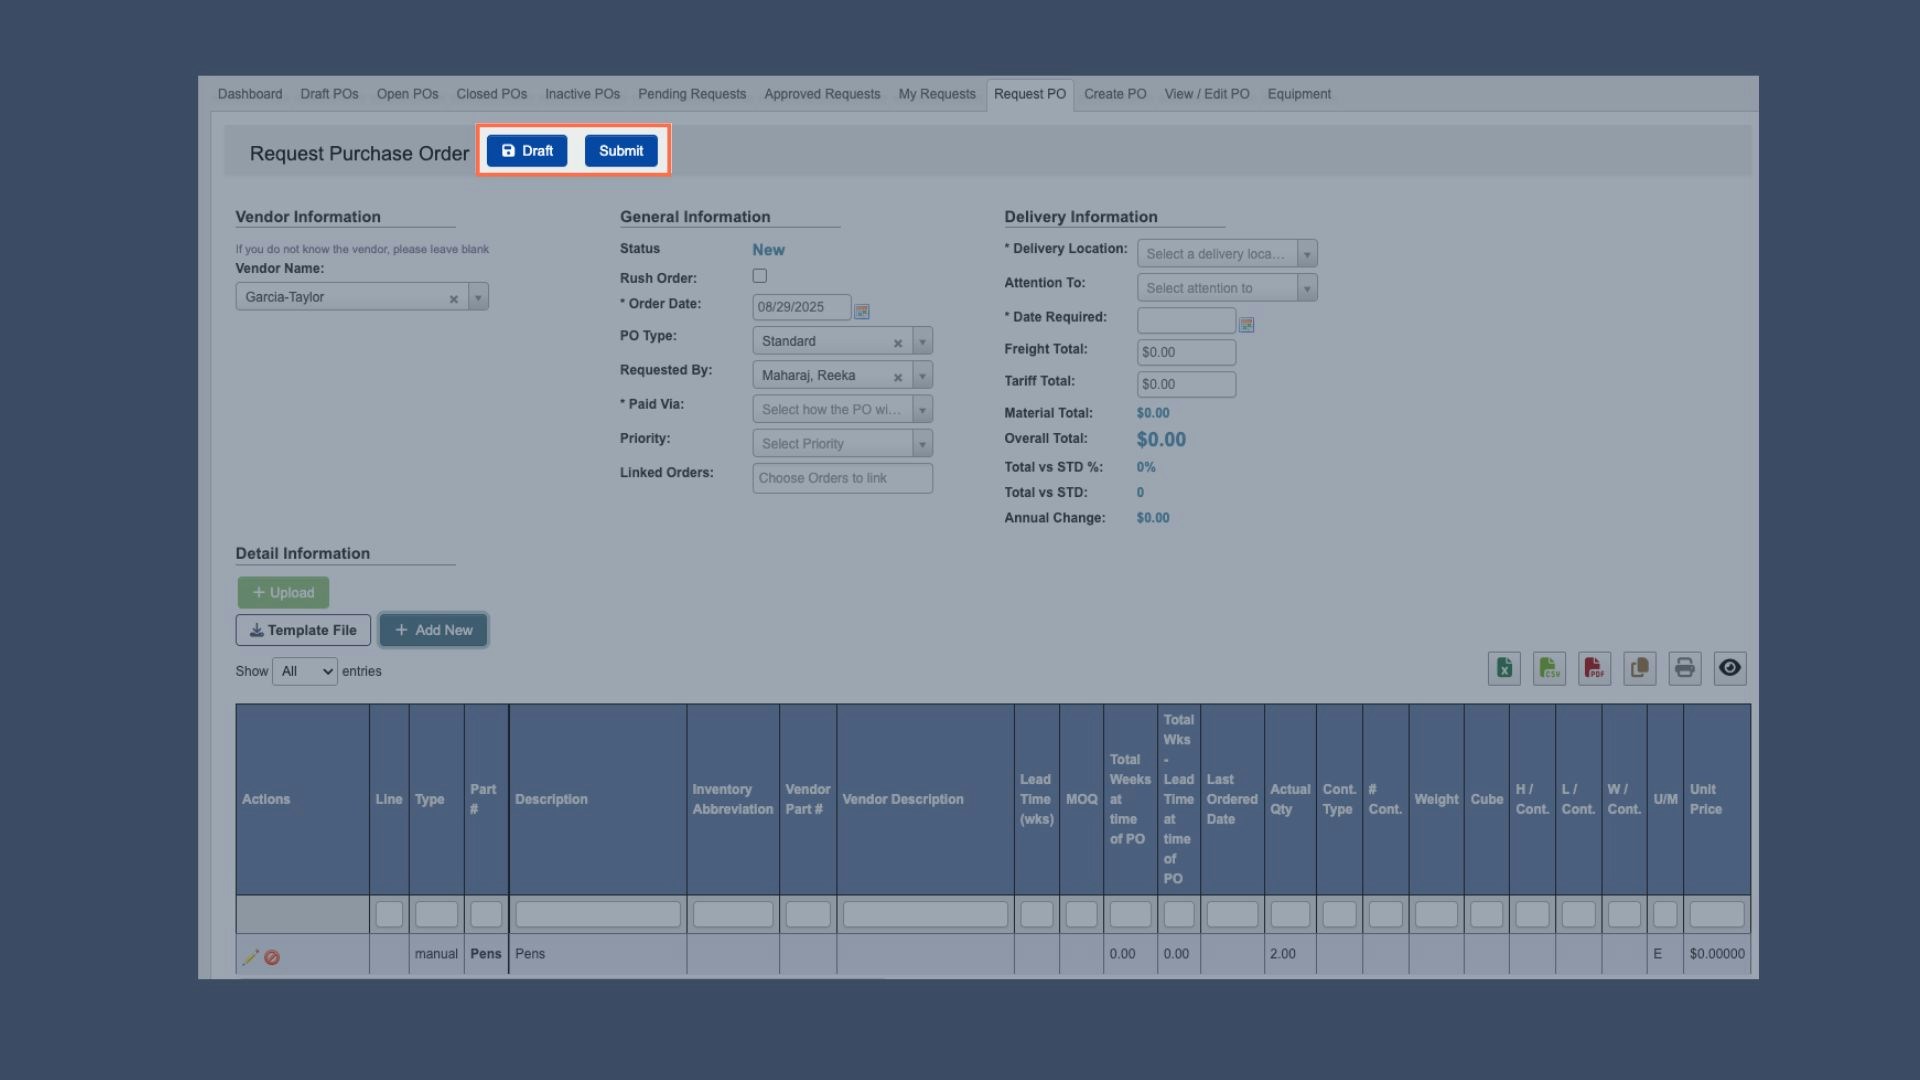
- Submitted POs enter the approval workflow. Depending on the organization’s structure, one or more approvers may need to review and approve the request before the Purchasing team can release the PO to the vendor.