Overview
This tutorial helps you receive a purchase order (PO) and print/apply tags in the DASH Purchase Orders → Receiving submodule. Use it when a shipment arrives and you have the packing list and bill of lading (BOL) in hand. After you select the PO and complete the Delivery Information, you’ll enter received quantities, configure how many tags to print, upload the packing list/BOL to the PO, and finish receiving the order. DASH will create license-plate tags for you to apply to each pallet/piece.Receive a PO
-
Go to Purchase Orders → Receiving → Receive Items.
-
On Delivery Information, fill in:
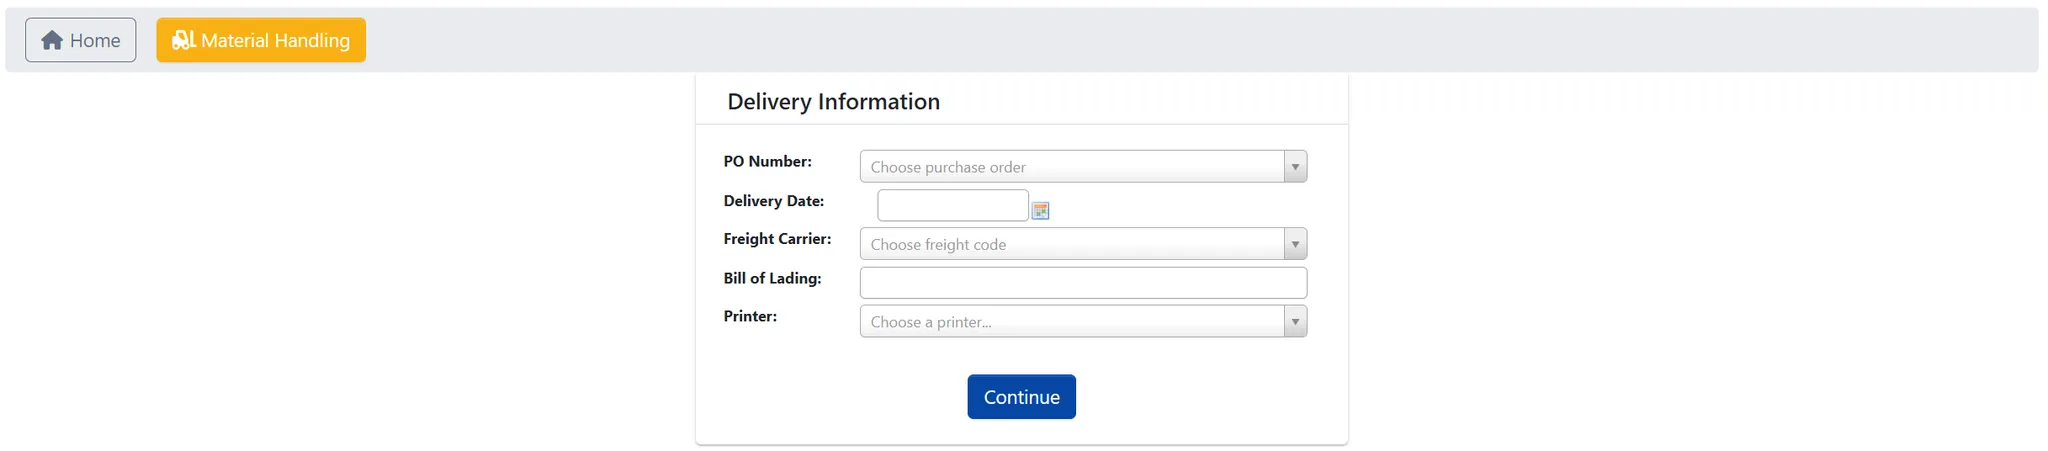
PO Numberfrom packing list.Delivery Datedefaults to today; you can adjust as needed.Freight Carriertype to filter.Bill of Ladingfrom paperwork - usually the delivery driver hands you this.Printerselect your label printer.
-
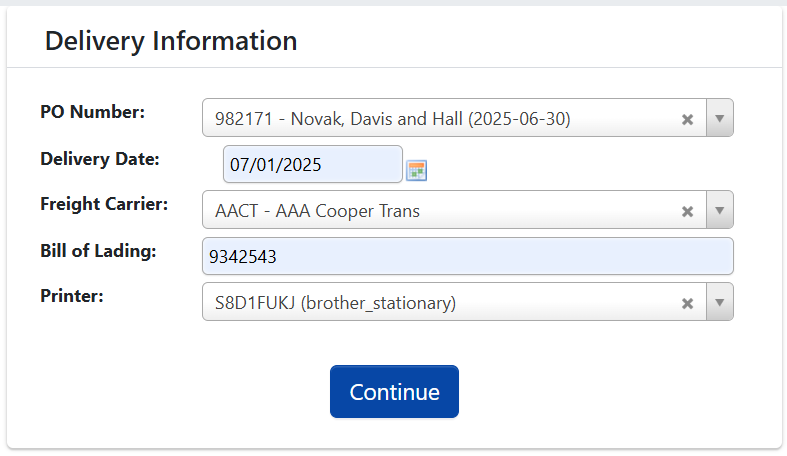
Click
Continueto open the PO. -
After the PO opens, select and verify the item:
- Pick the
Part #from the dropdown (this shows the item(s) on the PO). - Verify
Descriptionand part match the packing list.
- Pick the
-
Enter the quantity:
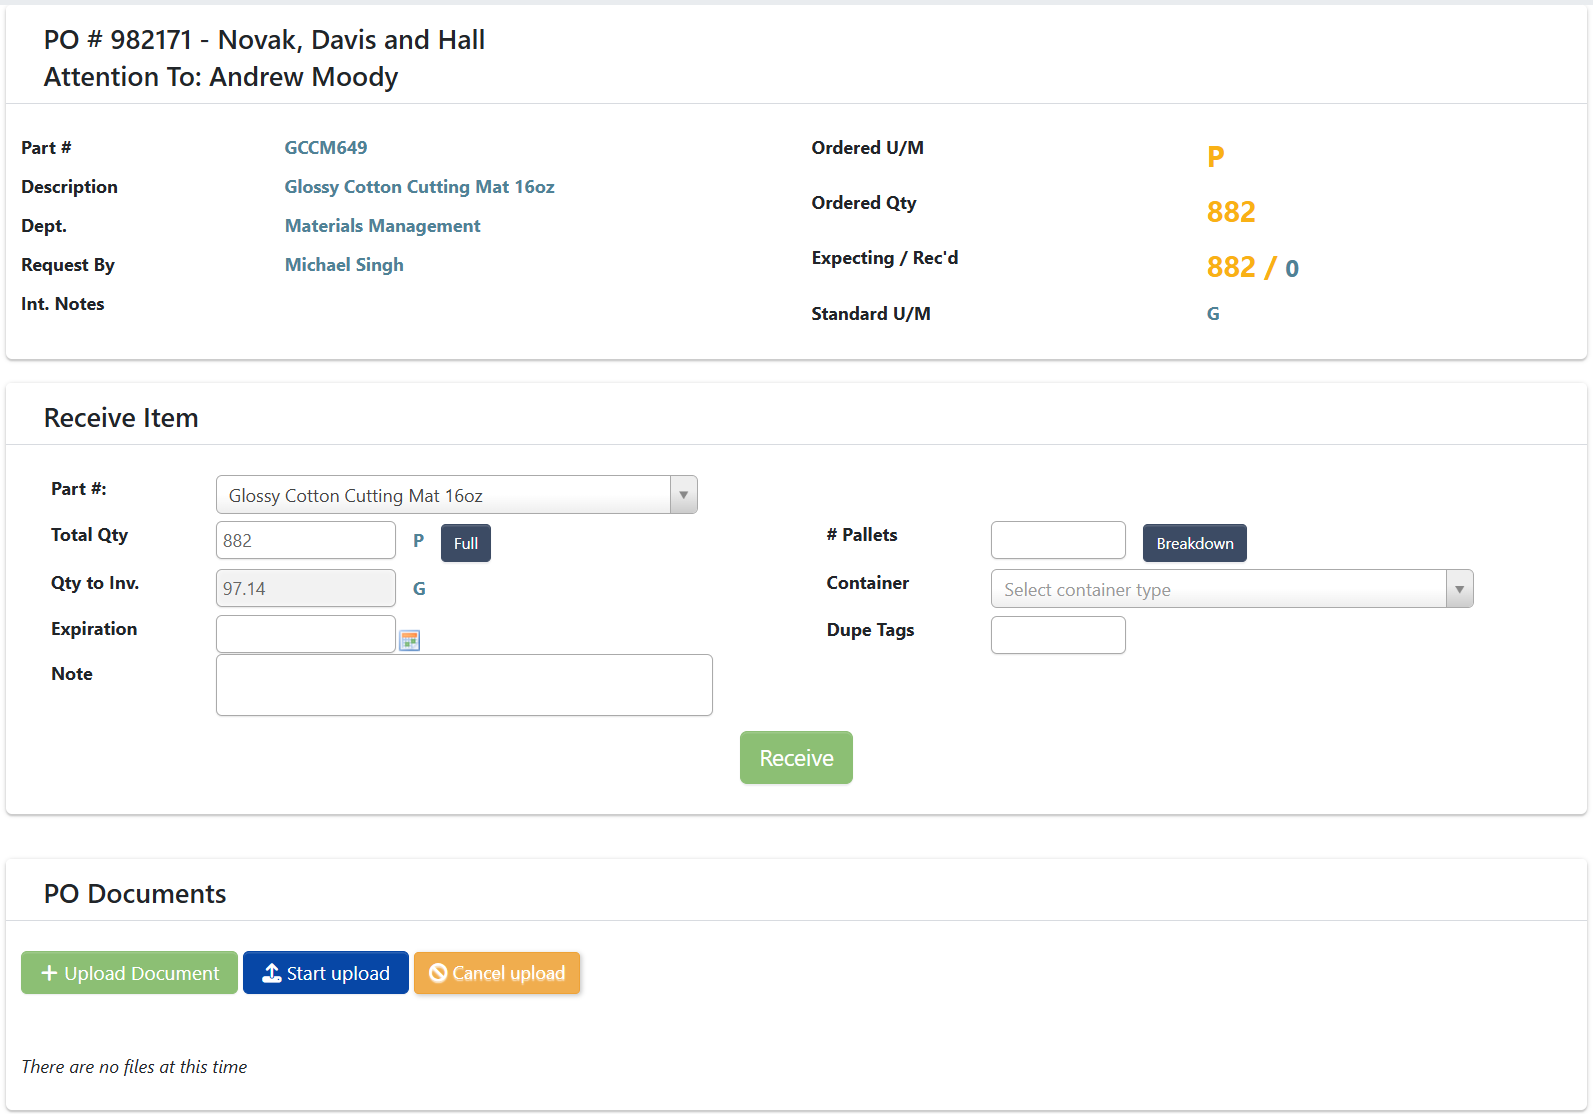
- If you received the full amount, click
Full; otherwise type the partialTotal Qty. - Make sure the unit shown on screen is the unit you enter. Convert first if needed. The system will convert to storage gallons for liquids.
- Enter a date in
Expirationif applicable.
If you’ve accidentally entered a larger amount than you meant to while receiving, you can enter a negative number to correct that entry. You have to add a Note before continuing.For example, let’s imagine you were receiving a PO with anOrdered Qtyof 5, but you accidentally entered 7 inTotal Qtyand clickedReceive.In this situation, you can go back to this PO and follow steps 1 to 5, but this time you would enter -2 forTotal Qty. Then, you would type in aNoteexplaining how you entered too much and this edit is to back it out. - If you received the full amount, click
-
Configure tag printing - the right side of the screen shows how many tags print and how quantities split per tag:
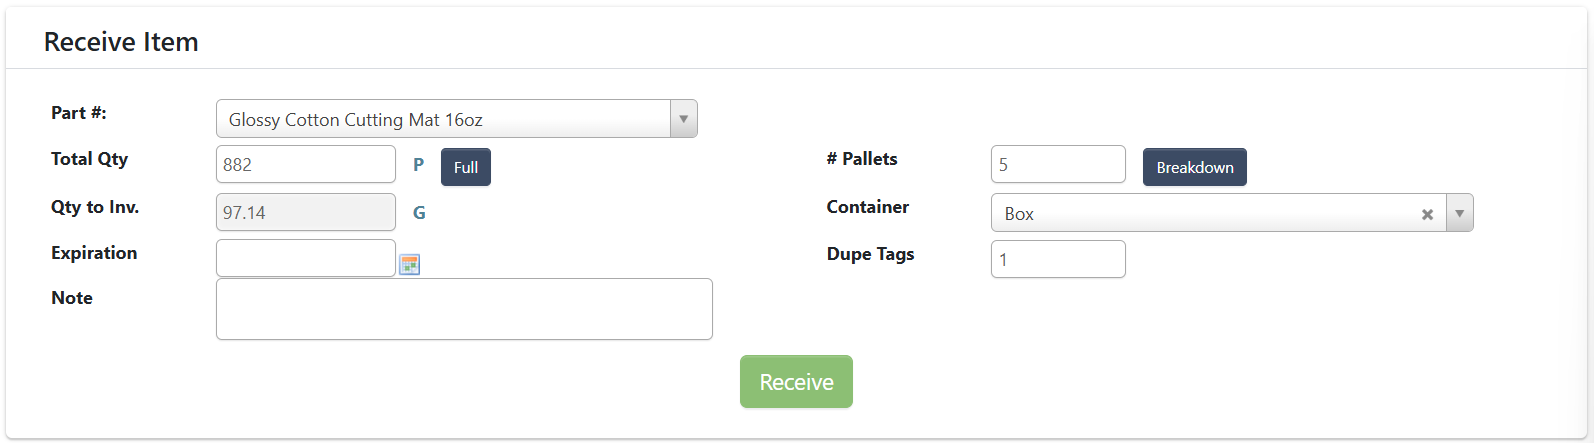
# of pallets: number of tags to print (use 1 per pallet/drum/pail/etc.; e.g., 18 pails → 18 tags).Breakdown(optional): split uneven pallets; all lines must sum to the total or you’ll get an error.Container: select what type of container you’re printing tags for.- This controls duplicate copies per tag: the system defaults to 3
Dupe Tagsfor drums and 2 for totes, and 1 for every other type. - You can also manually enter a
Dupe Tagsnumber.
- This controls duplicate copies per tag: the system defaults to 3
-
Attach required documents
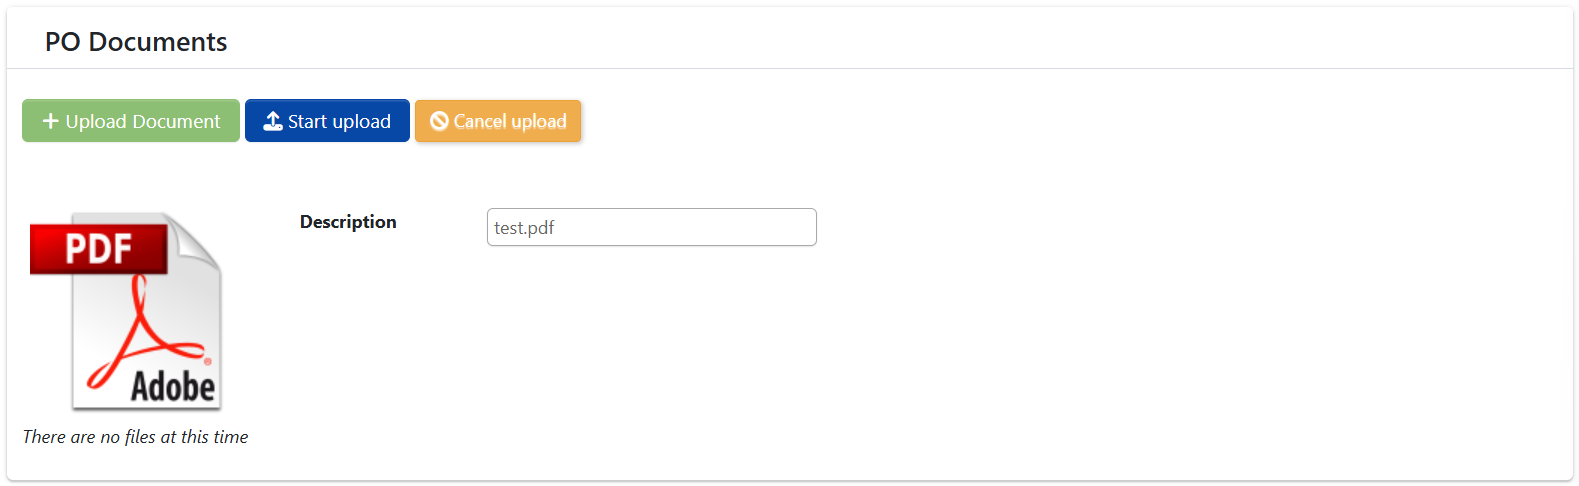
- Under PO Documents, click
Upload Document. - Select your scanned packing list and BOL.
- Click
Start upload.
- Under PO Documents, click
-
Click
Receive. Your selected printer will print the tags (e.g., 18 tags for 18 boxes).- At the bottom right of your screen, you’ll see a notification saying “Part successfully received”.

-
Tag the product & move to storage:
- Take printed tags to the product. Double check the description on the tag matches the vendor label on the item; also check the quantity.
- If there’s no vendor description or it doesn’t match, escalate (lab may test/verify) before tagging.
-
After tagging, use Inventory → Material Handler to scan the tag and move it to a rack location (scan location barcode; Check In).
To learn more about this process, check out Material Handler.
Troubleshooting
-
Tags didn’t print: Reprint from Manage Purchase Orders → View/Edit PO and click
Print Tagson the delivery (this sometimes happens if your printer disconnects after a Wi-Fi drop).
- This reprints the tags that should have been printed from Receiving.
-
Non-inventory items (e.g., maintenance parts): You don’t need to print labels; just enter quantity, upload paperwork, and click
Receive. - Wrong unit entered: Back it out with a negative quantity and add a Note explaining the correction; re-enter with the correct unit.