Overview
The Purchase Orders → Manage Vendors submodule lets you view and manage vendor records. This page explains common Vendor information fields and provides tutorials for managing Vendor information. The submodule contains the following tabs:- View / Edit Vendor: Manage existing vendor information.
- Add Vendor: Create a new vendor record and save it in the database.
- Active Vendors: View vendors you are currently doing business with, or mark vendors as inactive.
- Inactive Vendors: View vendors you are currently doing business with, or mark vendors as inactive.
- Prospective Vendors: Track potential vendors that may be onboarded for future purchasing needs.
- Vendor Addresses: Manage and update vendor address records for accurate ordering and payments.
Understand Vendor Information
Each vendor record is broken into sections that group related information. Below is a guide to each section and some of the fields within it that have special behaviors or system-wide effects.General Information:
This section captures the core identity and compliance information for a vendor.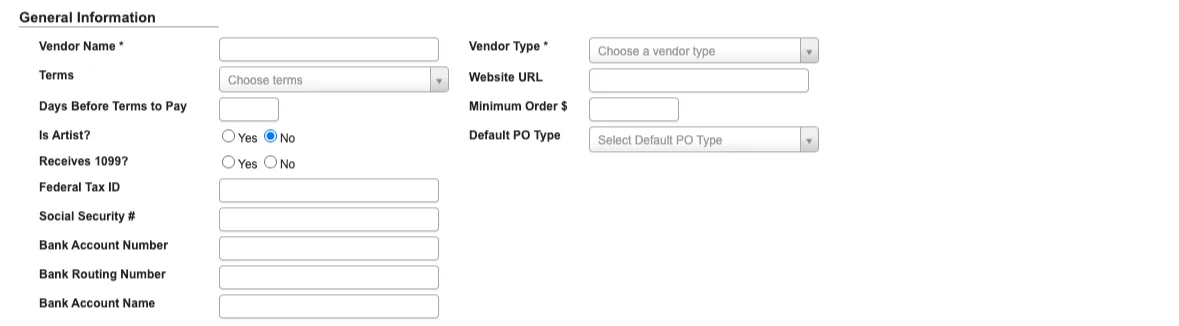
Vendor Name: Required field that identifies the vendor across the system.Terms: Defines the vendor’s payment terms (e.g., Net 30, Net 60).Days Before Terms to Pay: Indicates how many days in advance the system should schedule payment before the due date.Is Artist?(Yes/No): Flags vendors classified as artists, allowing for separate reporting and treatment.Receives 1099?(Yes/No): Marks whether the vendor should be included in year-end 1099 tax reporting.Federal Tax ID / Social Security #: Captures tax identification for compliance and reporting.Bank Account Number / Routing Number / Account Name: Stores vendor payment details for ACH or direct deposit.Vendor Type: Required classification field used for grouping and reporting vendors by category.Website URL: Stores the vendor’s website for reference.Minimum Order $: Defines the minimum purchase amount required for an order to be placed with the vendor.Default PO Type: Sets the standard purchase order type (service or standard) for this vendor.
PO Information:
This section identifies the vendor contacts who should receive purchase orders.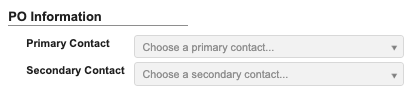
Primary Contact: The main point of contact for receiving POs.Secondary Contact: A backup contact in case the primary is unavailable.
Remittance Information:
This section defines where payment remittance notices are sent.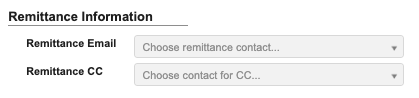
Remittance Email: The primary email address for remittance details.Remittance CC: Additional recipients for remittance notifications.
Freight Information:
This section defines the vendor’s shipping and freight policies.
1st Freight Carrier / 2nd Freight Carrier: Preferred carriers used when routing shipments.Freight Terms: Defines who is responsible for shipping costs (e.g., prepaid/no charge, collect, prepaid/add).Delivery Fee: Base freight amount that preloads into Freight Total when this vendor is selected on a new purchase order. The PO amount remains editable and can be changed or removed before saving.Freight Policy: Captures vendor-specific rules or agreements governing freight and shipping.
View / Edit Vendor
From within the View / Edit Vendor tab, you can explore and manage existing vendor information.Step 1: Pull up a vendor’s records
-
From the Purchase Order → Manage Vendors submodule, click on the
View / Edit Vendortab. - Click the dropdown menu next to the Vendor field.
-
Enter the vendor number or name you’re looking for, then click to select it.
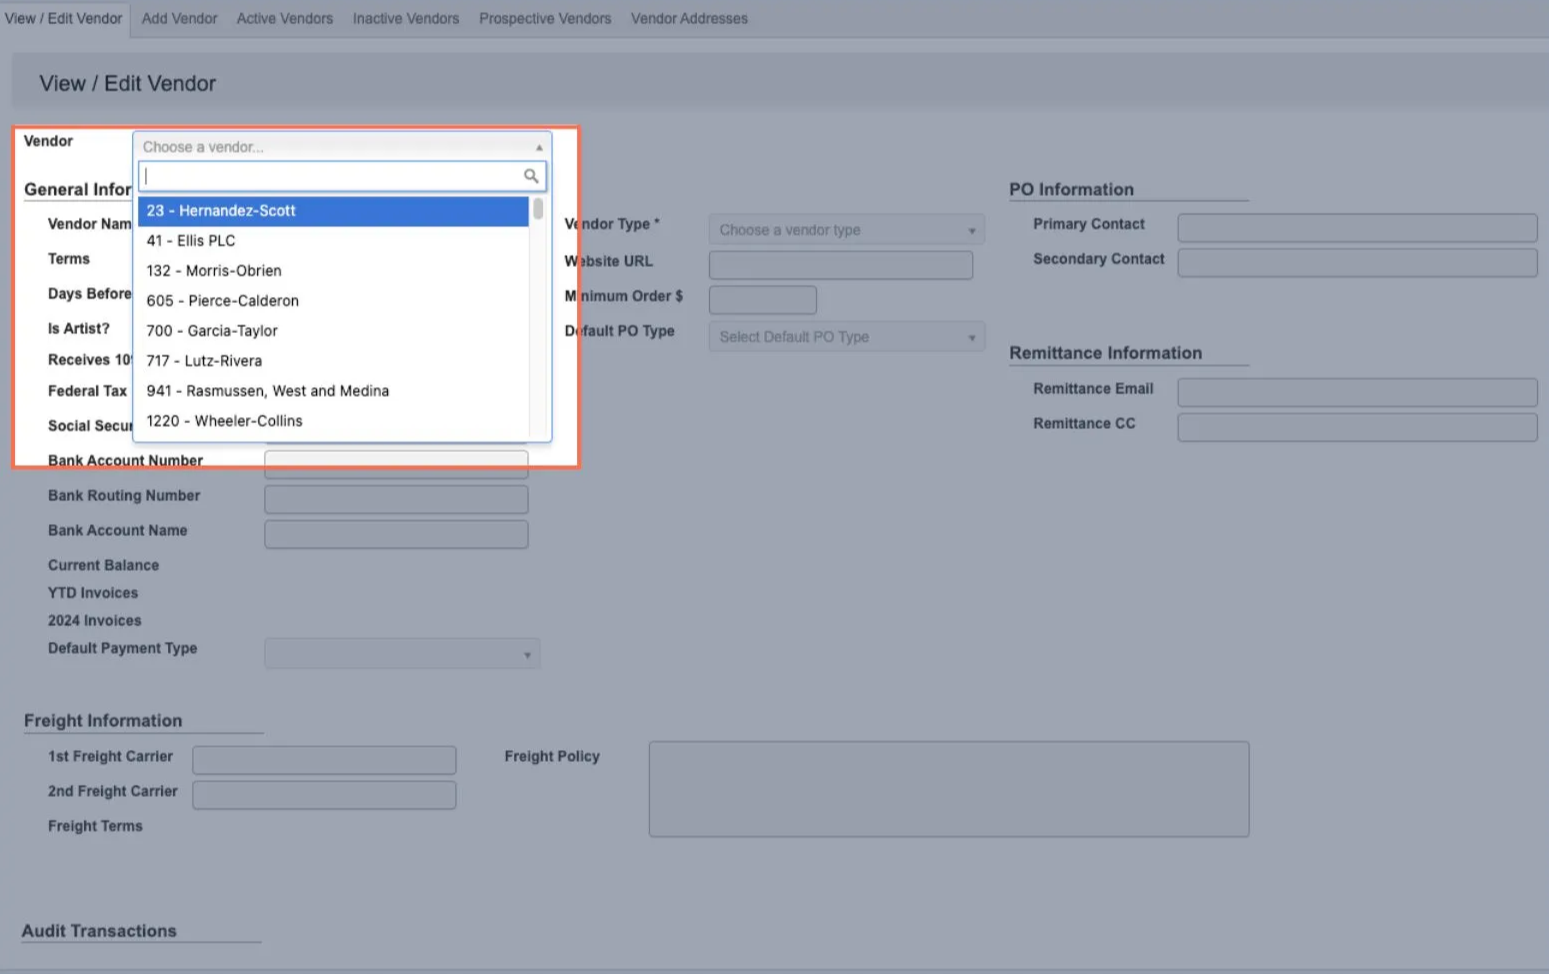
- You can now view that vendor’s details, including business information, payment terms, contacts, and addresses.
Step 2: Use the toolbar to manage a vendor’s records
Once you’ve pulled up a vendor’s records, you can manage their information with the following features located in the toolbar:-
Edit: Edit vendor information.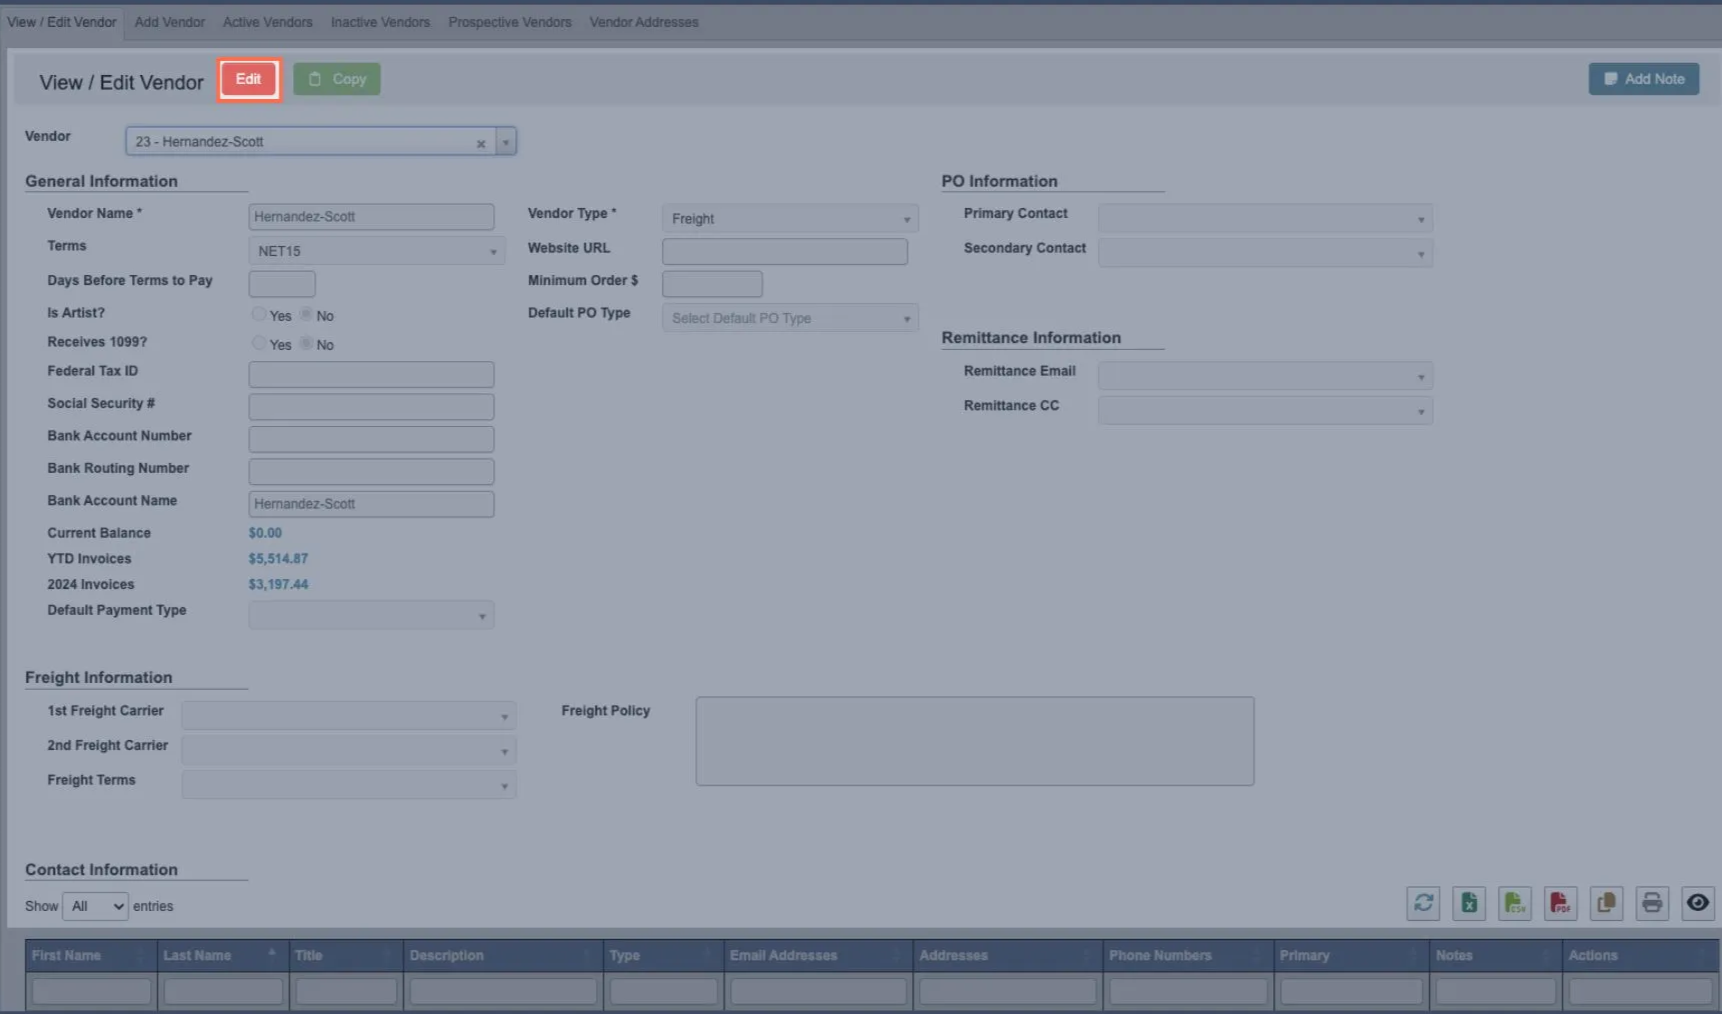
-
Once in the edit view:

-
Click
Cancel Editingto cancel editing. -
Click
Saveto save your changes. -
Click
Update Lead Timesfor all vendor items.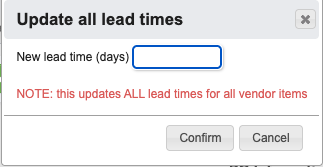
-
Copy: Copies all contacts, addresses, and price lists from the currently displayed vendor record into a new vendor profile.
-
Click
- This is useful when a vendor needs to be set up again under a new name or tax designation. Instead of re-entering all the same details manually, you can copy them into the new record and make only the necessary changes.
-
Once in the edit view:
-
Add Note: Attaches a comment to the vendor’s profile. You can optionally choose an expiration date for the note.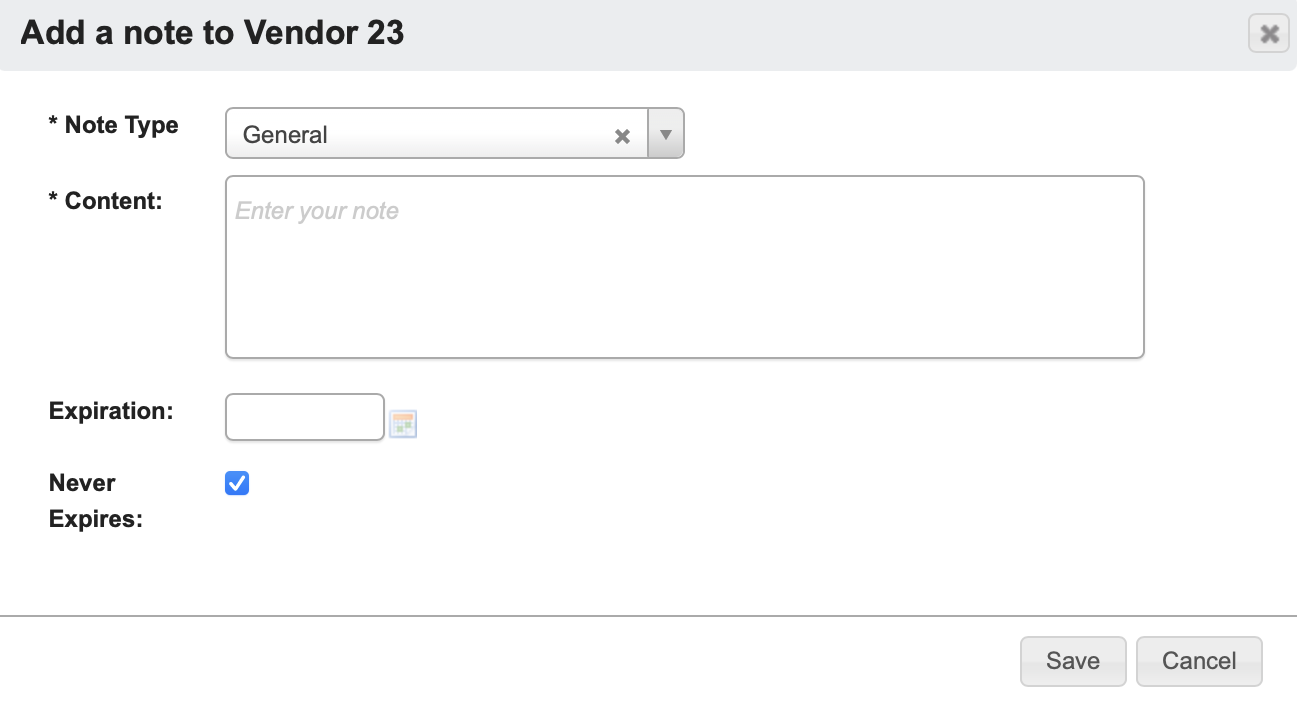
Add Vendor
-
From the Purchase Order → Manage Vendors submodule, click on the
Add Vendortab. -
Fill in
Vendor Namewith the vendor’s name. -
Choose a
Vendor Type. -
(Optional) Add any additional details you have for the vendor (e.g., payment terms, freight information). You can always go back and add new information later through the
View / Edit Vendorpage. -
Click
Save as Prospectiveto create the new vendor profile.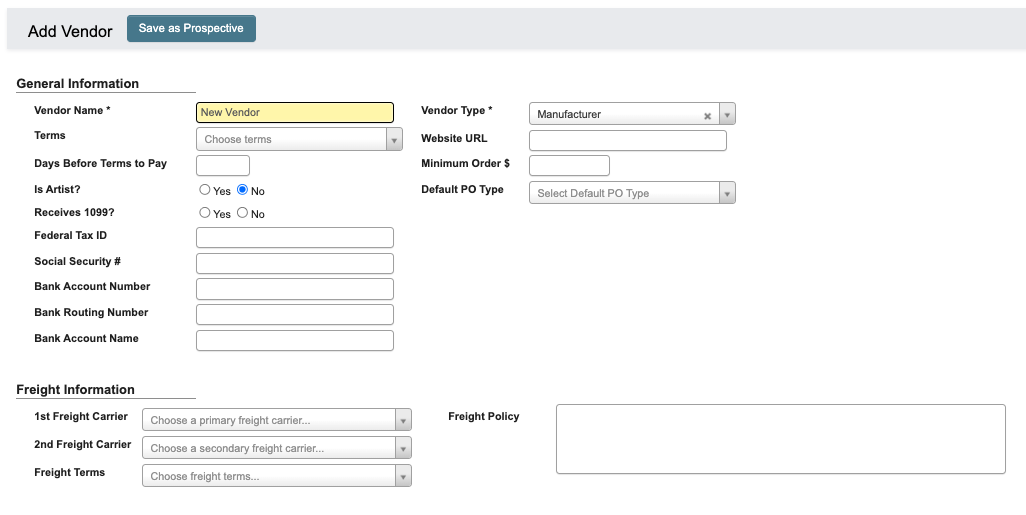
Active Vendors
From the Purchase Order → Manage Vendors submodule, click on theActive Vendors tab. This contains a table of summarized records for every “active” vendor.
Within this tab, you can:
- Click on an attribute heading (such as Vendor Name) to sort in ascending order. Click again to sort in descending order.
- Click on a Vendor ID or Vendor Number to view or manage the associated vendor records in the
View / Edit Vendortab. - Refresh, export, print, or filter data with the toolbar.
- Remove Active Vendors.
How to mark a vendor as inactive
- Scroll to the far right of the table and find the
Actionscolumn. - Click the
Deactivate Vendor(red “no”) button. - Click “YES, deactivate” when prompted.
Inactive Vendors
From the Purchase Order → Manage Vendors submodule, click on theInactive Vendors tab. This contains a table of summarized vendor records for every “inactive” vendor.
Just like the Active Vendors tab, you can:
- Click on an attribute heading (such as Vendor Name) to sort in ascending order. Click again to sort in descending order.
- Click on a Vendor ID or Vendor Number to view or manage the associated vendor records in the
View / Edit Vendortab. - Refresh, export, print, or filter data with the toolbar.
How to mark a vendor as active
- Scroll to the far right of the table and find the
Actionscolumn. - Click the
Activate Vendor(green checkmark) button. - Click “YES, activate” when prompted.
Prospective Vendors
From the Purchase Order → Manage Vendors submodule, click on theProspective Vendors tab. This tab contains records for potential vendors that are being evaluated but not yet approved for purchasing.

- Click on an attribute heading (such as Vendor Name) to sort in ascending order. Click again to sort in descending order.
- Track prospective vendors until they are approved and moved to
Active Vendors. - Click on a Vendor ID or Vendor Number to view or manage the associated vendor records in the
View / Edit Vendortab. - Refresh, export, print, or filter data with the toolbar.
- Remove Prospective Vendors.
How to mark a prospective vendor as active
-
Click the
Vendor IDfor the vendor. -
You will be taken to the
View / Edit Vendortab. A green header shows that this is a ‘Prospective Vendor.’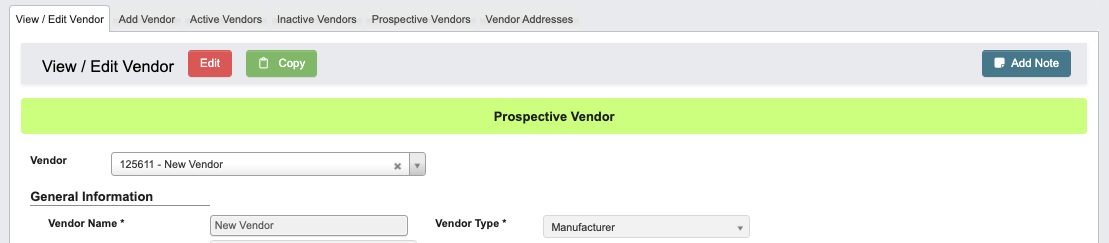
-
To convert to an ‘Active Vendor’ click
Edit. -
Click
Convert & Saveto convert the Vendor from ‘Prospective Vendor’ to ‘Active Vendor.’
How to mark a prospective vendor as inactive
- Scroll to the far right of the table and find the
Actionscolumn. - Click the
Deactivate Vendor(red “no”) button. - Click “YES, deactivate” when prompted.
Vendor Addresses
From the Purchase Order → Manage Vendors submodule, click on theVendor Addresses tab. This contains records for all vendor addresses stored in the system.