Overview
The Shipping → Bill of Lading submodule manages the creation, editing, and tracking of Bills of Lading (BOL) for freight shipments. This module coordinates with the production and inventory tracking systems to ensure accurate documentation of shipments from a shipping facility to customers. This submodule integrates with the order pallets system. Order pallets are created during the picking process by selectors and are then selected when creating a BOL. The submodule contains the following tabs:- Draft: View and manage BOLs in draft status awaiting finalization.
- Finalized: View completed BOLs that have been processed and sent.
- Create BOL: Generate new Bills of Lading with order and shipping details.
- View / Edit BOL: Access and modify existing BOL information.
Understand Bills of Lading
Bills of Lading serve as legal documents that detail the contents, quantities, and terms of freight shipments. The BOL system coordinates with the weekly customer priority meetings where major customers. They system tracks the order pallets created during the picking process. As selectors build pallets for each customer order, these pallets become the units selected during BOL creation and are used to generate accurate shipment details for the ASN.Draft
View Bills of Lading that are in draft status and awaiting finalization. Draft BOLs allow for editing and modifications before being processed and sent to carriers and customers.
Finalized
View completed Bills of Lading that have been finalized and processed. These BOLs represent shipments that have been coordinated with carriers and are ready for or in transit to customers.
Create BOL
Generate new Bills of Lading for customer shipments. This process works with the order pallet system, where pallets created during picking are tracked and used to finalize shipments during BOL and ASN creation. See BOL Reference page for definitions of fields.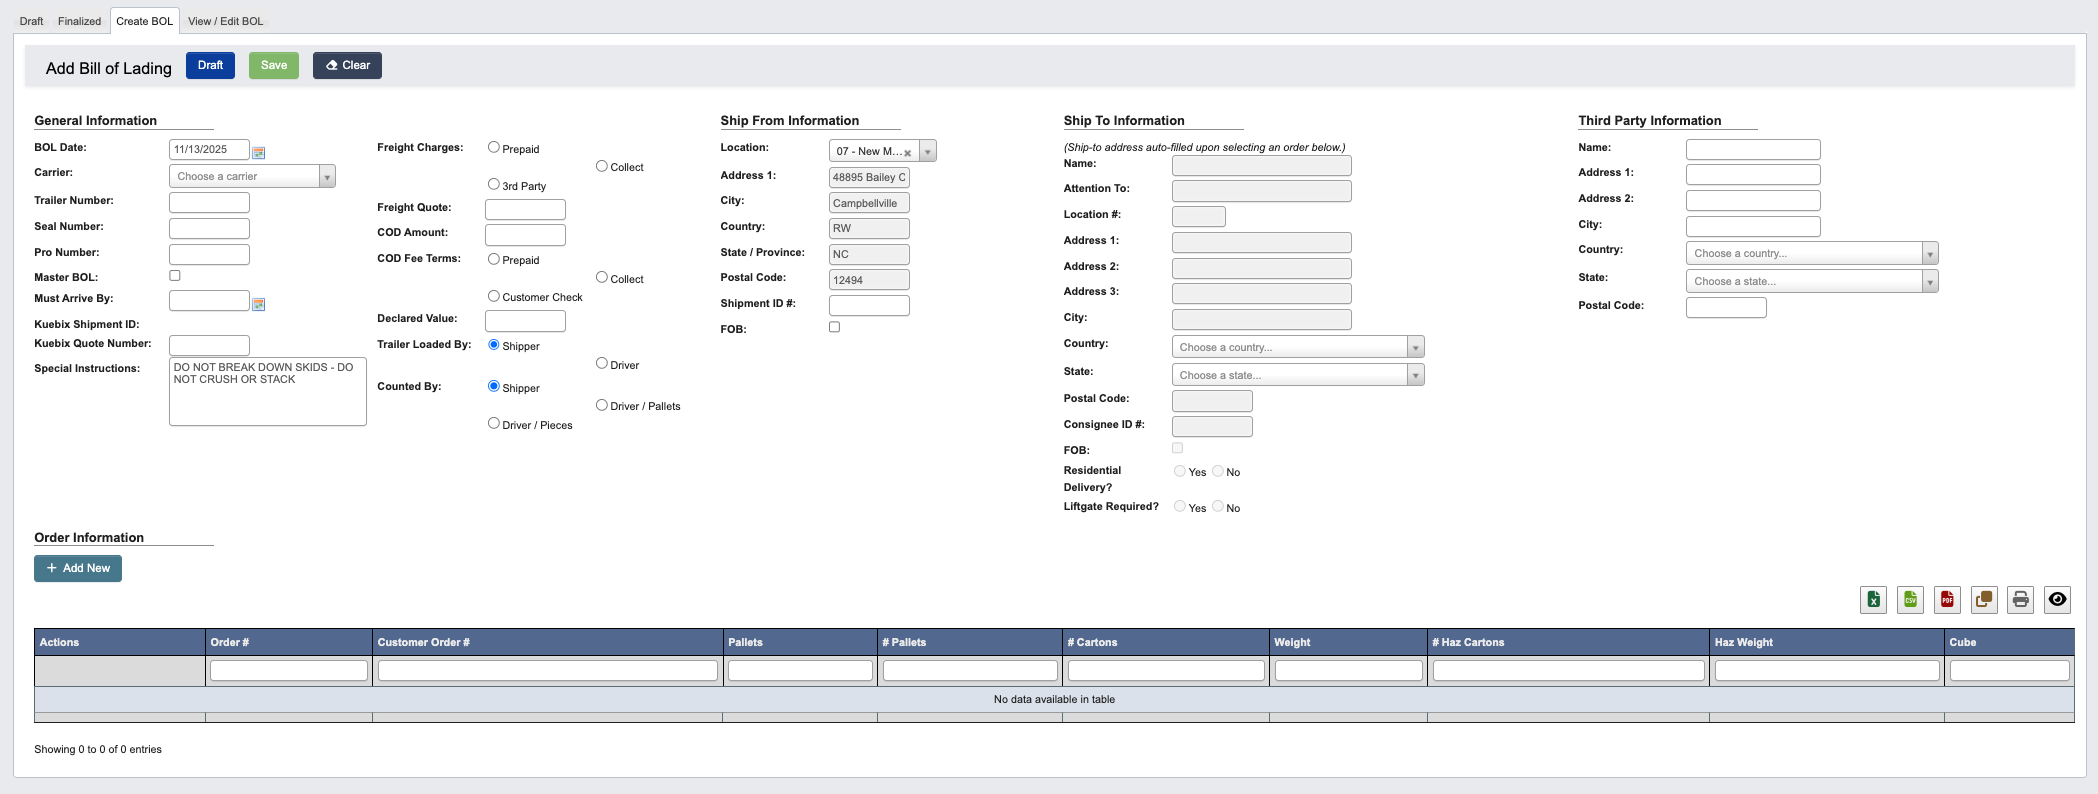
Step 1: Use the toolbar to manage BOL creation
Once you’ve accessed the Create BOL tab, you can manage the BOL creation process with the following features located in the toolbar:DraftButton: Save the BOL as a draft for later completion and editing.Save & ResendButton: Save changes and resend the BOL information.ClearButton: Clear all entered information and start over.
Step 2: Add order information to the BOL
Add customer orders to the Bill of Lading. Orders are linked to palletized inventory that has been tracked through the picking system.-
Click the
+ Add Newbutton to add additional orders to the current BOL. -
Fill in the order information fields. See BOL Reference page for field definitions.

-
Choose your save option:
Save and add anotherButton: Save the current order and add another order to the BOL.SaveButton: Save the order information and return to the main BOL screen.CancelButton: Cancel order entry and return without saving.
Invoiced orders or pallets already assigned to another BOL cannot be added to this BOL.
View / Edit BOL
Access and modify existing Bills of Lading. This section allows viewing completed BOLs and making necessary edits to shipping information.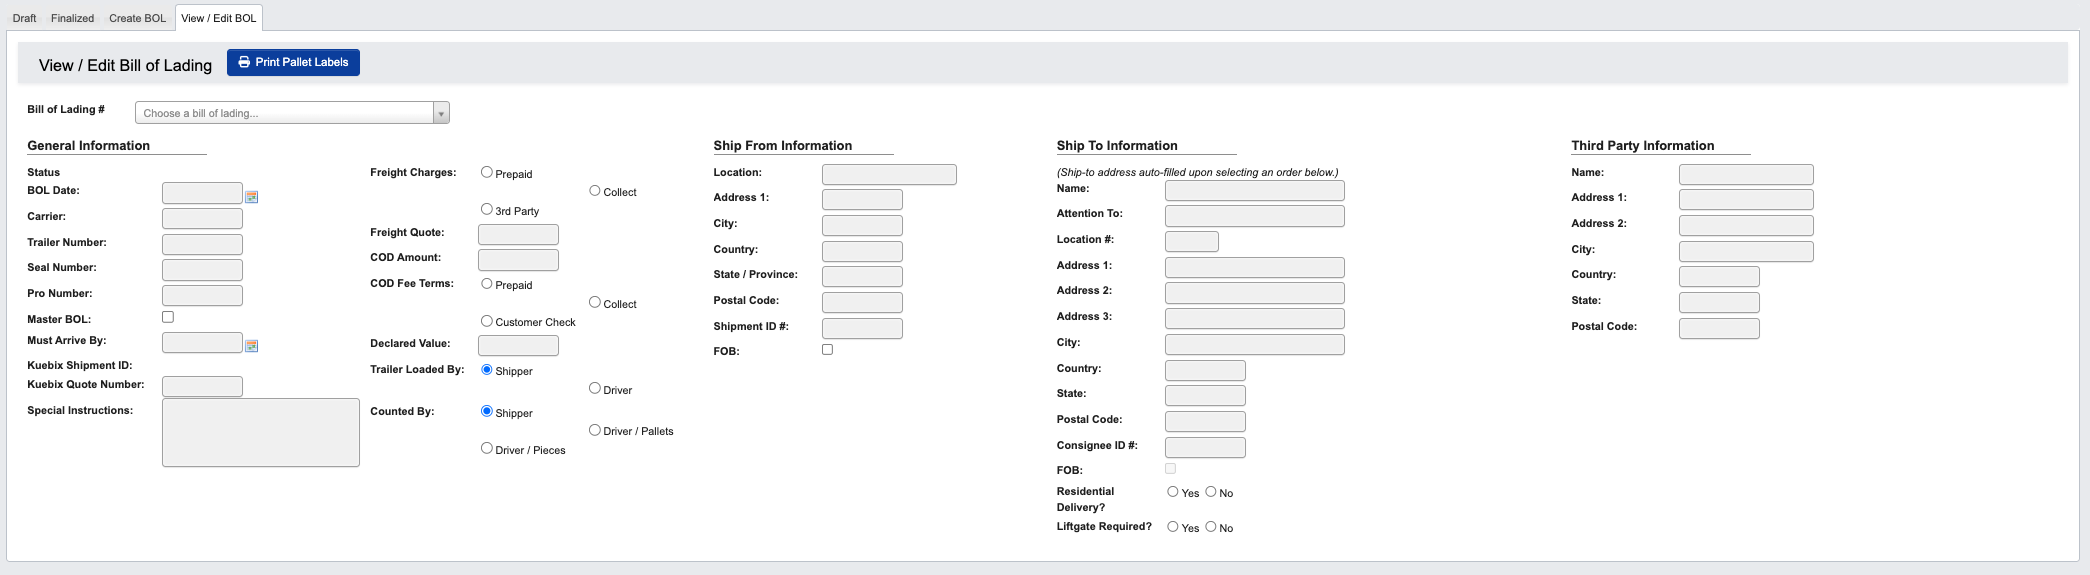
Step 1: Pull up a BOL’s records
-
From the Shipping → Bill of Lading submodule, click on the
View / Edit BOLtab. -
Click the dropdown menu next to the
Bill of Lading #field. -
Select the BOL you’re looking for from the dropdown menu. This will populate all BOL information.
Step 2: Use the toolbar to manage BOL records
Once you’ve pulled up a BOL’s records, you can manage the information with the following features located in the toolbar:
Edit: Enable editing view for BOL fields.Generate PDF: Create PDF version of the BOL document.Email PDF: Send PDF version via email to specified recipients.- Once in the edit view:
- Click
Cancel Editingto discard any changes made to the BOL and exit edit view. - Click
Save & Resendto save and resend the BOL. - Click
Clearto clear changes made to BOL.
- Click
Print BOL
Use thePrint Pallet Labels Button to generate pallet labels for the shipment.
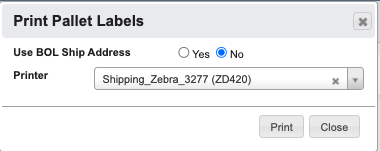
- Choose to
Use BOL Ship Address(Yes/No). - Select printer from available options.
- Click
Printto generate labels orCancelto return.
Deactivate or Delete BOL
Use theDeactivate (Delete) BOL button to deactivate or delete a BOL.
- Click the
Deactivate (Delete) BOLbutton. - In the popup window, confirm
YES, deactivateorCancel.
Edit Invoice Information
Edit: Edit Freight Charges and Weight.Save: Changes to Invoice information.
Edit Order Information
+ Add new: Click to add an order to the BOL. See BOL Reference page for order information field definitions.- Use the buttons in the Actions column to:
- Pencil icon: Edit an Order.
- Delete icon: Delete an Order.
- Printer icon: Print an Order.
- Excel icon: Download Order as an excel spreadsheet.