Employee Information Card
Line: This field is automatically populated based on your physical production line location.Shift: Automatically populated with the current shift number.Operator: Enter the employee ID number for the operator.Packer: Enter the employee ID number for the packer.- Click
Add Packerto include additional packers if needed. - Use the
Remove Packer(red “x”) button to remove packers as needed.
Employee Card: Binoculars Icon
Click thebinoculars icon next to the Line field to view license plates by location.
- This shows what pallets are currently at your production line.
-
Use
Select Allor click individual checkboxes to select plates. -
Click the white boxes in the
Mass Movecolumn to relocate selectedPlate #to aNew Location.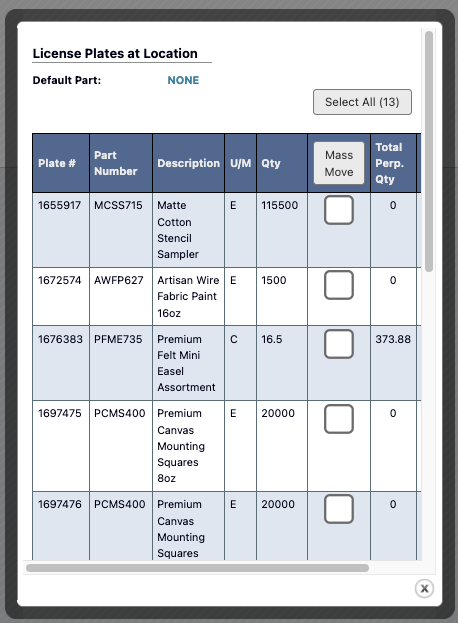
Bottling Job Information Card
# of Pumps Used: Number of pumps for bottling job.Batch #: Batch number from production schedule, triggers bottling job popup.Bottling Job #: Specific job selection, auto-populated after batch number entry.Pallet # on Barrel: Pallet identification.Scan new WIP Pallet: Click to add additional WIP pallets to the job.Previous Pallet Label: Previous pallet reference, optional entry for continuity tracking.
Setup Time
During the setup time, the following activities and information are available:- Comments: Leave notes about the bottling job.
- Other Bottling Jobs on Batch: View other bottling jobs for the current batch.
- Special Instructions: Access job-specific instructions.
- Pallet Information: Review pallet details.
- Part Information: Access part specifications and details.
- Manufacturing Documents: View relevant manufacturing documents.
- Status Information: Monitor current job status.
- Production Quantities: Use
+ Add Qtyto add quantities as bottles are completed. - Time Tracking: Monitor time spent on bottling job activities.
- Production Quantities: Use
- Use the
Downtimebutton to record downtime. - Use the
End Runbutton to end the production run.
Downtime Recording
The downtime phase captures non-productive time with detailed categorization.-
Click
Downtimeto record periods when production is not active, including reasons for downtime and duration.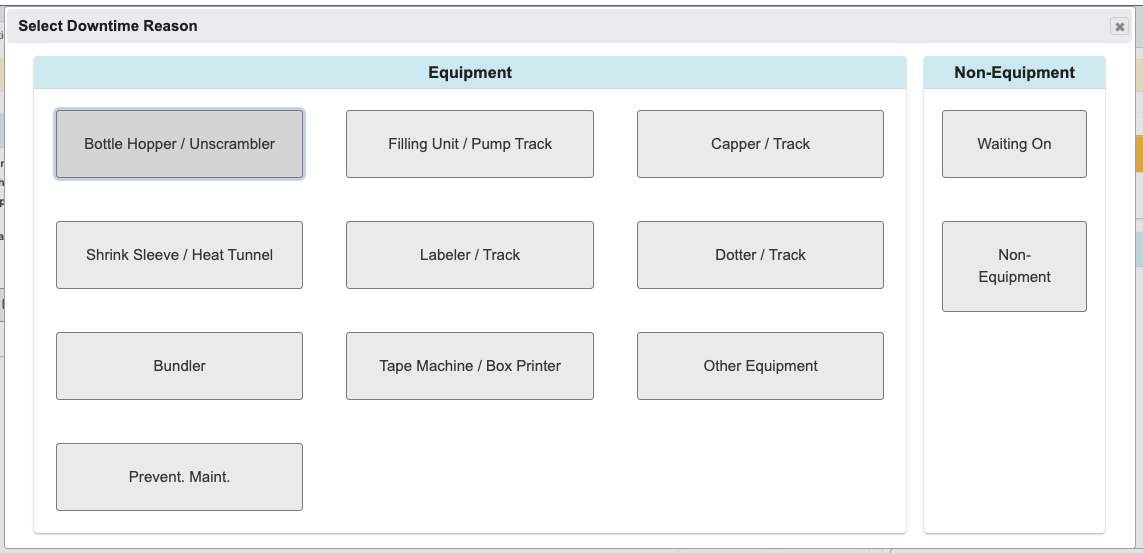
-
Choose a downtime reason. All options allow you to add comments for additional detail:
- Equipment: Select this if the downtime is caused by an equipment issue. Choose the specific reason and add comments as needed.
- Non-Equipment: Select this if the downtime is not equipment-related.
- Waiting On: Use this when production is paused due to other personnel, materials, or dependencies.
- Non-Equipment: Use this for breaks, cleanup, clearing tables, lunch, meetings, spills, or other non-equipment activities.