Overview
This page explains how to use the Order Processing → Order Picking submodule to pick and fulfill customer orders. Pick/pack teams use this interface to see which orders are ready to pull, monitor progress, and handle different types of orders. The order picking interface provides a prioritized view of orders ready for fulfillment, with color-coded status indicators to help selectors efficiently manage their picking workflow. For detailed interface information and field definitions, see the Order Picking Reference.When to Use Order Picking
Various warehouse and shipping roles use this interface throughout their operations:- Pick/Pack Teams: Primary users who pull orders from inventory and prepare them for shipment.
- Warehouse Selectors: Responsible for efficiently picking orders based on priority and location.
- Shipping Staff: Review picked orders and coordinate with carriers for delivery.
- Sales Staff: Monitor picking progress for their customer orders and handle special requests.
- Supervisors: Oversee picking operations and address issues that require attention.
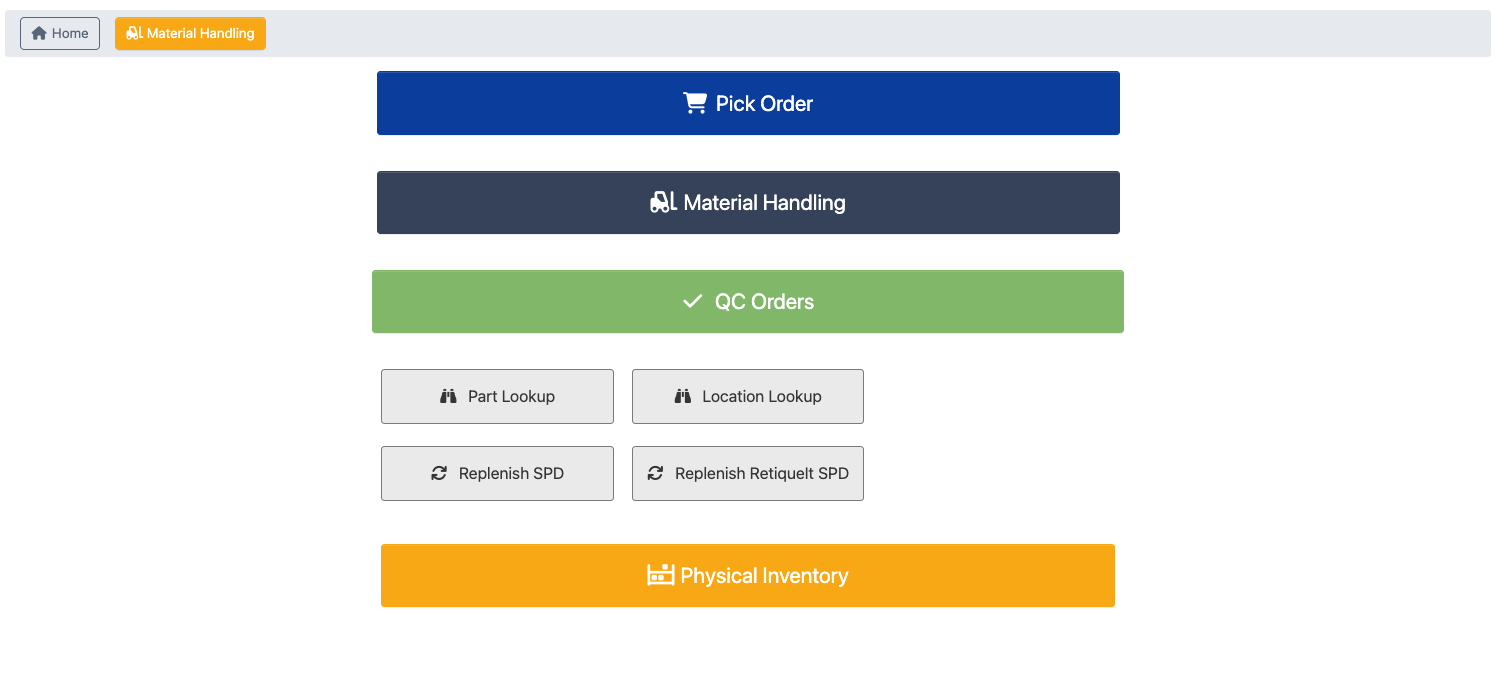
Pick Small Package Delivery (SPD)
-
Go to Shipping → SPD.
-
Click
Pick Order. -
Select your selling channel, a red bubble with a number shows how many orders are ready to pick.
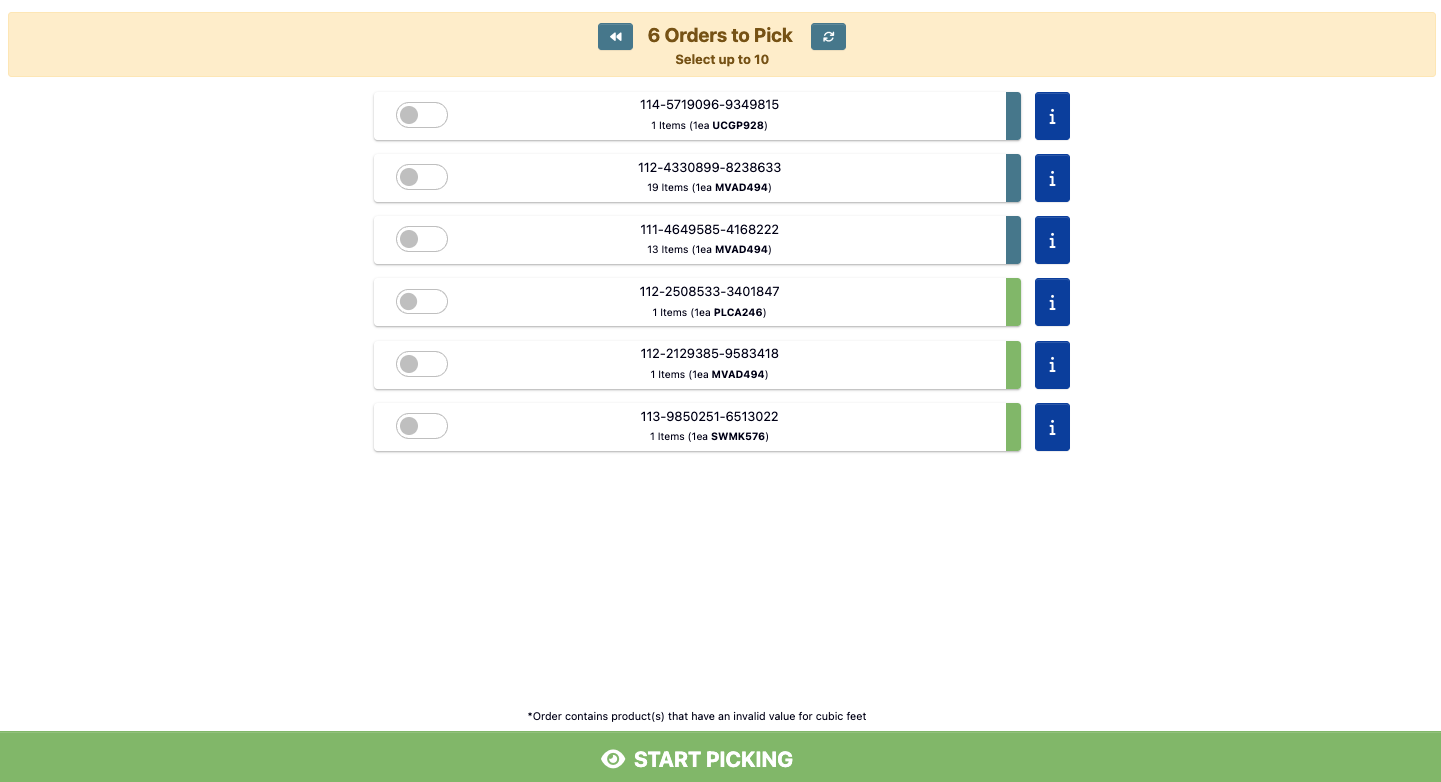
Step 2: Select Orders to Pick
-
The Order Picking interface will display a list of orders ready for fulfillment. Each order includes:
- Item count: The total number of items that need to be picked.
- Information for estimated shipping box: The quantity and part number are shown in parentheses. This information helps determine the box size based on the order’s cubic volume.
- Status indicator: A colored tab showing the current status of the order:
- Green: The order is new and has not be started.
- Blue: The order has already been started by someone else.
- Pink: The order is a rush order.
- Dark grey: The order is being picked by someone else.
- Information icon: Click to see order information.
-
Click the toggle buttons to select the order(s) you want to pick. You can select multiple orders to pick in a single batch.
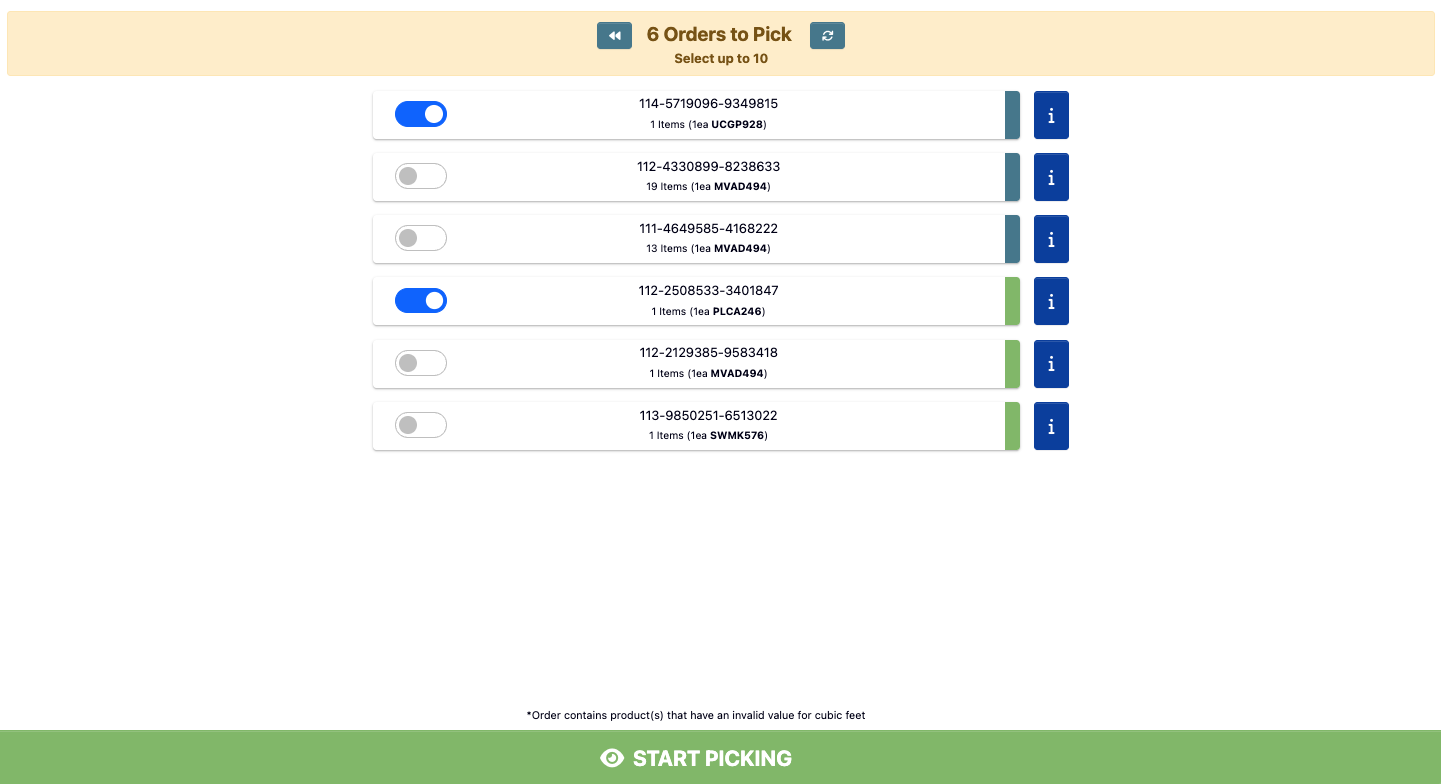
-
Click
Start Pickingto begin the picking process. After clicking, your printer will print a barcode label for each order.
Step 3: Picking the Order
Before you begin, use the image below to familiarize yourself with the elements on the screen.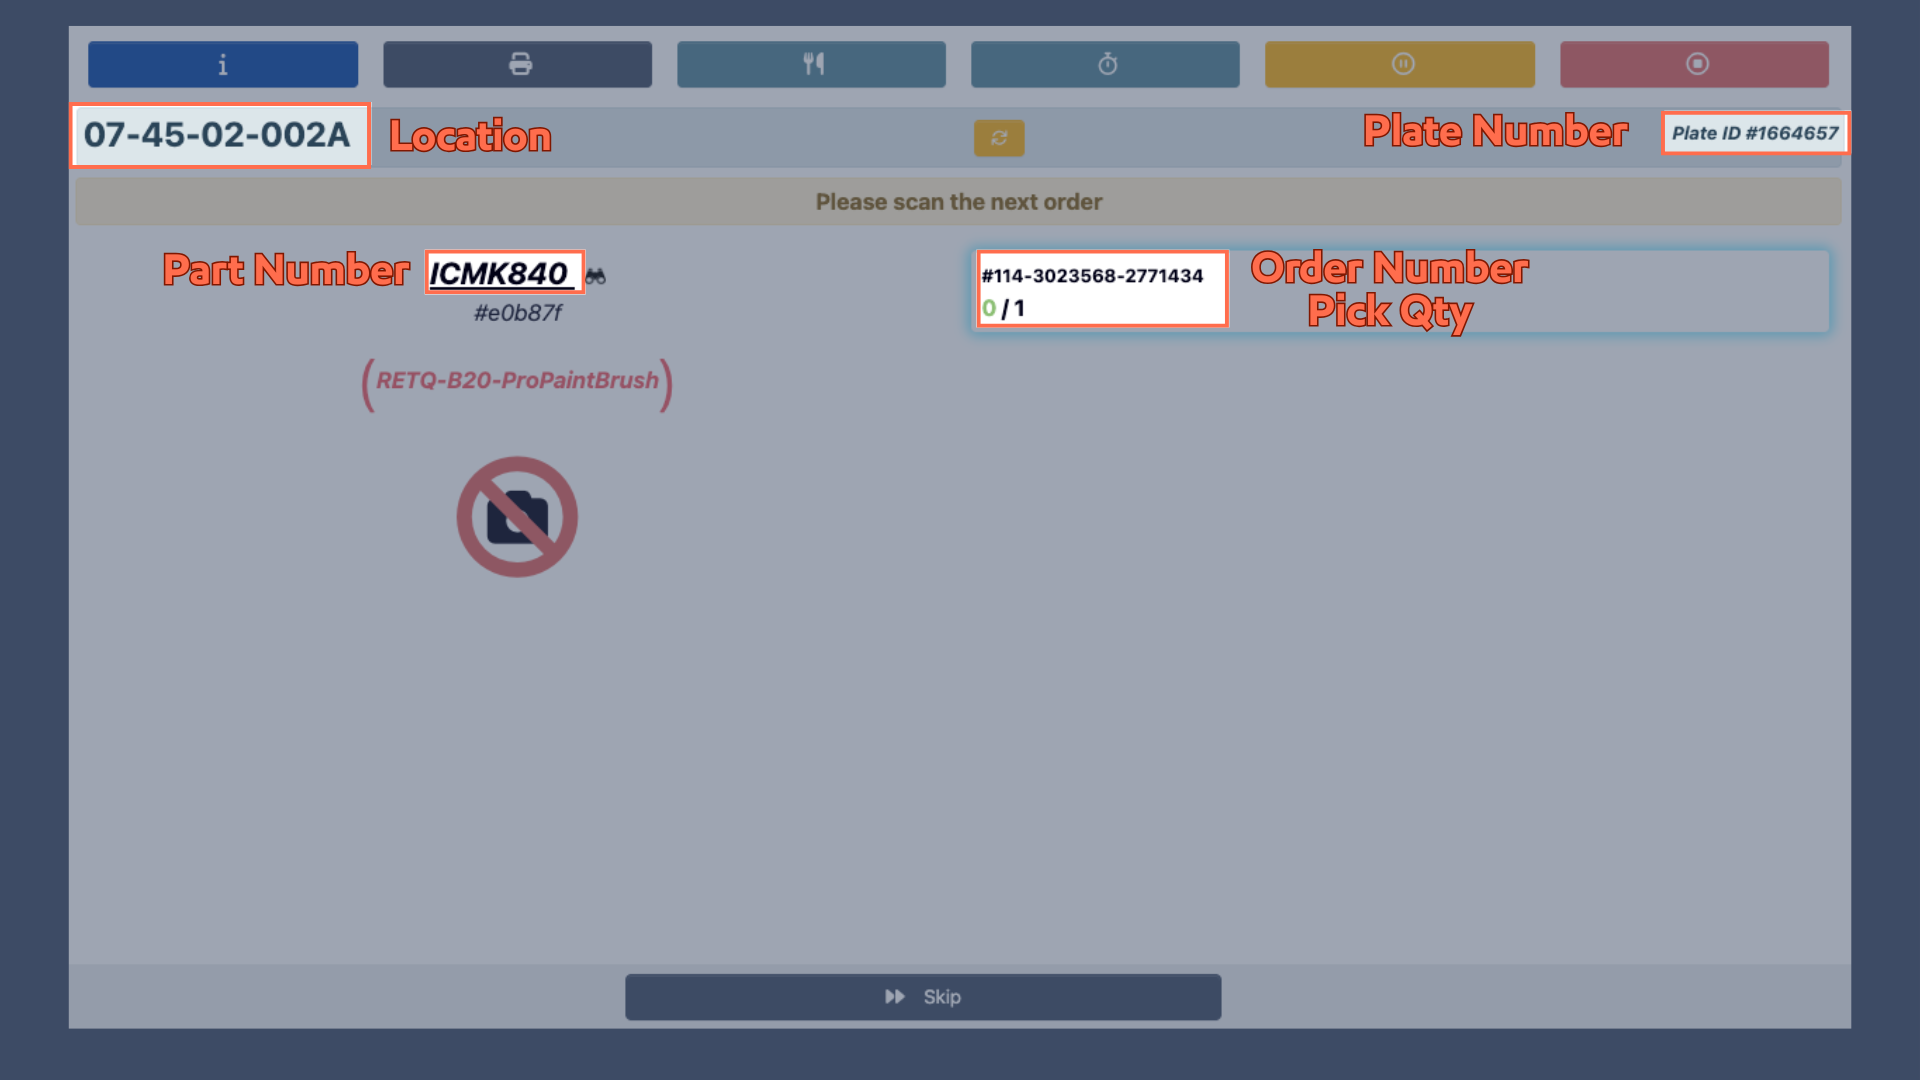
- Begin picking your order by scanning the order barcode.
-
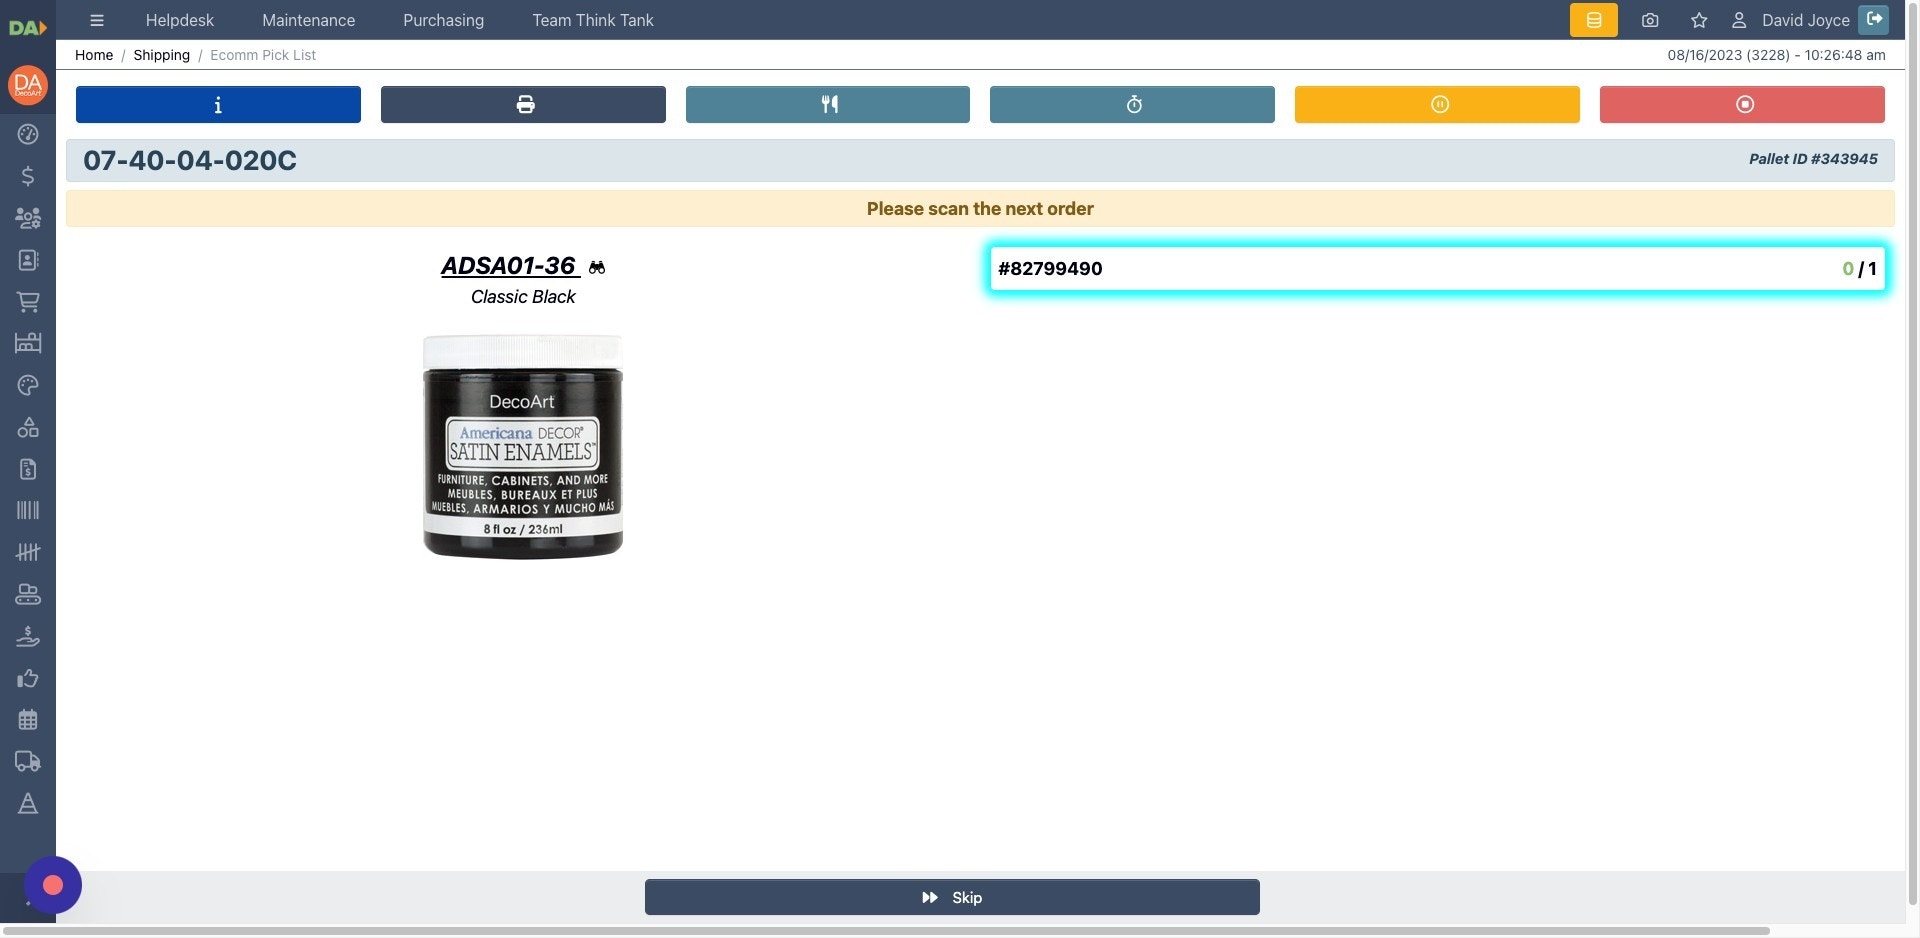
After scanning, the order number will highlight in blue to confirm it has been recognized.
-
Next, scan the product barcode for the item you are picking.
.jpeg?fit=max&auto=format&n=dx_LHZrXqBgnC_EY&q=85&s=130f384cea2f6441c993e4c8121628a0)
-
Read the pick instruction on the order card before scanning the product. DASH shows whether the next accepted product scan will pick a case or an each:
-
Pick CASE: scan the product once for one full case. -
Pick CASE, then EACH: scan the product once for the case quantity, then scan the remaining eaches one at a time.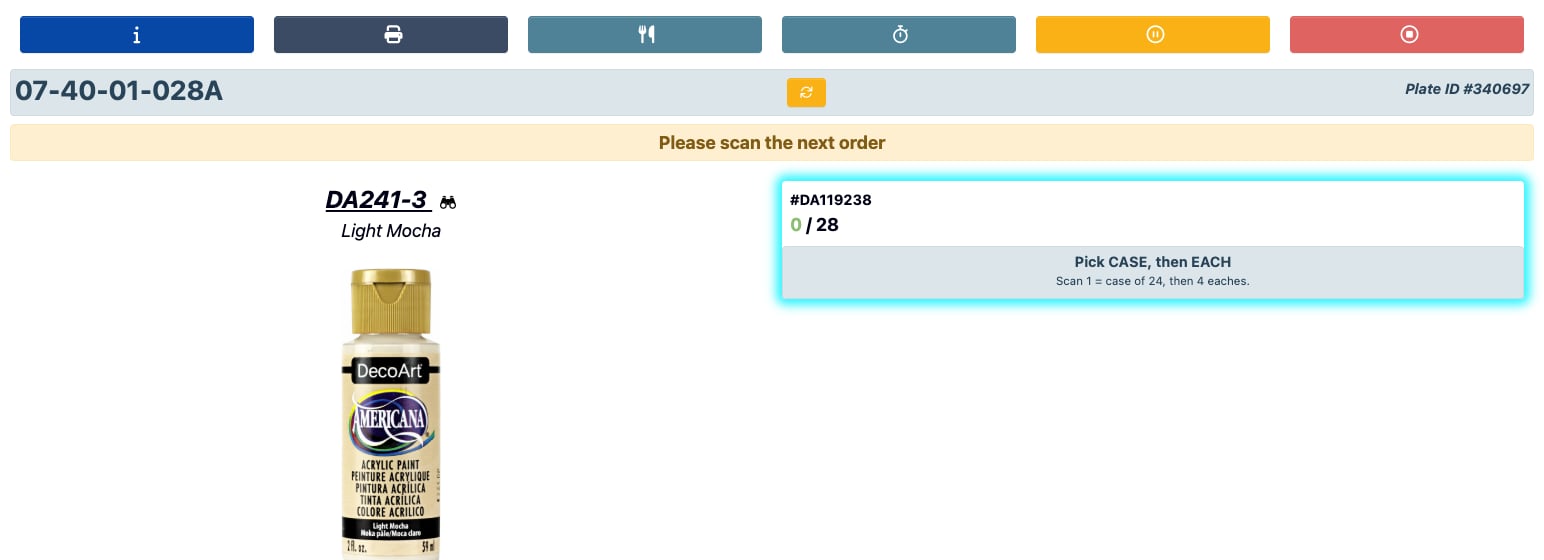
-
Pick EACH: scan each individual unit.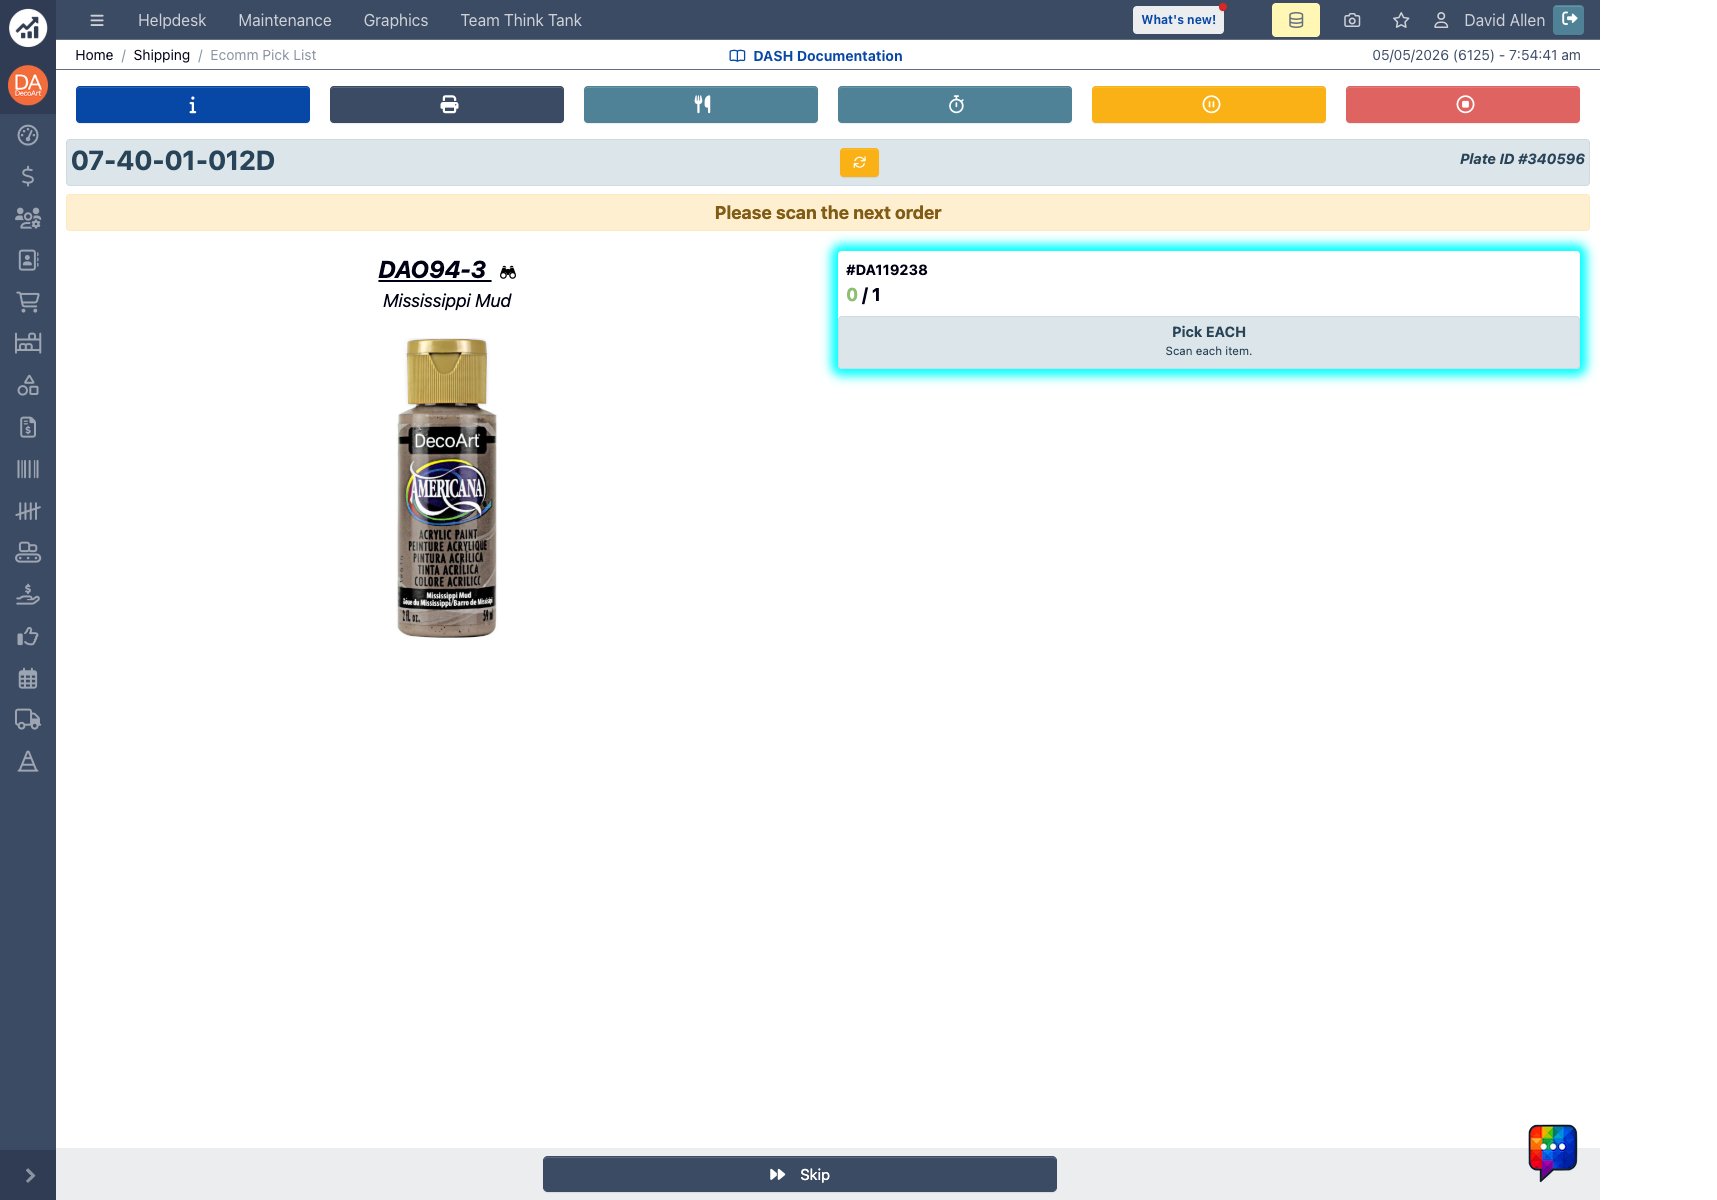
DA119238includedDA241-3, which required one case scan and then four each scans. The next line,DAO94-3, required one each scan, andDA174-3required four each scans. -
- Continue scanning the order and product barcodes until all items have been picked. The page will advance to the next part after the required case or each scans are complete.
- For detailed interface information on each interface button, see the Order Picking Reference.
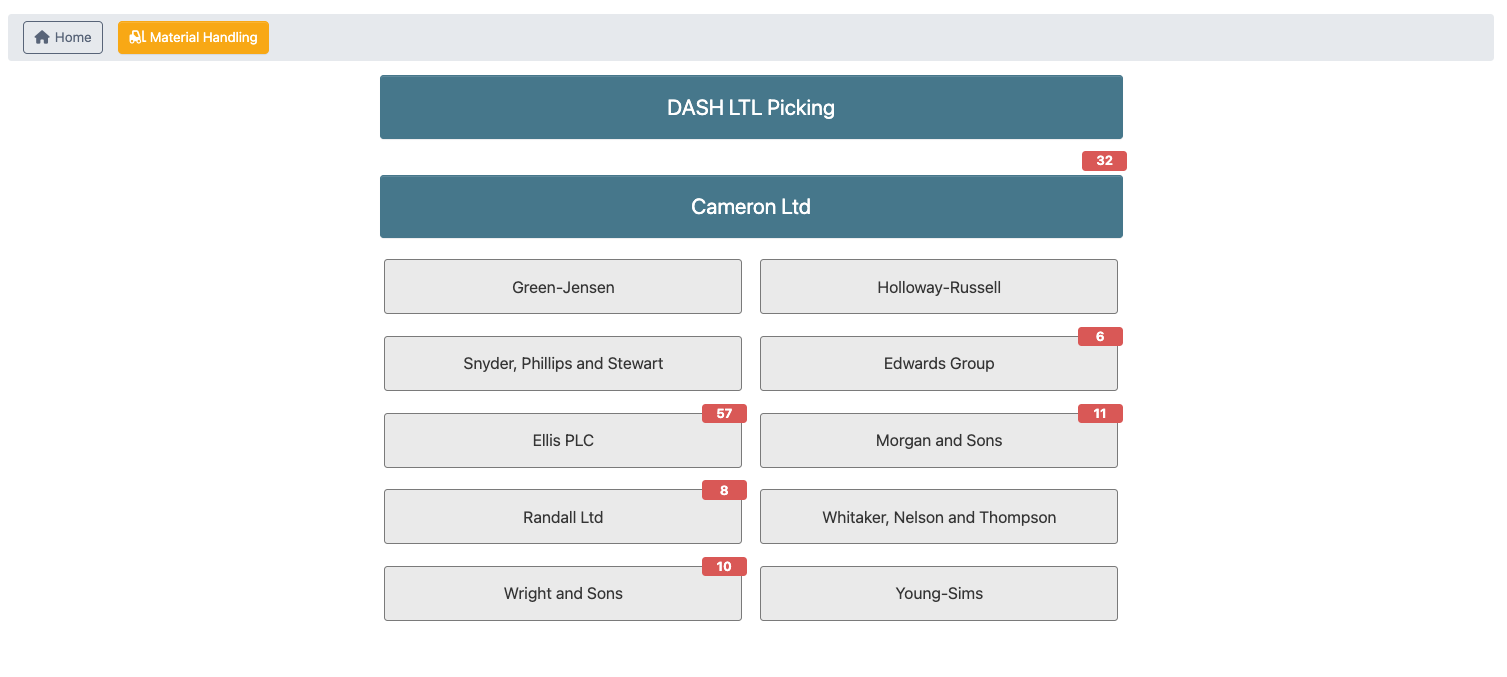
Pick DASH LTL Orders
Step 1: Access DASH LTL Order Picking
- Go to Shipping → Selector.
-
Click
Pick Orderto pick. -
Select
DASH LTL Pickingto see a listing of Order numbers. -
Click on an
Order #to open the Pick Order page.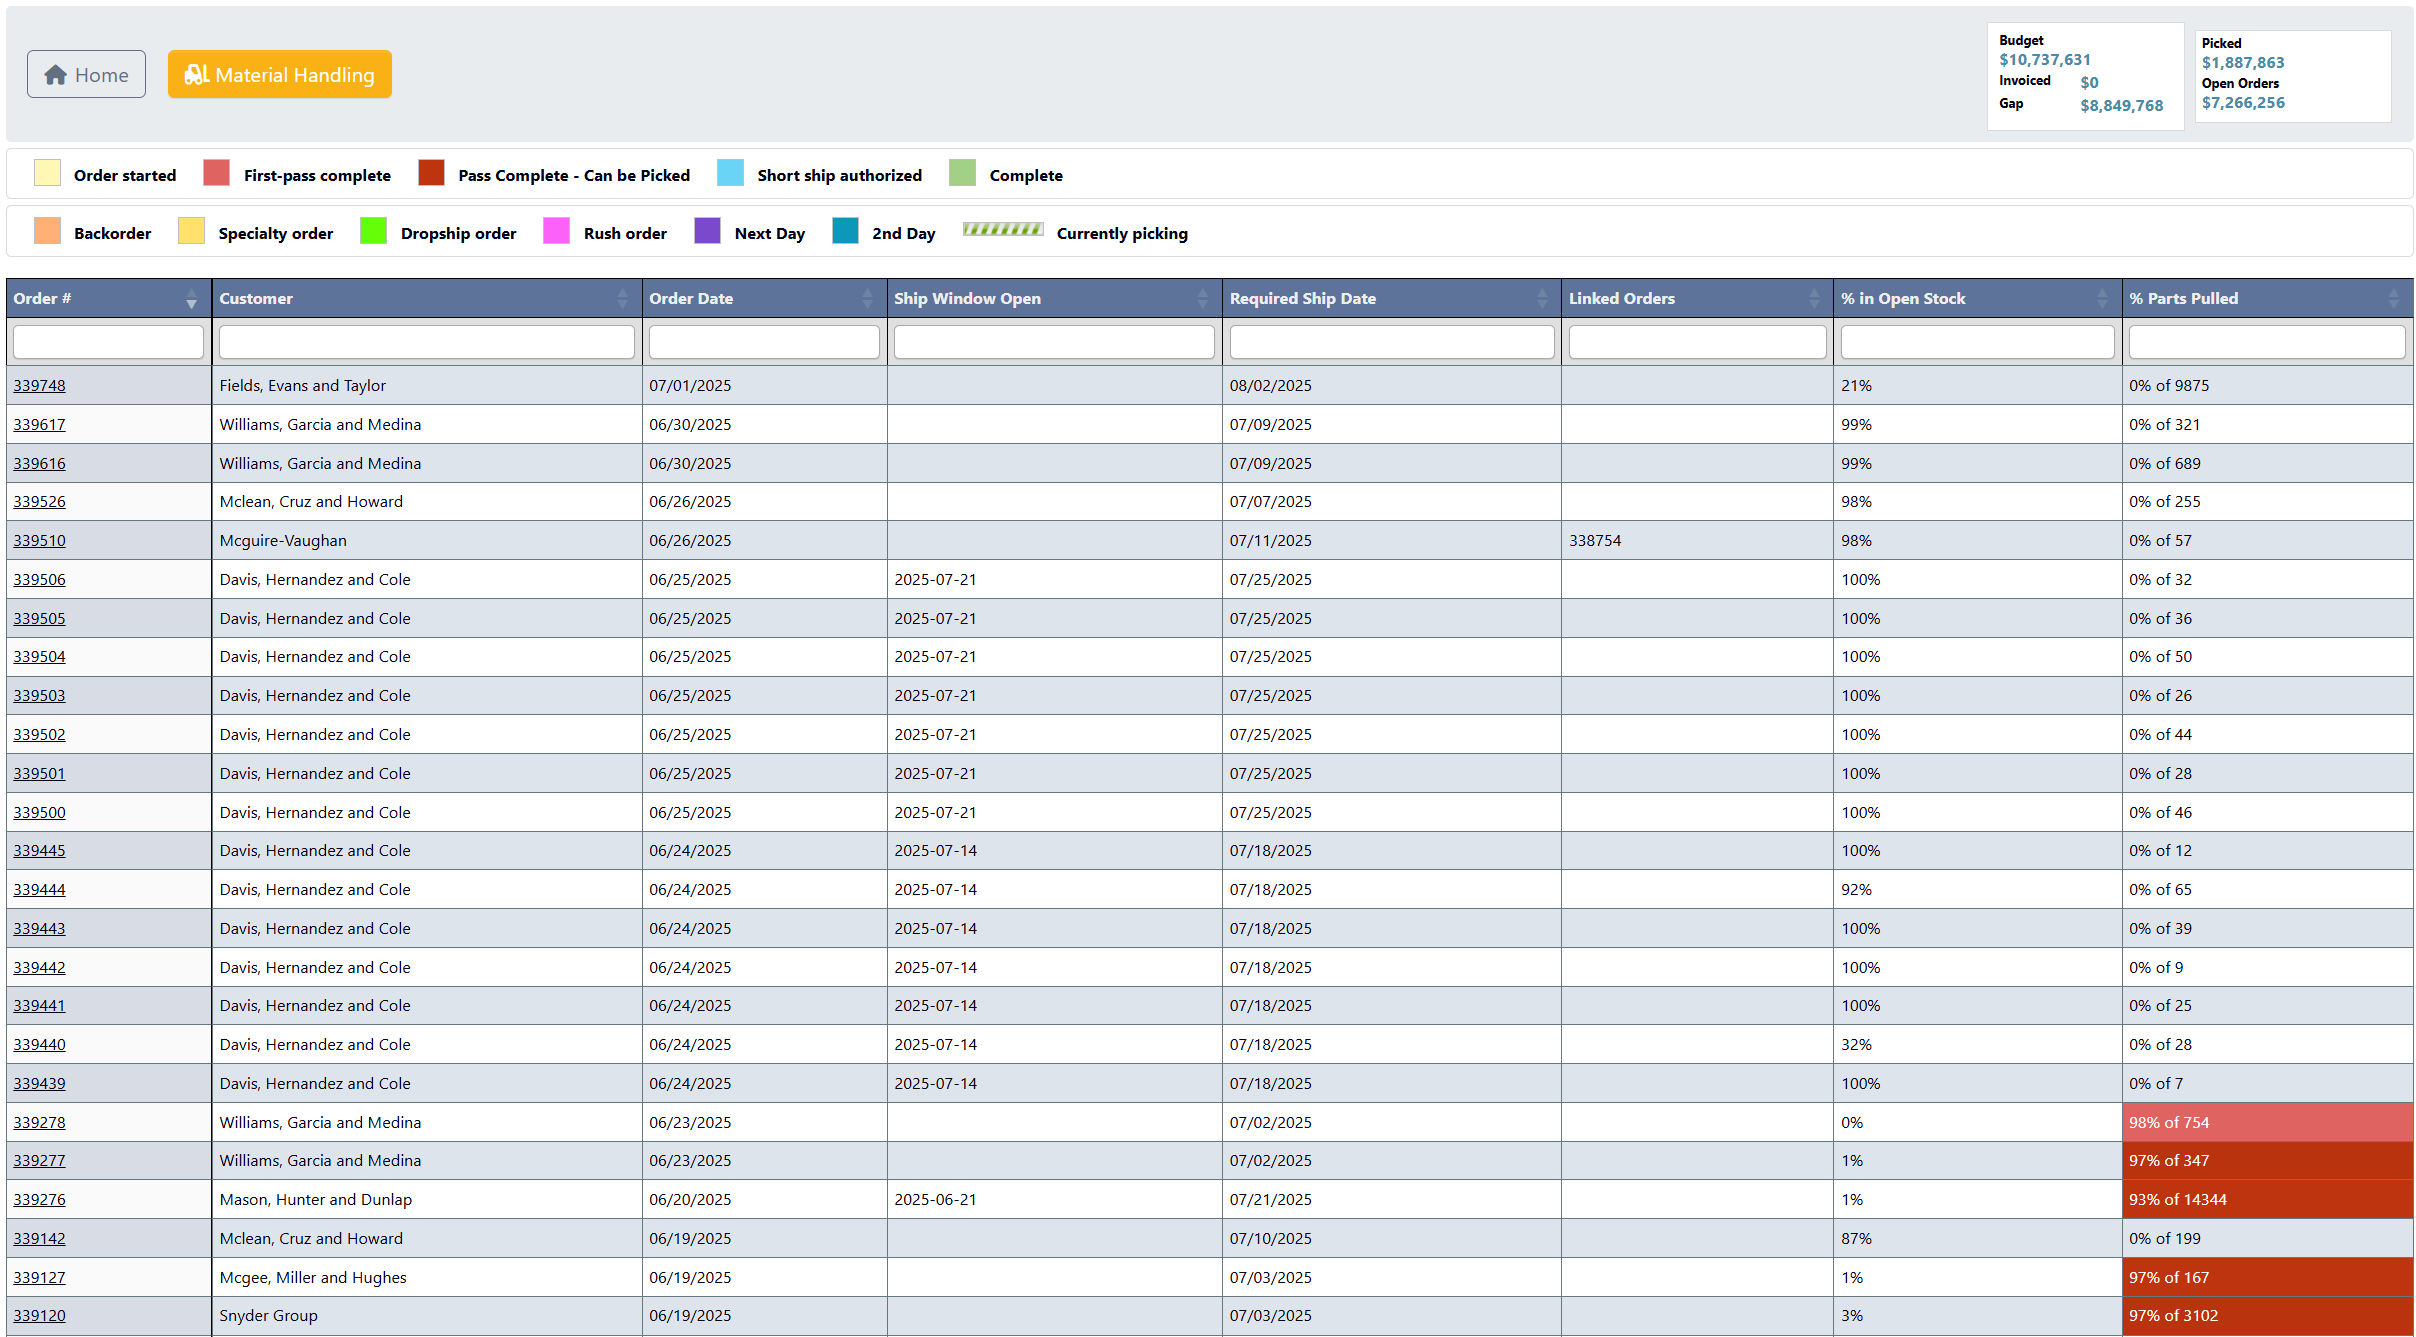
Step 2: Review Order Information

-
Click
Review Order Info Before Picking Order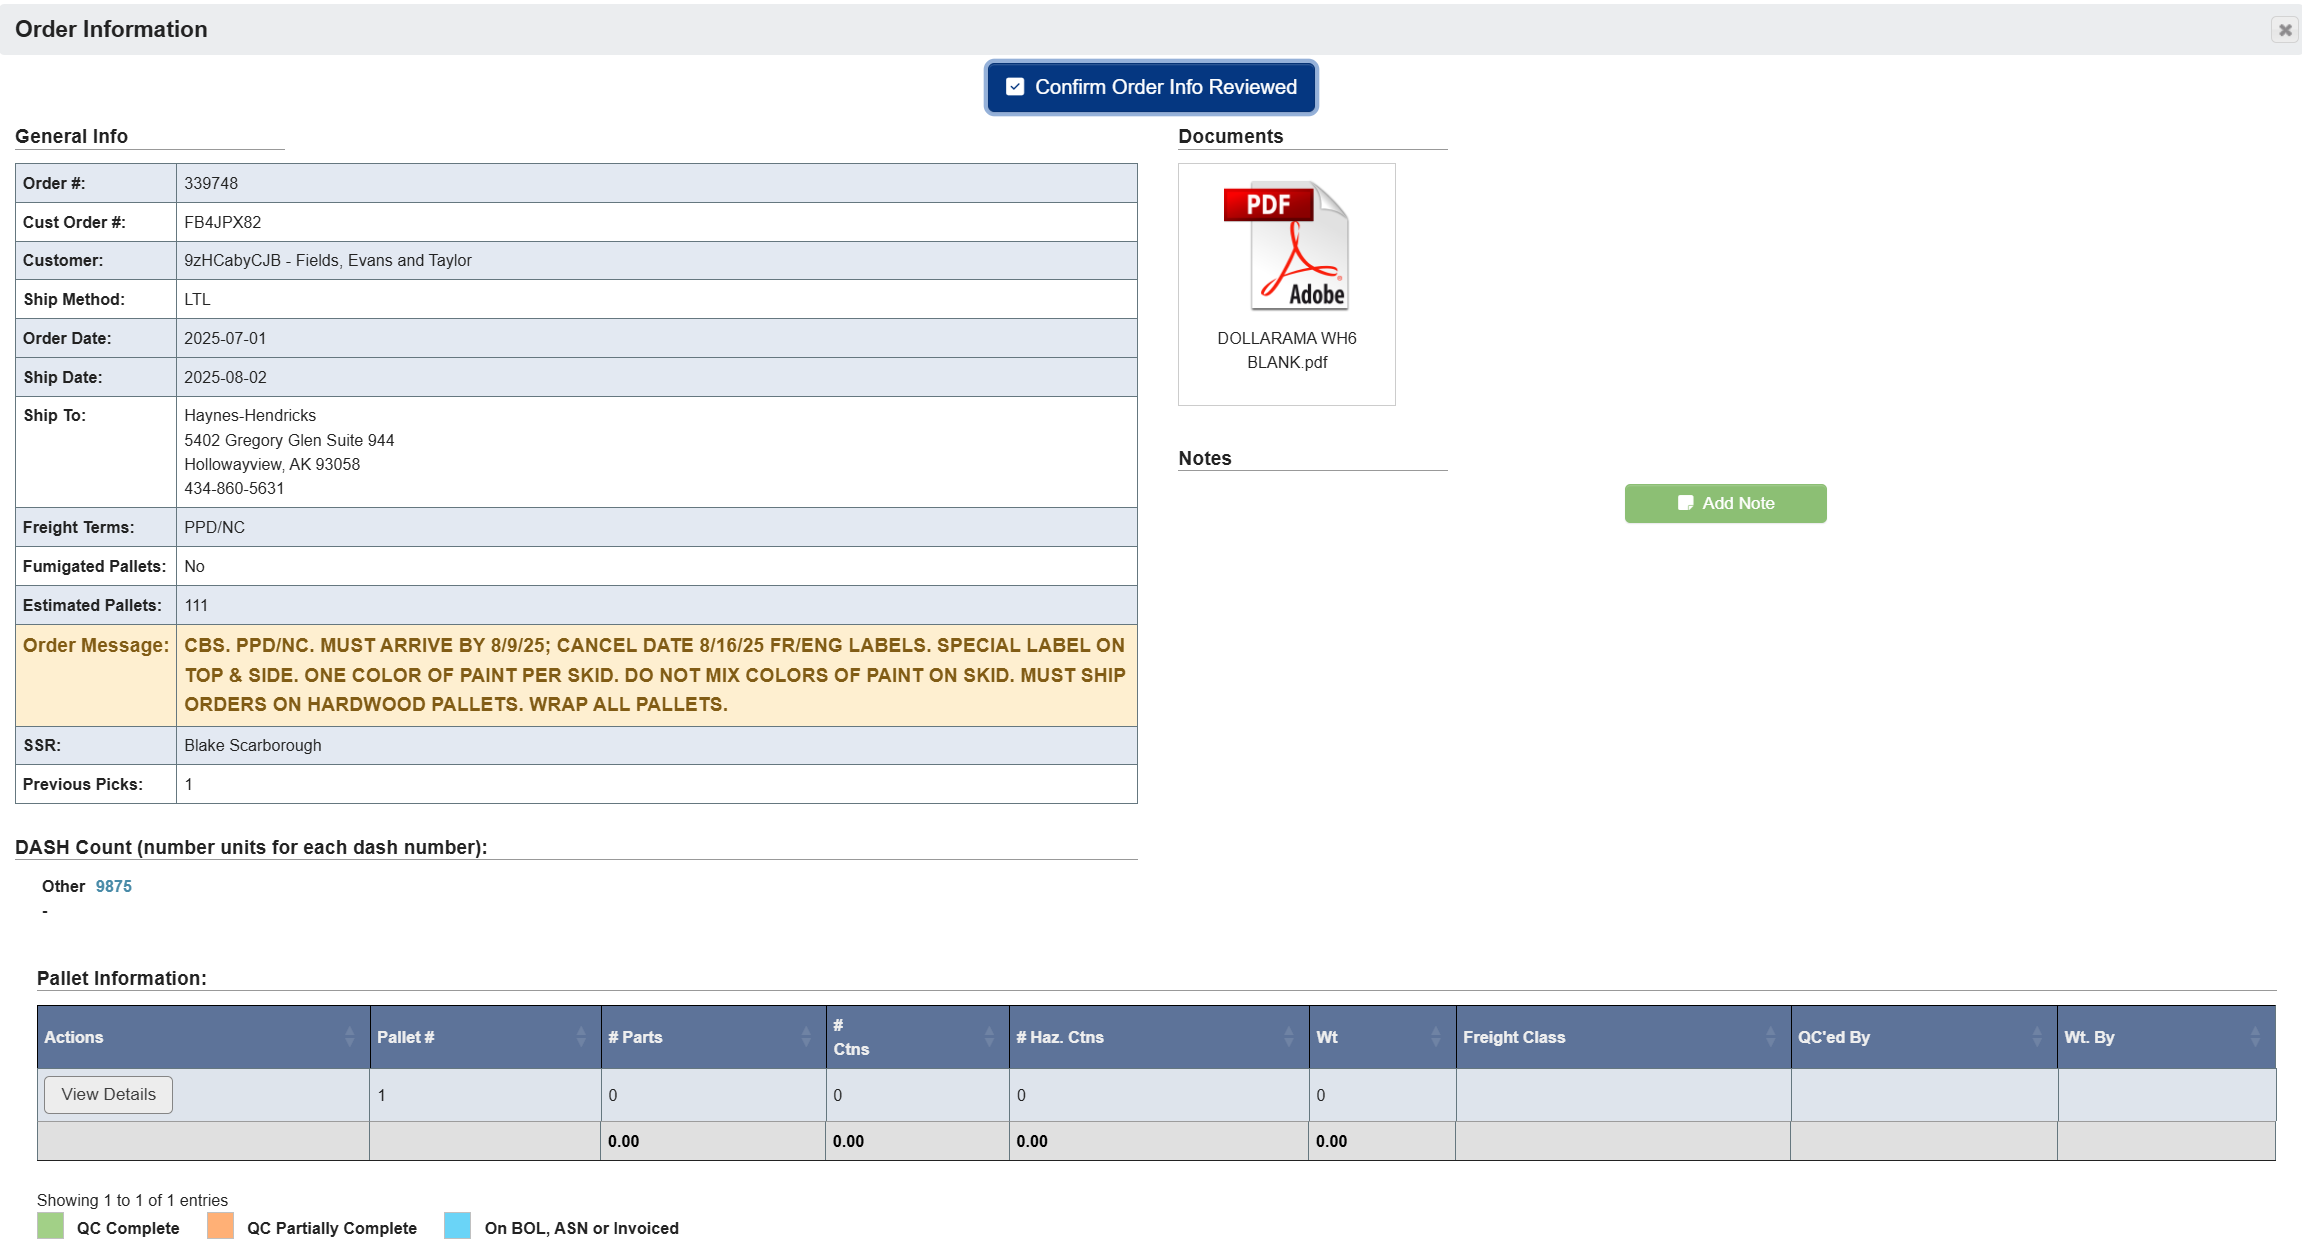
- Pay attention to any special instructions or requirements.
- Note any special handling requirements.
-
Click
Confirm Order Info Reviewedafter reviewing all requirements. -
Click
Pick Orderto being the picking process.
Step 3: Picking the Order
-
In the Choose Stating Pallet pop-up, click
Confirm.
-
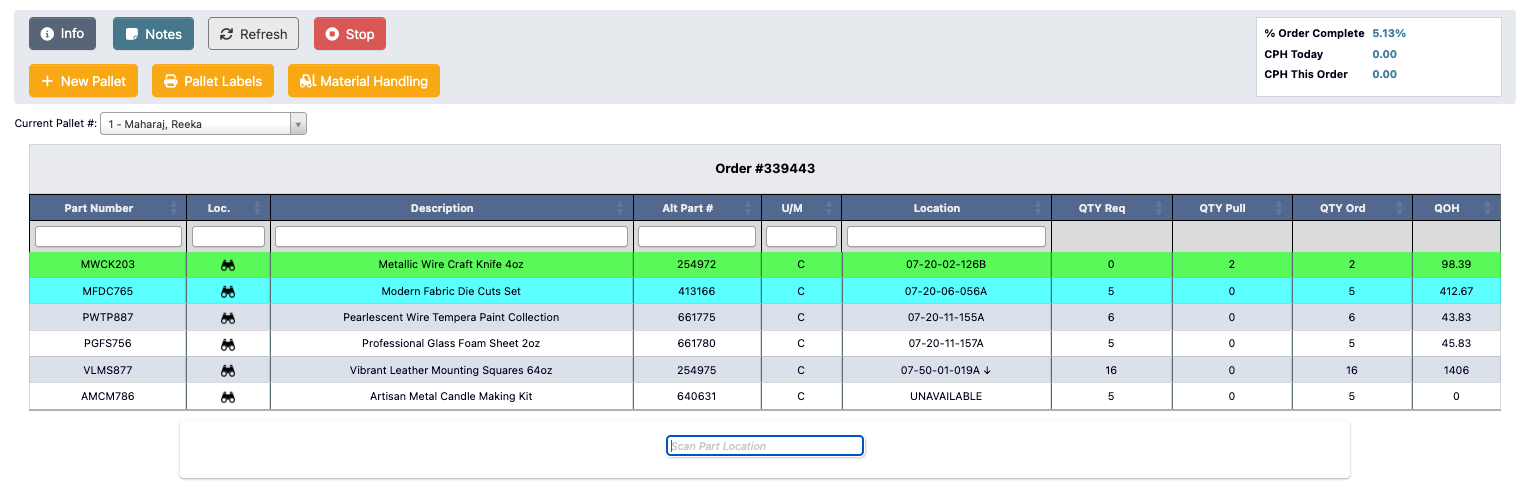
Begin picking your order by scanning the
Part Location. For detailed interface information on each interface button, see the Order Picking Reference.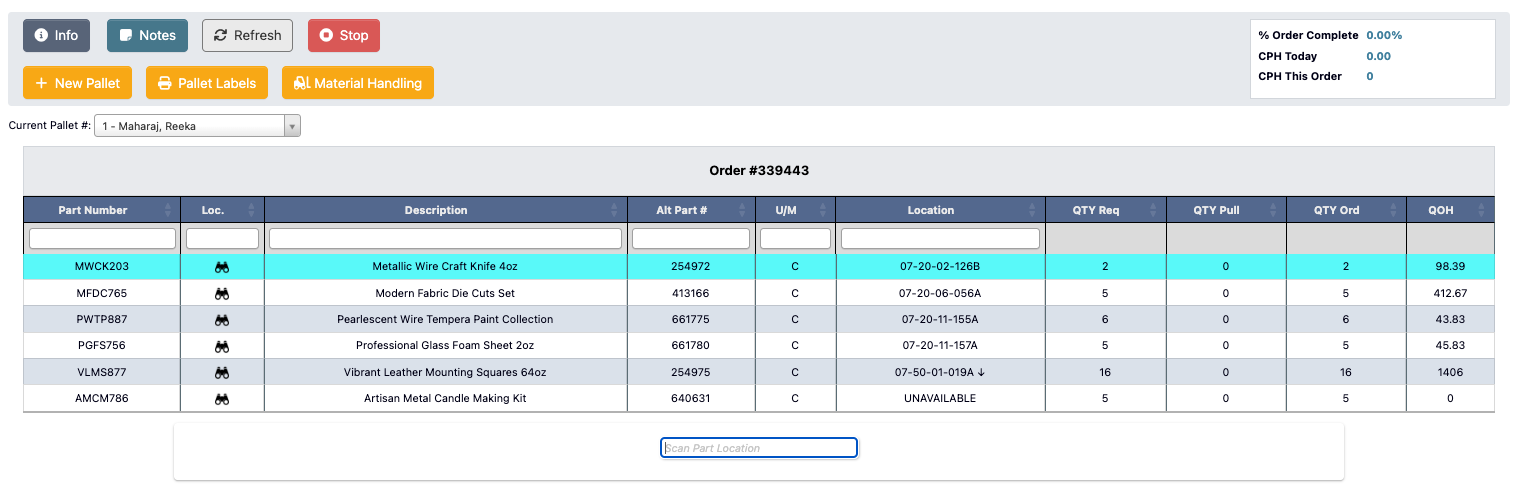
-
Enter the
Qty Pickedand# Cartonsmanually, or click theQuick Pickbutton to autofill with the required quantities.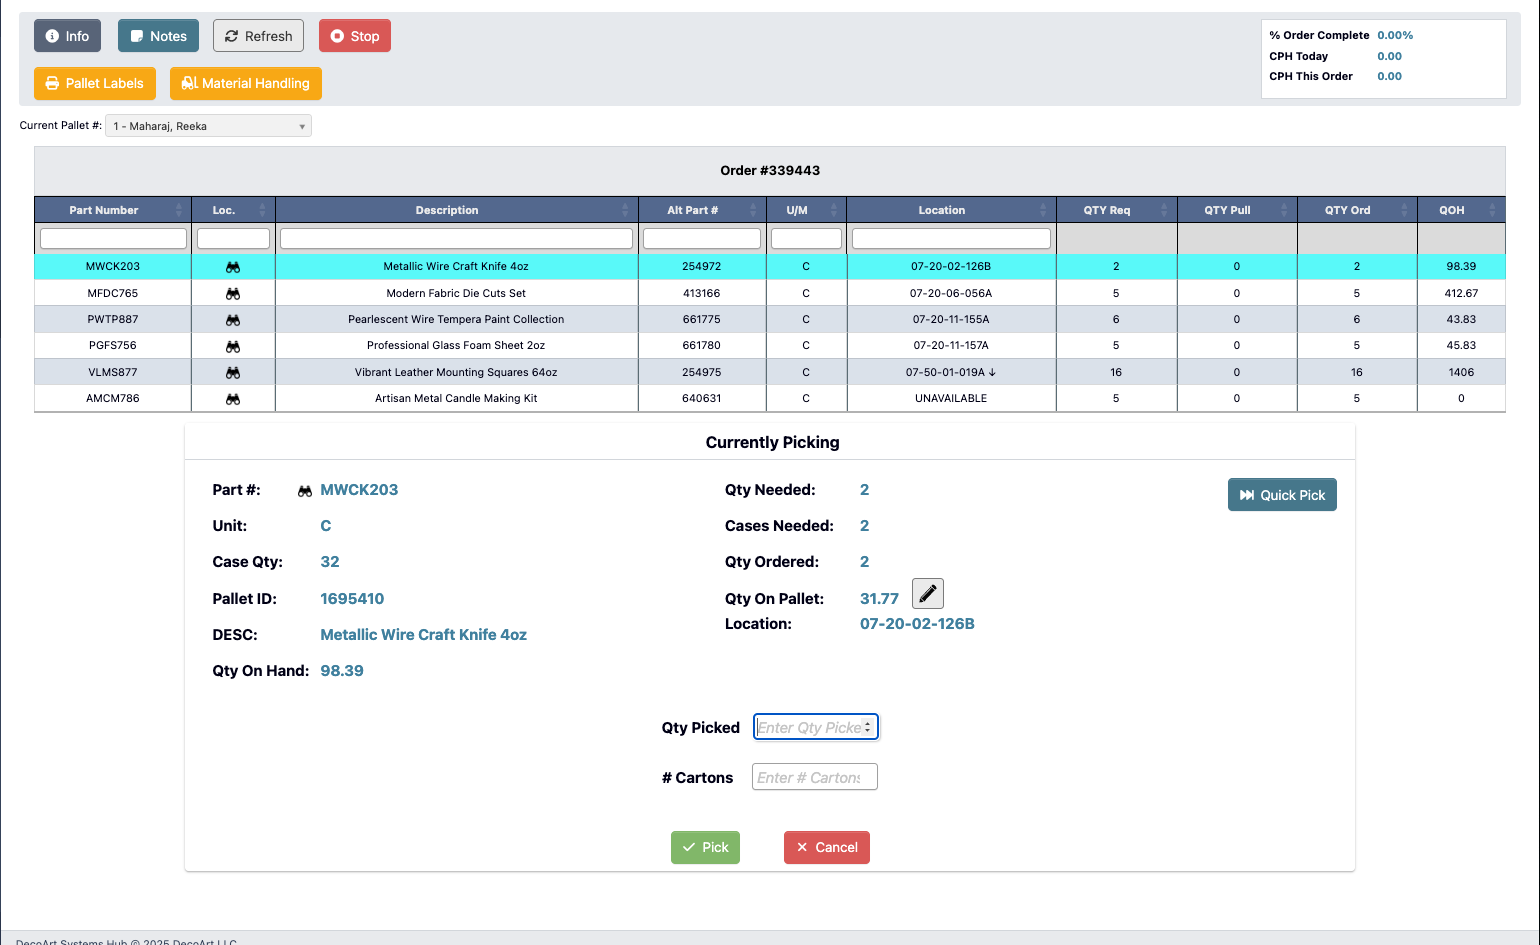
-
Click
Pickto record the pick for this part number, or clickCancelto discard changes. -
Once the line is picked, it will turn green indicating completion.
Step 4: Complete Picking
-
After all items are picked, the
Stopbutton changes to aOrder Complete. Click it to complete the pallet. -
A confirmation window will appear.
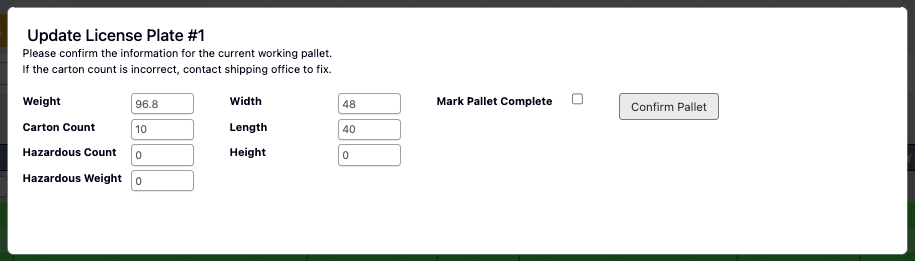
- Select
Mark Pallet Complete. - Click
Confirm Palletto complete the order.
- Select
-
You’ll be prompted to enter remarks:
- Click
YES, mark order completeto finish the order. - Click
NO, close windowto return to the picking screen.
- Click