Overview
This tutorial helps you create a new sales order using the DASH Order Processing → Manage Orders submodule, specifically in the Add Order tab. This page also walks you through each field within the Add Orders page so you understand what information it requires. New orders start on Admin Hold so you can finish edits and get customer approval. After you Submit, the order is released and edits will be limited.Add an Order
Step 1: Choose the customer (Sold To)

- Go to Order Processing → Manage Orders, and click on the
Add Ordertab. - Choose a
Customerfrom the dropdown selection box. If you just updated the customer account, click Update Billing Information to refresh the order with the latest data. - The Customer’s information will autopopulate many fields such as Address, City, and Phone Number if that information is available in their profile.
The SSR (sales/service rep) usually auto-populates from the account, but you can change it per order. Notifications about hold releases go to the SSR on the order.
Step 2: Enter Shipping Information
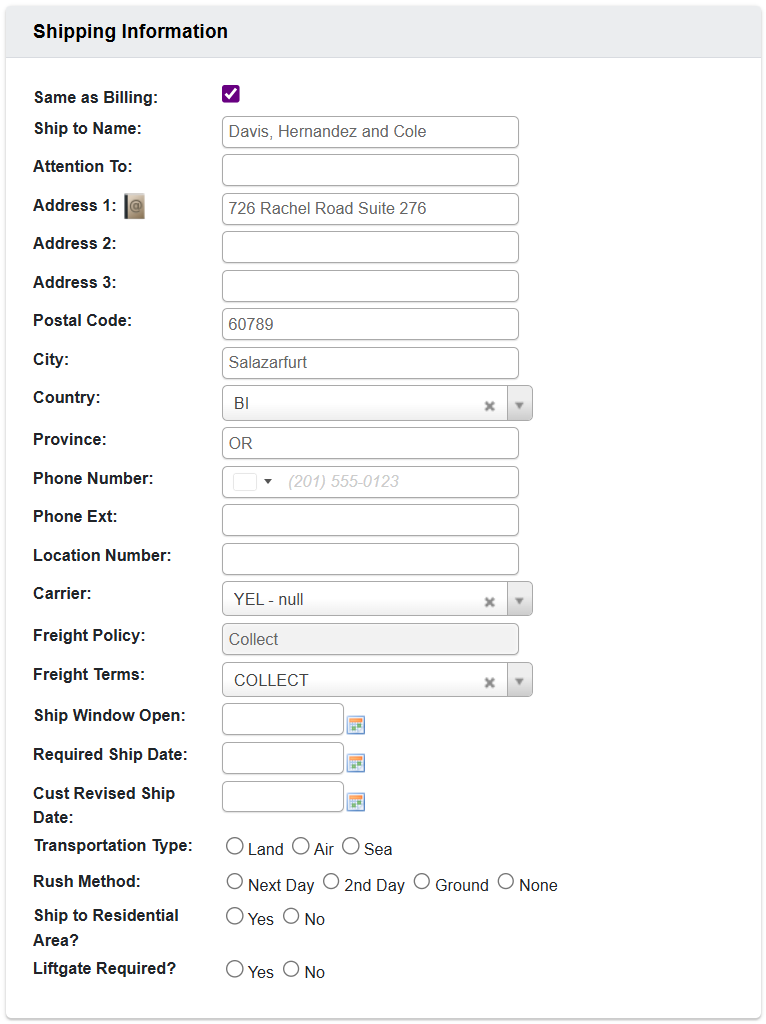
- Click on Address 1’s
Address-book Iconto pull up saved ship-to address information. Alternatively, you can type in addresses manually. Common fields include:- Transportation Type (often only used for international), as well as Residential? and Liftgate required? toggles.
- Rush Method: if you mark an order Rush, you must give a reason.
- “Required Ship Date / Window: specify when the order should ship; this date is used in Open Orders to monitor progress.
Step 3: Add items (Order Detail)
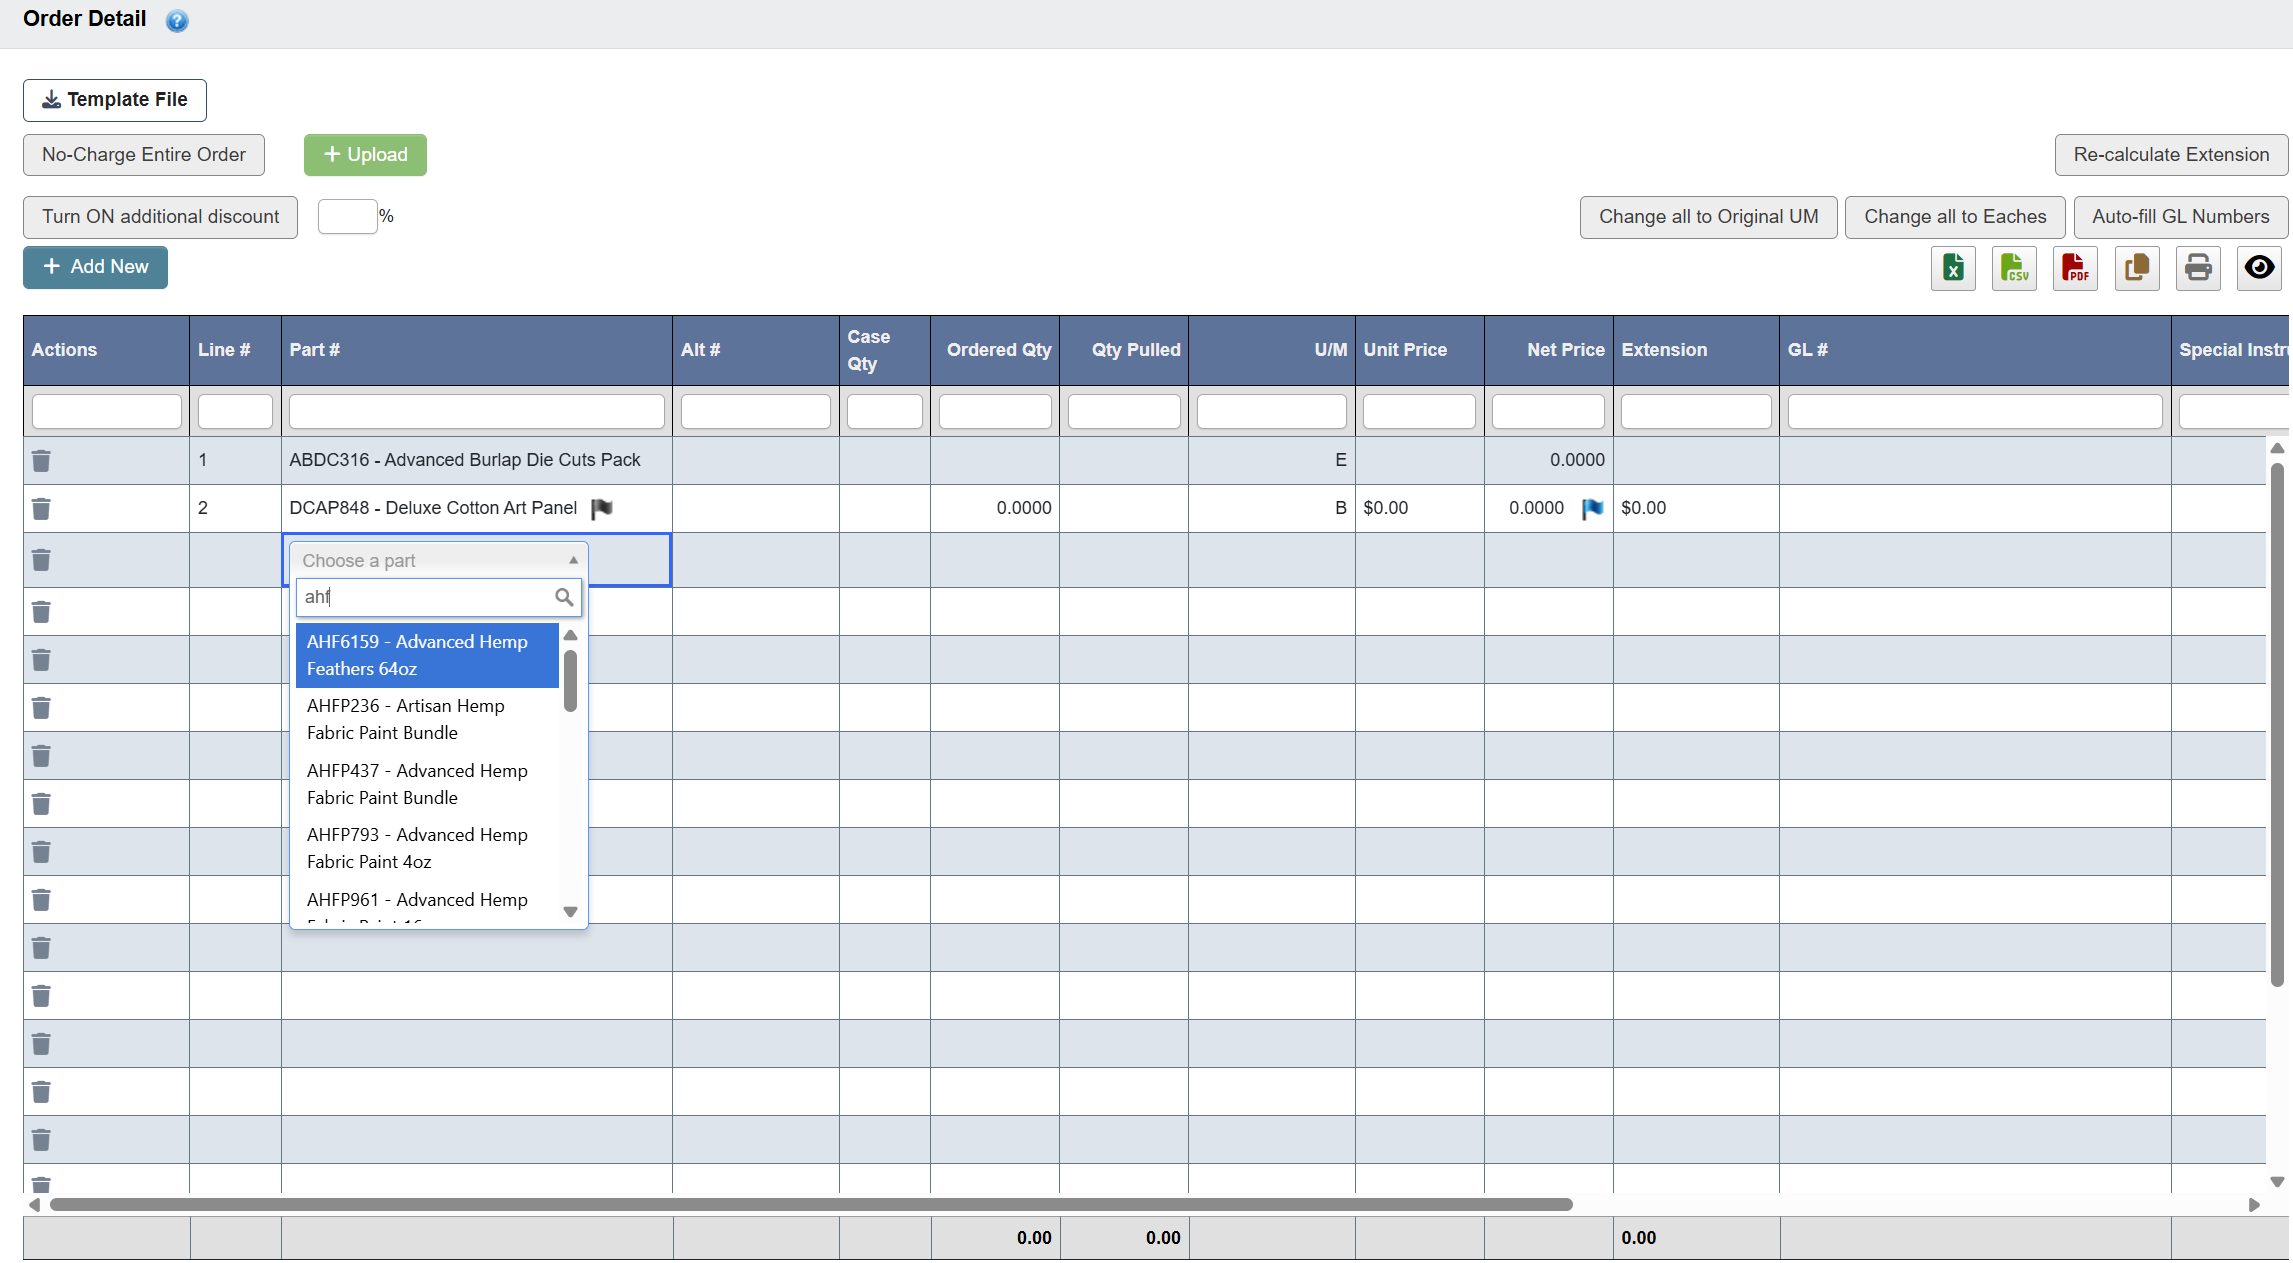
- Scroll down on the page to see the Order Detail table.
- Either add items to the table manually or by importing part numbers + quantities in bulk:
- If manually adding parts, click on an empty row’s Part # (not the first row, which is used for searching the database), and choose a Part from the dropdown. Fill in any other information for that row that does not autopopulate.
- If importing in bulk, click
Template File / Upload (items)and upload a simple spreadsheet of part numbers + quantities to auto-populate lines. You can stillAdd Newlines afterward. - If you want to remove a row, click the
Trash iconunder the Actions column.
- (Optional) Adjust item information as needed. You can learn more about what each column, colored flag, and piece of information means further down this page in “Order Detail Table”.
Step 4: Attach customer documents
- Scroll down to the Order Documents section and add any relevant customer documents, such as their PO.
Upload Documentselects a file.Start uploadactually attaches it.Cancel uploadstops it.
Step 5: Holds and submitting
- Scroll back up to the top of the Add Order page.
- (Optional) In Other Order Information, choose whether to toggle a
Price OverrideorNo-Charge, although these actions require you to select a reason. They will place the order in their respective holds for review. - (Optional) In the Add Order toolbar, choose whether to place the order on
Admin Hold. While on Admin Hold, you can send a Pro Forma (order preview) to the customer and keep editing. Note that after clicking Submit, pricing and many fields can no longer be changed. - Once you have completed all fields, and as long as the Order is not held for one of the previous reasons, click
Submitto release the order to the warehouse.
Understanding Inputs
Each Add Order screen is broken into cards that group related information. Below is a guide to each card and the fields within it.Sold To (Billing)
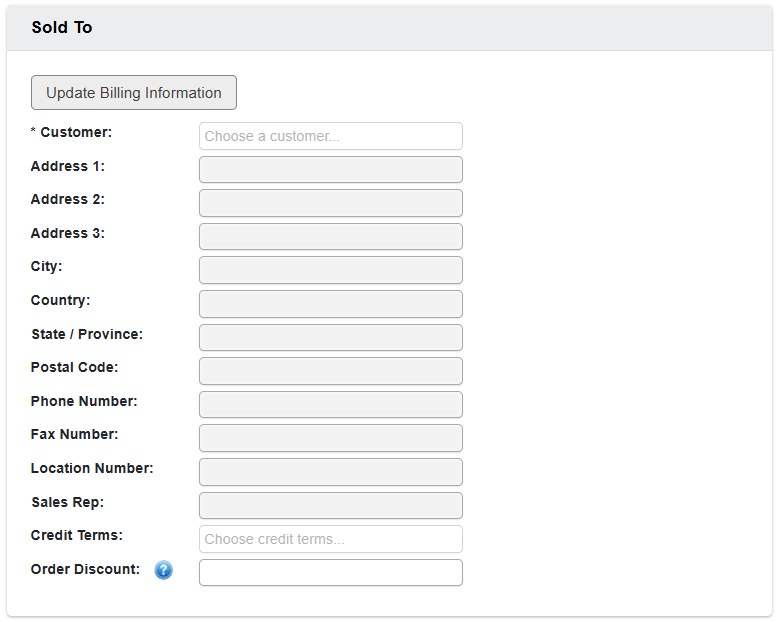
Customer: Pick the account. Selecting the customer pulls default billing details from the customer file.Update Billing Information: Refresh the order after you edit the customer record so the latest data fills in.Address / City / State / Postal Code / Country / Phone / Fax: Billing address and contact.Location Number: Optional internal/site code for the customer.Sales Rep: Defaults from the customer record but can be changed per order.Credit Terms: Populates from customer; drives downstream financial checks.Order Discount: Optional order-level discount (subject to permissions and price-override review).
Shipping Information
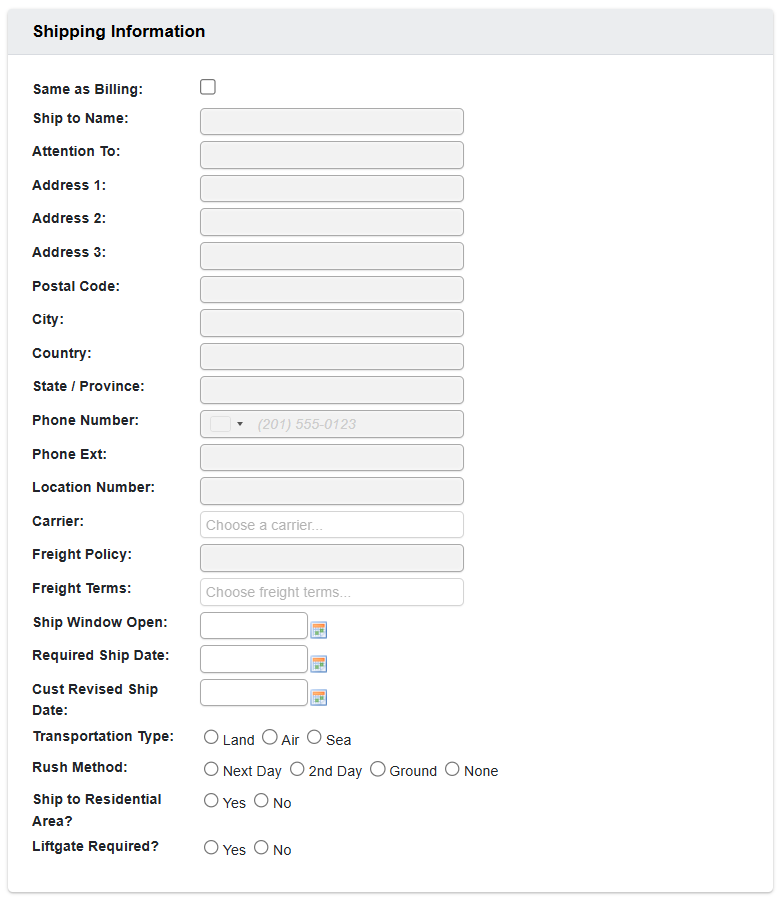
Same as Billing: Copies billing to ship-to.Ship to Name / Attention / Address…: Choose from the address book or enter a new ship-to; large accounts may have many saved addresses.Carrier / Freight Policy / Freight Terms: Routing and billing; set per customer/order.Ship Window Open / Required Ship Date / Cust Revised Ship Date: Planning dates; teams commonly key a required ship date and revise it as needed.Transportation Type: Usually only used for international.Rush Method: Marking an order as rush requires a reason.Ship to Residential Area,Liftgate Required: Delivery constraints for the destination.
Other Order Information
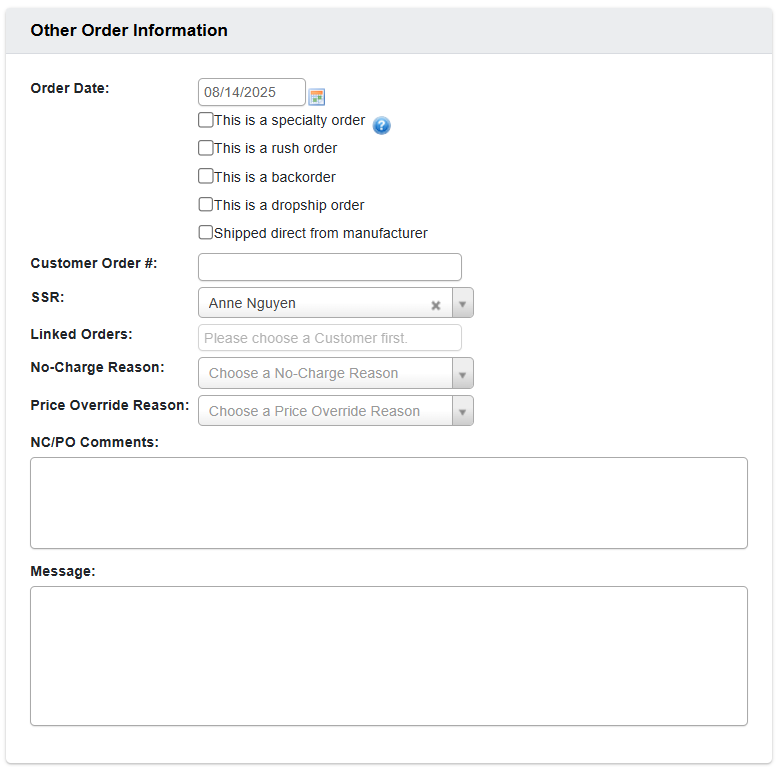
Order Date: Defaults to today; can be adjusted.This is a specialty order: For make-to-order/custom-cut items.This is a rush order: Prioritizes fulfillment; requires a reason.This is a backorder: Auto-checked for “backorder accounts”; creates/handles backorders accordingly.This is a dropship order/Shipped direct from manufacturer: Shipping path; dropship can default from the customer profile but can be changed per order.Customer Order # (PO): Customer’s purchase order/reference number.SSR: Order owner; gets automated emails when a hold is released.Linked Orders: Link orders so they ship together; provide the related order number.No-Charge Reason/Price Override Reason: Required when zeroing charges or overriding prices; puts the order into No-Charge or Price-Override hold for approval.
Order Detail Controls

Template File / Upload: Bulk-load line items from a template (part numbers + quantities). You can still Add New lines afterward.Turn ON additional discount+Re-calculate Extension: Apply an extra % discount across lines, then recalculate totals. (Discounts may trigger a price-override hold.)No-Charge Entire Order: Zeroes all lines; requires a reason and places the order under a No-Charge Hold. This would also require a GL # on all line items.Change all to Original UM / Change all to Eaches: Bulk unit-of-measure tools.Auto-fill GL numbers: Automatically assigns general ledger (GL) numbers to each row.Legend badgesare used to highlight line statuses:- Red means the line item is cancelled
- Purple means the line item is suspended.
Order Detail Table
The Order Detail table displays each part associated with the order, and contains the following columns (many of which autopopulate when you select a row). You can use the first row to search for values within a particular column in your table.Actions: Lets you delete a line with the Trash icon, or apply line-specific controls.Line #: Sequential number for each row in the order.Part #: The item code and description being ordered, which can be selected from a dropdown menu.Alt #: Alternate item code if a substitute is used.Case Qty: Number of cases requested (if the item is sold by case).Ordered Qty: Quantity the customer ordered.Qty Pulled: Quantity actually pulled from inventory for fulfillment.U/M: Unit of measure (e.g., E = Each, B = Box). Some items allow for their unit of measurement to be edited in this column when needed.Unit Price: Price per unit of measure.Net Price: Price after discounts applied.Extension: Total line amount (Net Price × Ordered Qty).GL #: General Ledger account number where the transaction will post. This is required even for no-charge items.
- Black flag: The part number is obsolete. Quantity is forced to zero since no more are available and it is no longer being made.
- Grey flag: The part is scheduled for discontinuation. You can only enter a quantity up to the amount currently on hand.
- Yellow flag: The part is inactive. This is informational only and does not prevent entry.
- Blue flag: The item has been entered as no-charge to the customer. This requires a GL account number on the line item, a no-charge reason on the order, and forces the order to no-charge hold for approval.
- Red flag: The price has been overridden from the customer’s agreed pricing. This forces the order to go on price-override hold.
Totals

Before/After Discount,Discount %,Extended Cost,Total: Pricing roll-ups (affected by overrides/discounts).Freight Amount,Surcharge,Freight Surcharge: Shipping-related charges.Calculated Weight / Cube / Estimated Pallets: References for shipping mode/cost planning.# Line Items / # Parts: Quick order size indicators.
Order Documents

Upload Documentselects a file.Start uploadactually attaches it.Cancel uploadaborts.- You can delete an attached file with the
X icon.