Overview
The Part Information → Manage Product Classes submodule lets you view and manage product class records used across the DASH system for pricing, categorization, and reporting. The submodule contains the following tabs:- Active Product Classes: View product classes that are currently in use for pricing and categorization.
- Inactive Product Classes: View product class records that are no longer in use but preserved for historical reference.
- Add Product Class: Create a new product class record and save it in the database for use across DASH.
- View / Edit Product Class: Manage your existing product class information.
See the Manage Formula Reference page to learn more about product class sub-codes.
Active Product Classes
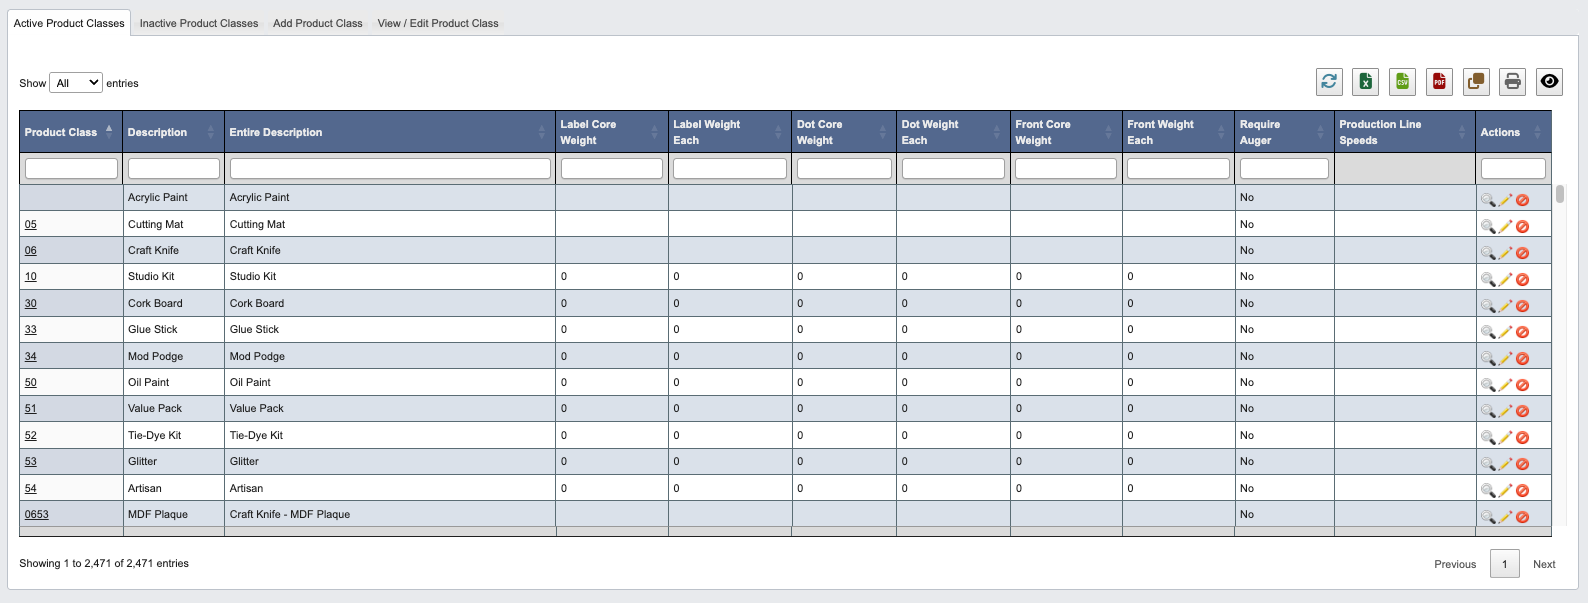
From the Part Information → Manage Product Classes submodule, click on theActive Product Classes tab. This contains a table of summarized product class records for every “active” product class.
Within this tab, you can:
- Click on an attribute heading (such as Product Class) to sort in ascending order. Click again to sort in descending order.
- Click on a Product Class Code to view or manage the associated product class records in the
View / Edit Product Classtab. - Refresh, export, print, or filter data with the toolbar.
How to deactivate a product class
- Scroll to the far right of the table and find the
Actionscolumn. - Click the
Deactivate Product Class(red “no”) button. - Click “Deactivate Product Class” when prompted.
Inactive Product Classes
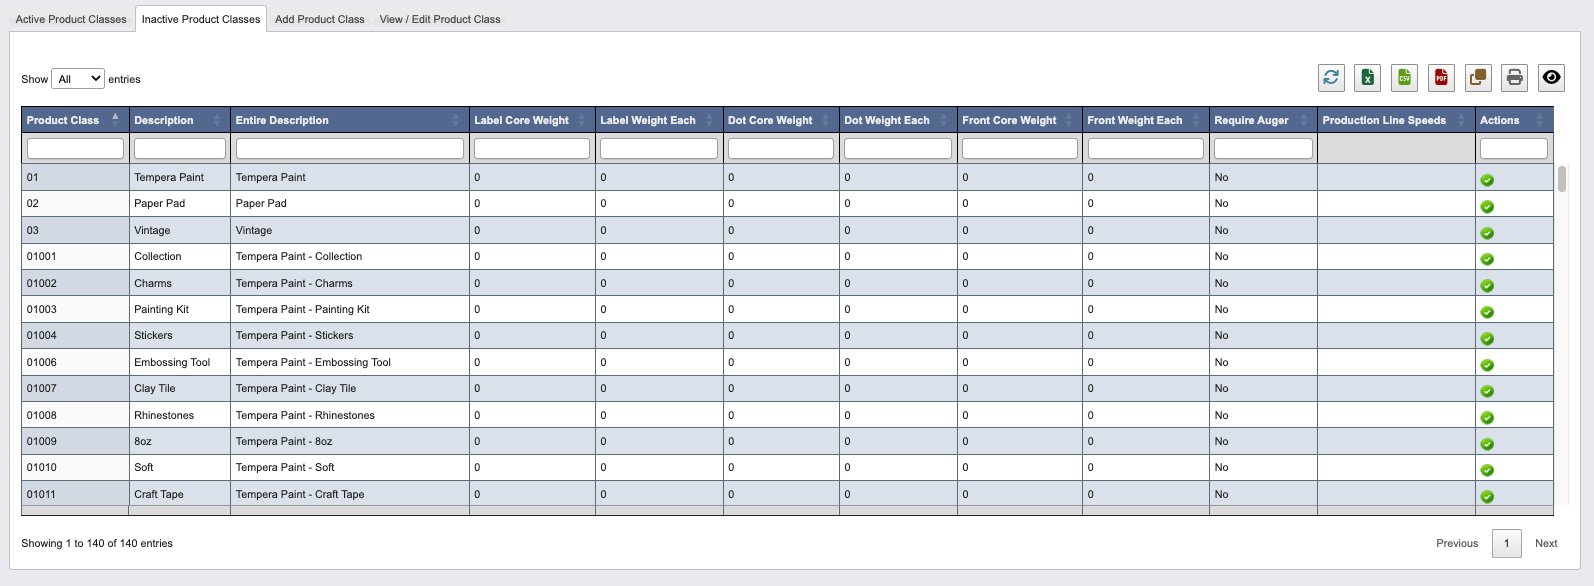
From the Part Information → Manage Product Classes submodule, click on theInactive Product Classes tab. This contains a table of summarized product class records for every “inactive” product class.
Within this tab, you can:
- Click on an attribute heading (such as Product Class) to sort in ascending order. Click again to sort in descending order.
- Refresh, export, print, or filter data with the toolbar.
How to mark a product class as active
- Scroll to the far right of the table and find the
Actionscolumn. - Click the
Activate Product Class(green “checkmark”) button. - Click “Activate Product Class” when prompted.
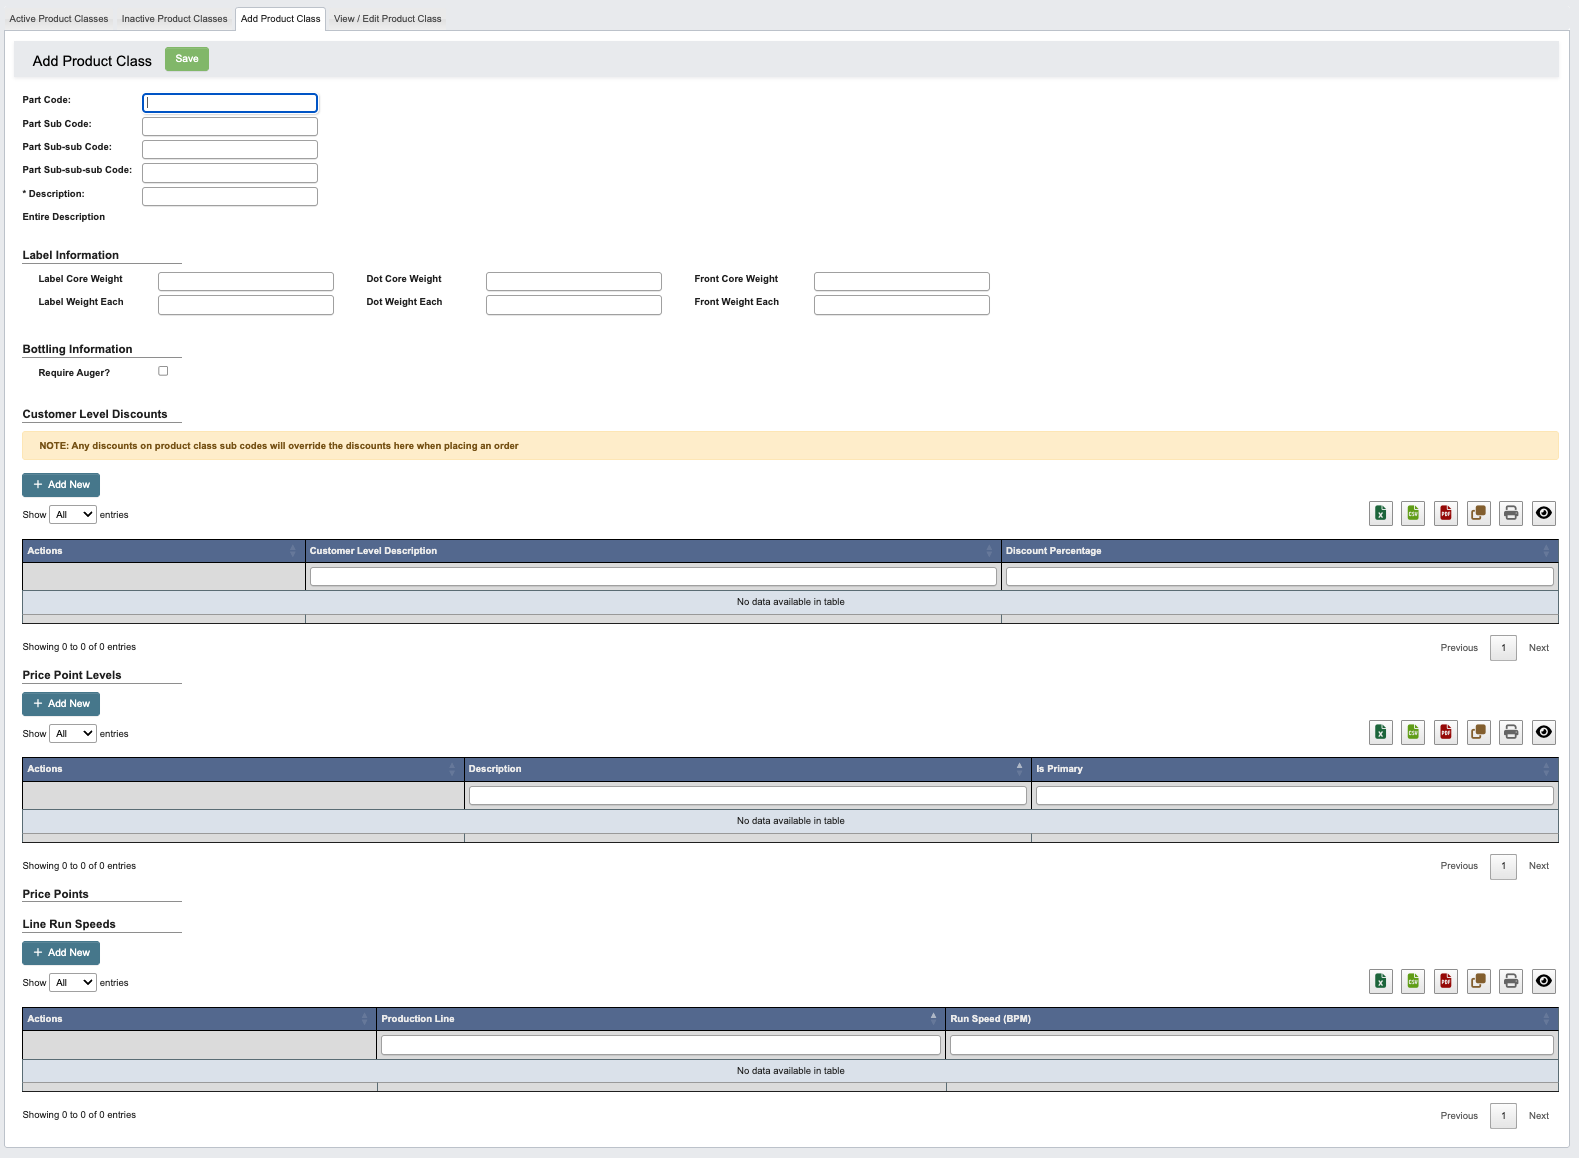
Add Product Class
From the Part Information → Manage Product Classes submodule, click on theAdd Product Class tab. Here you can add a new Product Class.
View / Edit Product Class
From within the View / Edit Product Class tab, you can explore and manage existing product class information.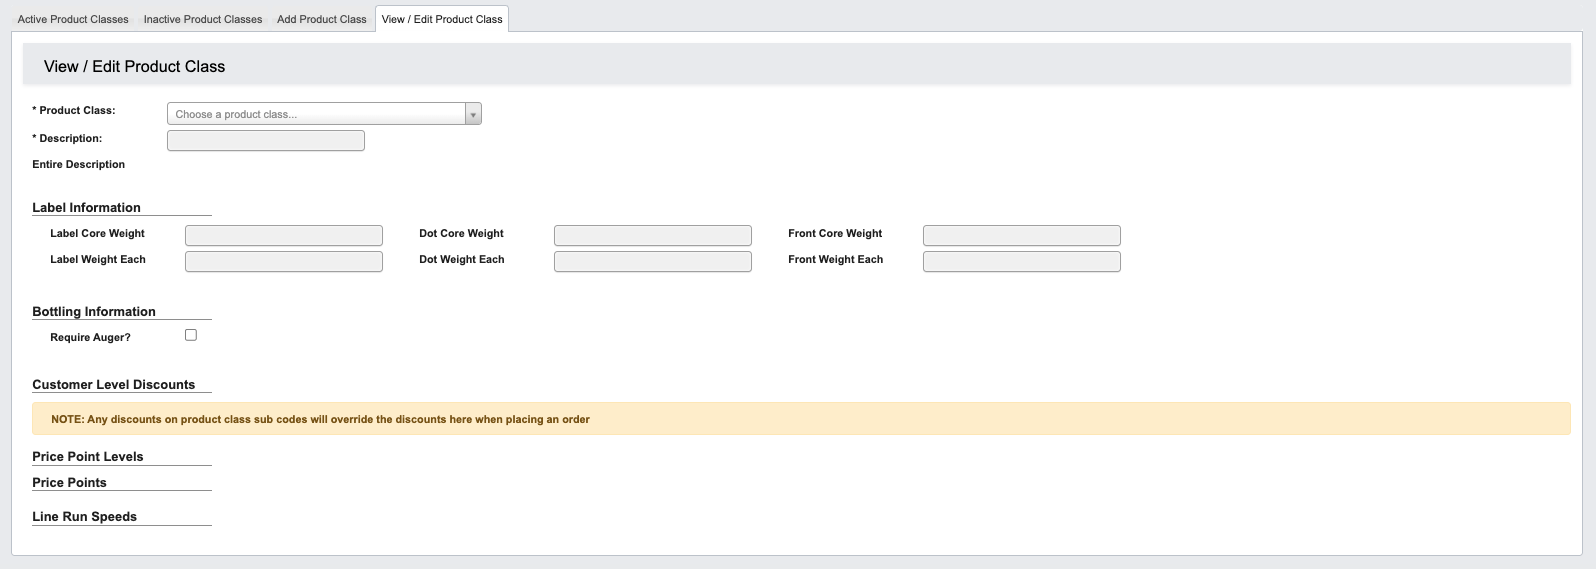
Step 1: Pull up a product class record
- From the Part Information → Manage Product Classes submodule, click on the
View / Edit Product Classtab. - Click the dropdown menu next to the Product Class field.
- Enter the product class code or name you’re looking for, then click to select it.
- You can now view that product class’s label, bottling, price point and line run speed information.
Step 2: Use the toolbar to manage a product class record
Once you’ve pulled up a product class record, you can manage the information with the following features located in the toolbar:Edit: Edit product class information. Once in the edit view:- Click
Cancel Editingto cancel editing. - Click
Saveto save your changes.
- Click