Overview
This tutorial explains how to add a new part in the DASH Part Information → Manage Parts submodule. Parts in DASH can be raw materials (RM), finished goods (FG), or work-in-process (WIP or WP) items that support the entire manufacturing workflow. See the View / Edit / Add Part Information Reference for definitions of parts. Use this tutorial when you need to create a new part that will be available for inventory management, production planning, purchasing, or sales operations.When you should use Add Part
Various departments and roles may need to add new parts when:- Purchasing/Procurement: A new raw material or purchased item needs to be sourced and tracked in inventory.
- Product Development: New finished goods are being launched and need part numbers for production and sales.
- Manufacturing: Work-in-process parts are needed for intermediate manufacturing steps.
- Packaging: New packaging configurations require separate part numbers for inventory tracking.
- Compliance: Regulatory changes require new part classifications or separate tracking.
Add a Part
Step 1: Navigate to Add Part Information
-
From the Part Information → Manage Parts submodule, click on the
Add Parttab.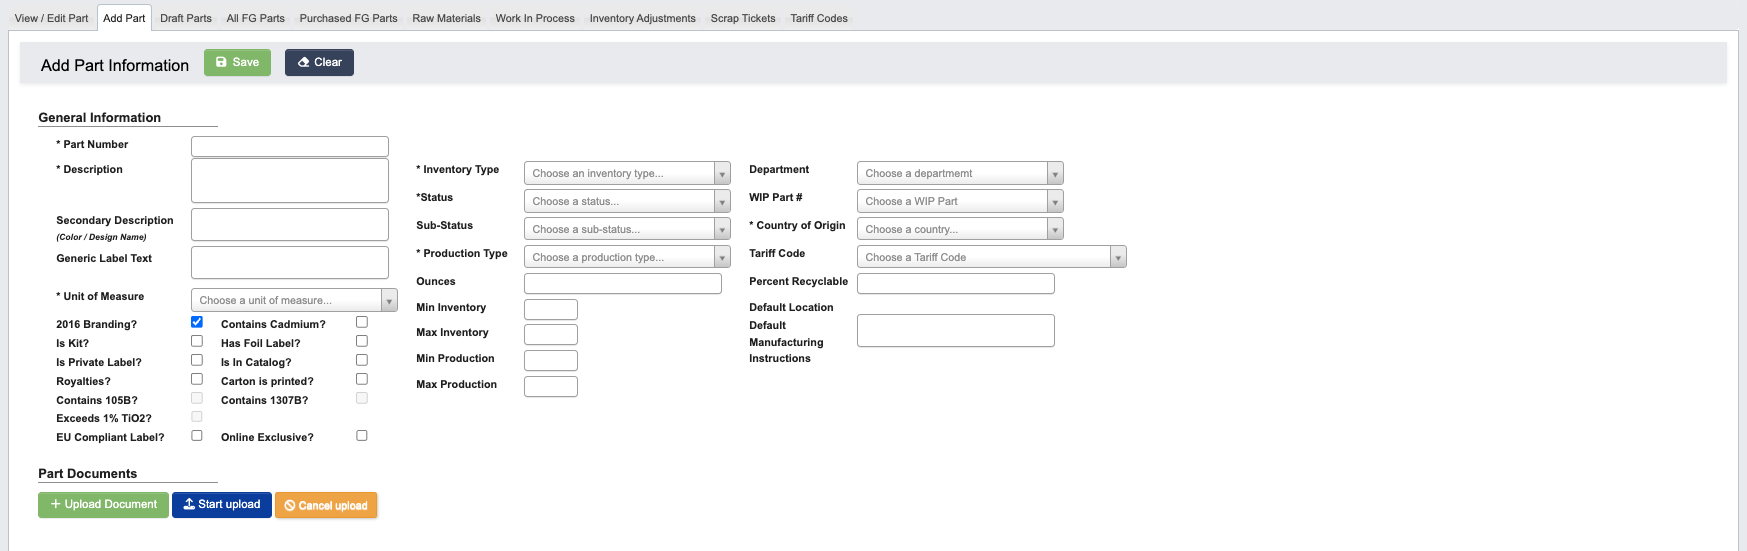
- The Add Part form will display with multiple sections for comprehensive part information.
Step 2: Fill in Part Information
-
The following sections should be filled out as completely as possible:
General Information: This section contains the key identifying details for the part, such as its part number, description, unit of measure, and status.Package Information: Enter physical and dimensional data including weight, dimensions (width, length, height), and packaging details. This information supports shipping calculations and storage planning.Costs: Define cost elements for the part including material, freight, tariff, and labor costs. Enter standard, current, and future costs as applicable for accurate costing and margin tracking.
While only a few fields are required to save a part, it’s strongly recommended to complete as much information as possible:- Required fields ensure the part can be saved and used in basic operations.
- Complete information is helpful for cost calculations, inventory management, and production planning.
- Missing data can lead to inventory discrepancies, costing errors, and operational delays.
- Complete all required fields in the form. Depending on the part’s inventory type (RM, FG, WIP) and production type (Purchased, Manufactured), additional fields may need to be filled out. For a full list of field definitions, see the View / Edit / Add Part Information Reference.
Step 3: Upload Supporting Documents (Optional)
Use this step to attach relevant documents underPart Documents and/or Cost Documents as needed.
- Click
+ Upload Documentunder “Files” to open a file browser and select the document you want to attach. - Click
Start uploadto begin uploading. - Click
Cancel uploadif you need to cancel the upload.
Step 4: Finalize & Save the Part
- Review sections to make sure everything is filled out correctly.
- When complete, click
Saveat the top of the page.